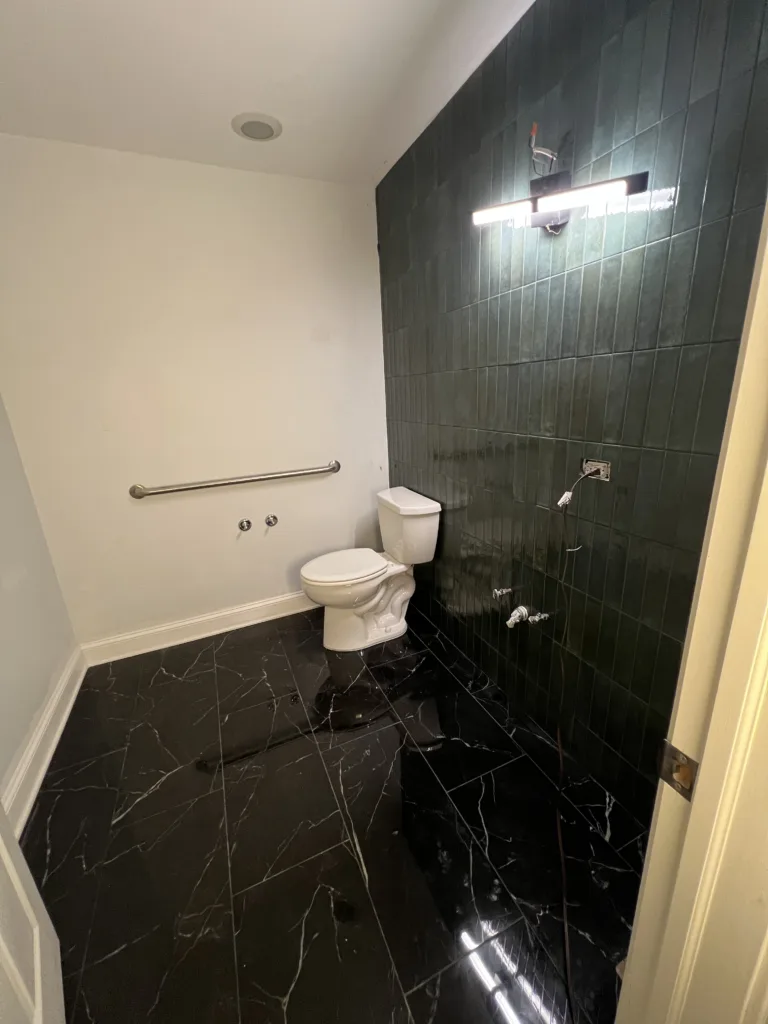
This completed office restroom remodel in Chicago updated a small commercial bathroom with a cleaner, darker, more modern tile design. The original restroom had an older brown tile floor, basic fixtures, light gray walls, and a traditional small-bathroom layout. The goal was to keep the restroom practical for office use while giving it a stronger, more finished commercial interior look.
The remodel focused on the surfaces that make the biggest visual and functional difference in a small restroom: the floor, the feature wall, tile layout, substrate preparation, fixture coordination, and final finish. The old floor tile was removed, the floor was prepared, the wall was tiled with dark green vertical tile, and the floor was finished with black marble-look tile. The result is a restroom that feels more intentional, modern, and easier to present to clients, tenants, employees, or visitors.
This was not a full layout change. The restroom stayed in the same footprint. The project was a focused commercial restroom renovation: remove dated materials, prepare the surfaces correctly, install new tile, work around plumbing and electrical locations, reset the toilet, and create a cleaner finished look without rebuilding the entire room.
Project Overview: Office Restroom Remodeling in Chicago
The restroom was a compact office toilet room with a toilet, wall-mounted or pedestal-style sink area, mirror/light area, grab bar, and a small floor footprint. Small restrooms can look outdated quickly because every surface is close to the user. The floor, walls, toilet, sink, light, trim, and accessories are all visible at once.
The design direction was to create a stronger modern contrast: glossy dark green tile on the main wall and black marble-look tile on the floor. This combination gives the restroom more depth than a plain painted wall and makes the space feel more upgraded without changing the plumbing layout.
- Existing office restroom inspection
- Old floor tile demolition
- Removal of loose material and old adhesive
- Floor substrate inspection and preparation
- Floor leveling before tile installation
- Dark green vertical wall tile layout and installation
- Laser alignment for straight tile rows
- Tile spacers and leveling clips for consistent joints
- Blue uncoupling membrane installation on the floor
- Black marble-look floor tile layout and installation
- Careful cuts around the toilet flange, wall edges, and door area
- Toilet reset and final tile cleanup
Before the Remodel: Dated Office Bathroom Finish
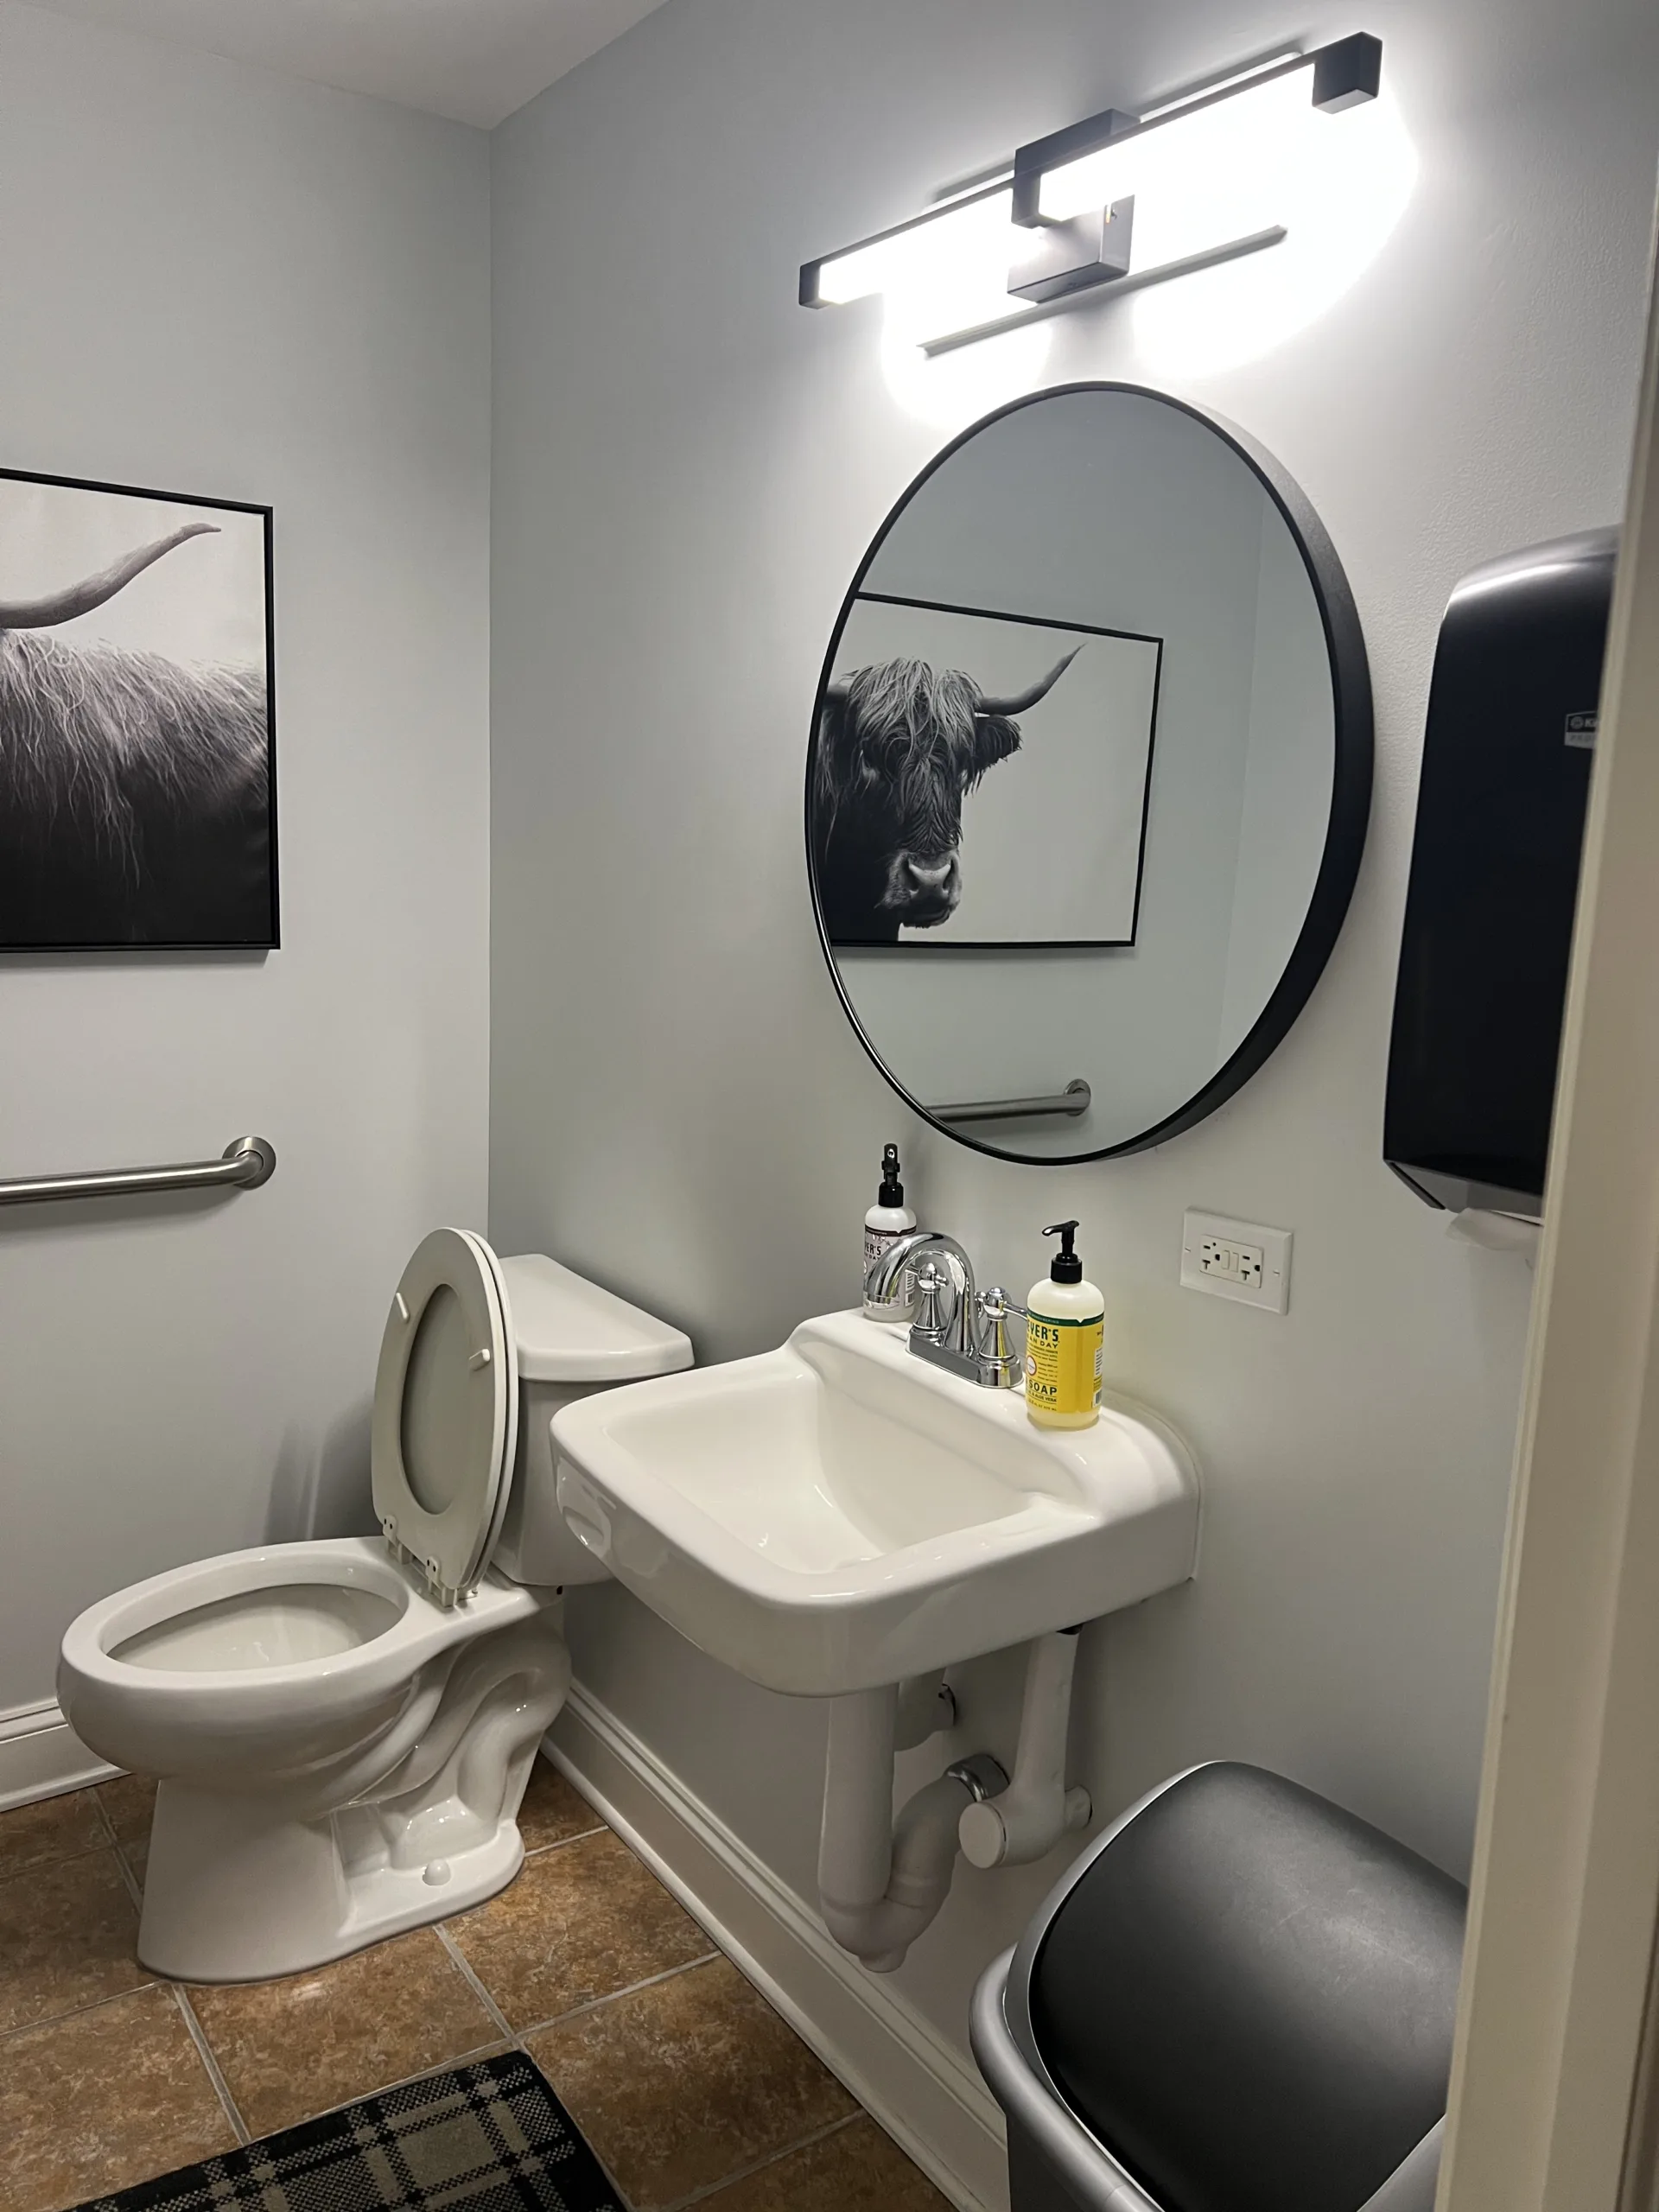
Before the remodel, the restroom had a basic office bathroom layout with a toilet, sink, mirror, wall light, grab bar, and brown floor tile. The space was usable, but the finishes looked older and did not match a more updated commercial interior.
In a small office restroom, dated tile and plain wall finishes are very noticeable. There is not much furniture or decoration to hide worn surfaces. The floor and the wall behind the fixtures become the main visual elements. That is why replacing the old floor tile and creating a tiled feature wall can change the entire feel of the room.
The remodel kept the restroom practical. The goal was not to make the room decorative for no reason. The goal was to make it cleaner, more durable, more modern, and better suited for a commercial office environment.
Step 1: Removing the Old Bathroom Floor Tile
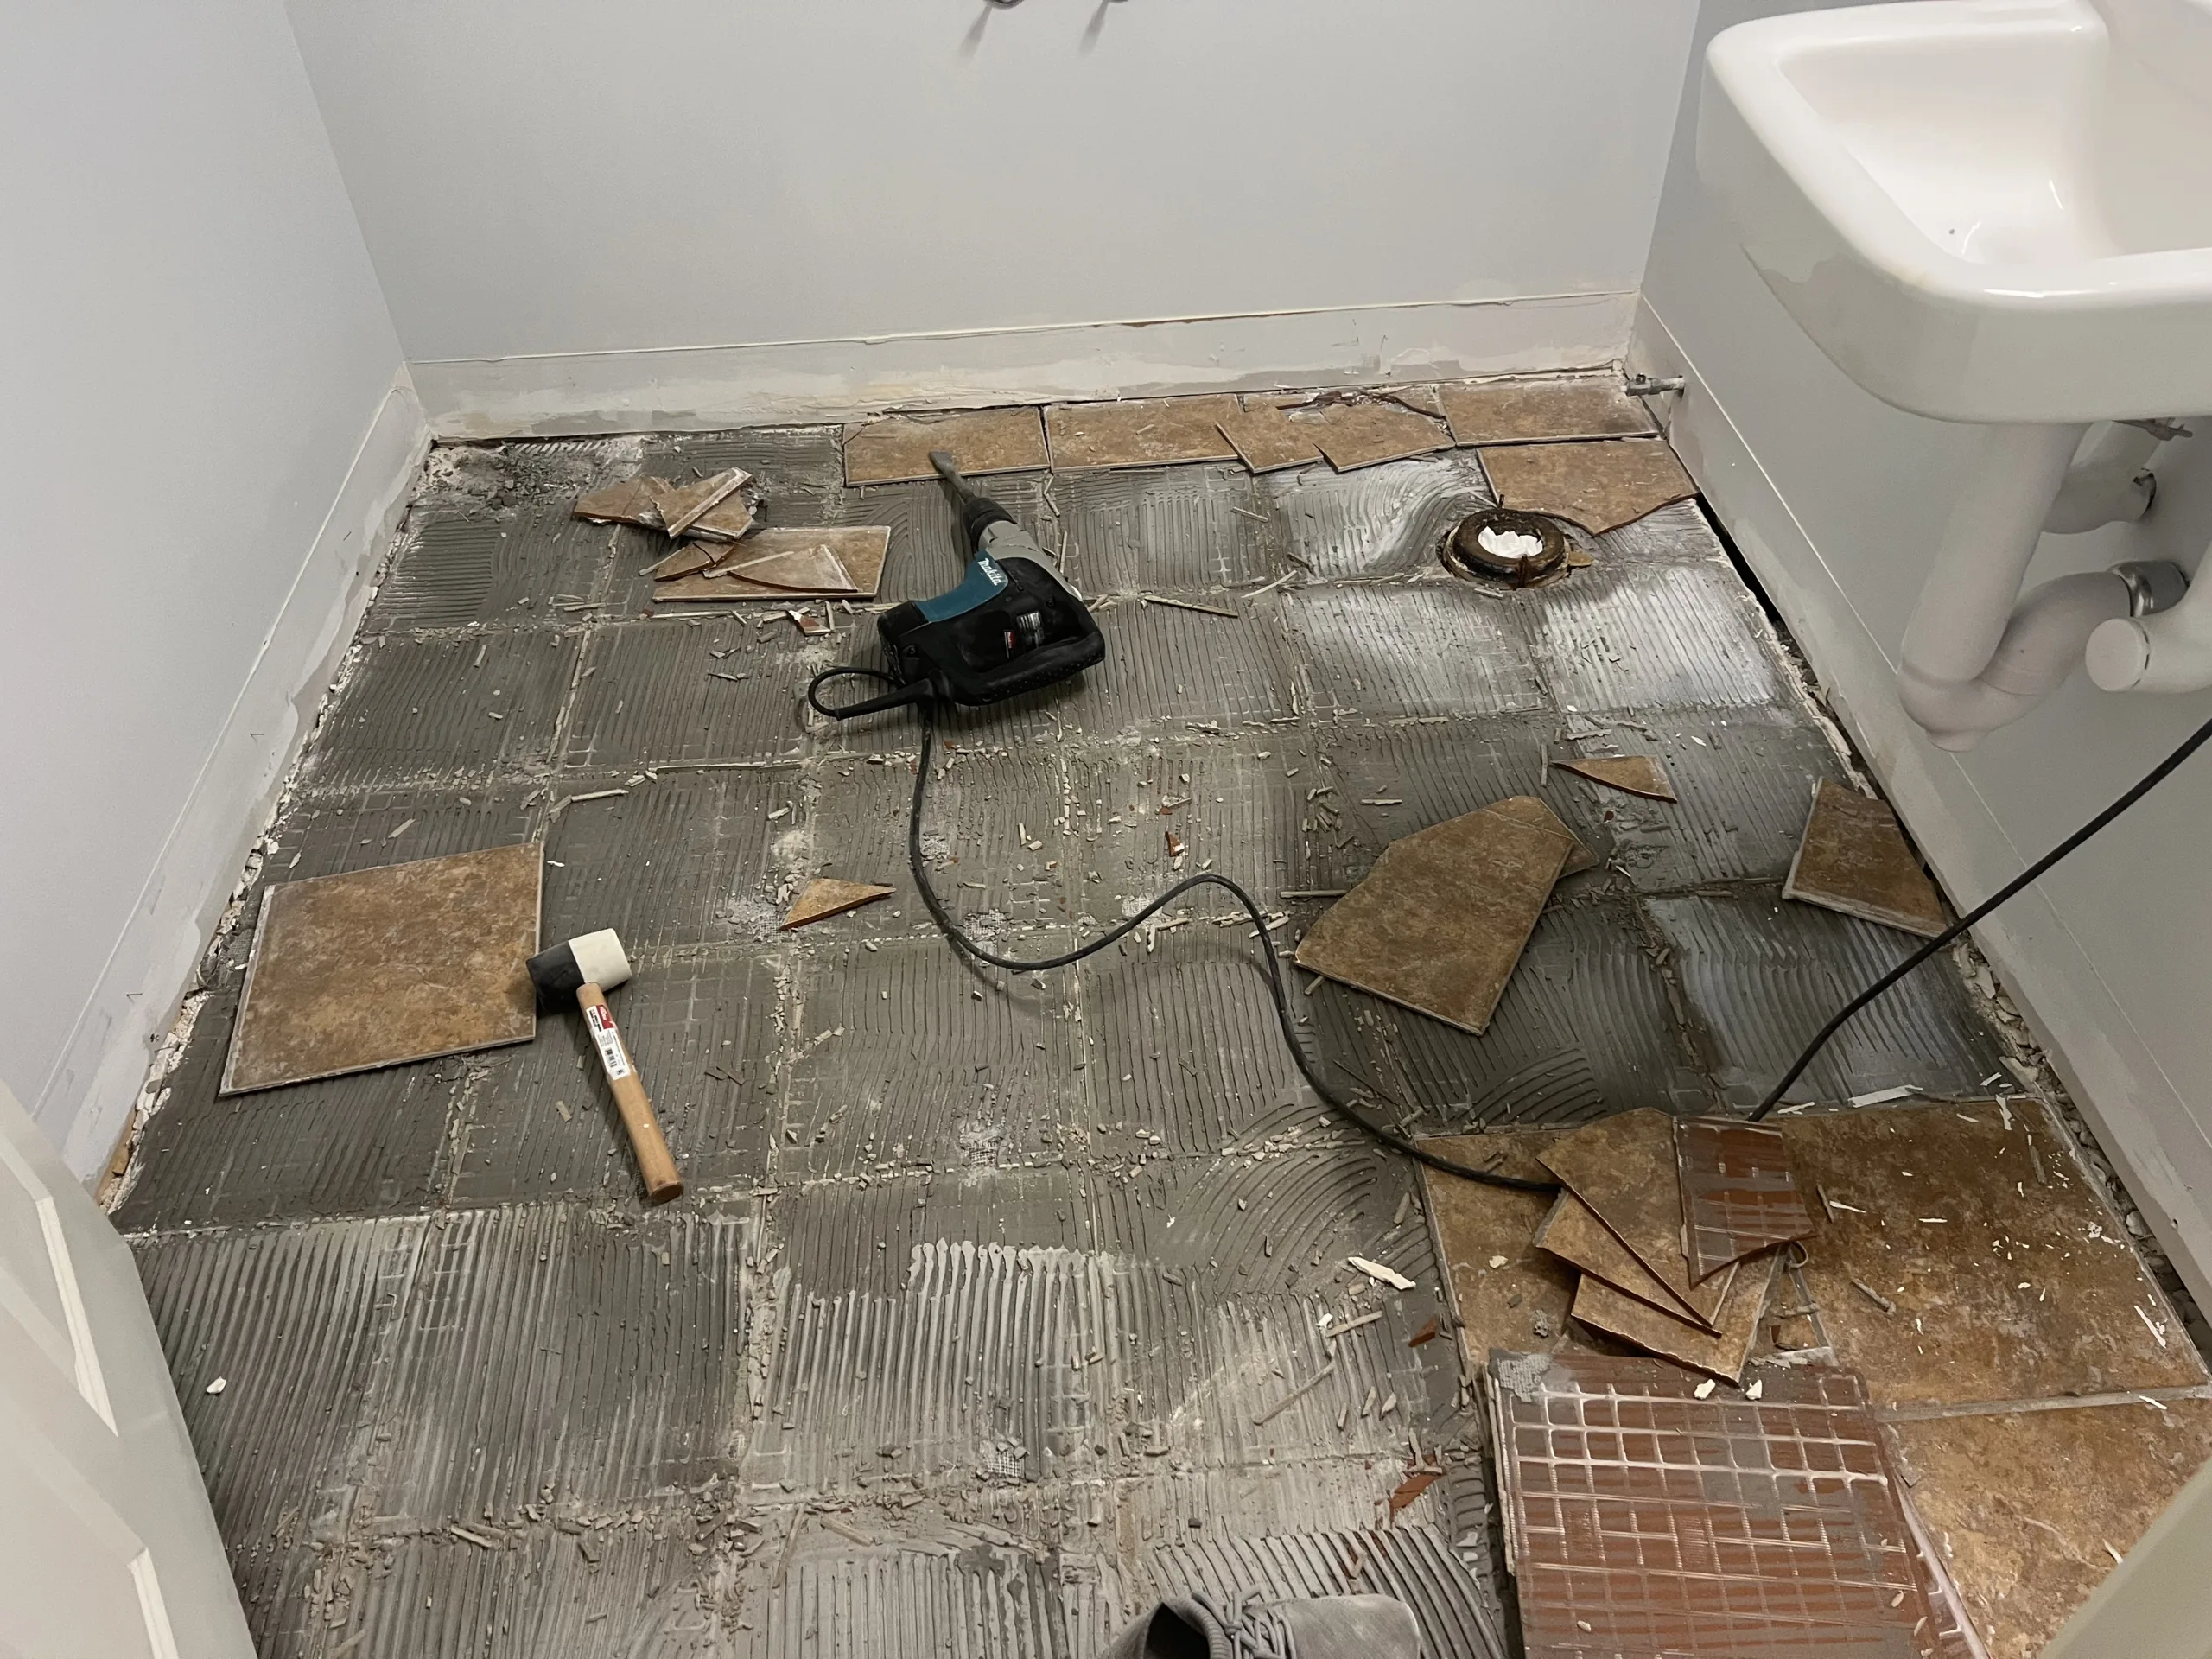
The first major step was demolition. The old brown tile floor was removed so the new floor tile would have a proper base. Tile demolition in a small restroom requires careful work because there are plumbing penetrations, wall edges, trim, toilet flange areas, and existing fixtures nearby.
The floor tile was broken out and removed, exposing the old adhesive and substrate below. This stage is messy but necessary. Installing new tile over a weak or uneven old surface can lead to poor bonding, uneven tile, cracked grout, or movement in the floor later.
After demolition, loose pieces, broken tile, old adhesive ridges, and debris had to be cleared before the next preparation stage. A good bathroom tile installation starts with what happens before the new tile is even installed.
Step 2: Floor Substrate Cleanup and Preparation
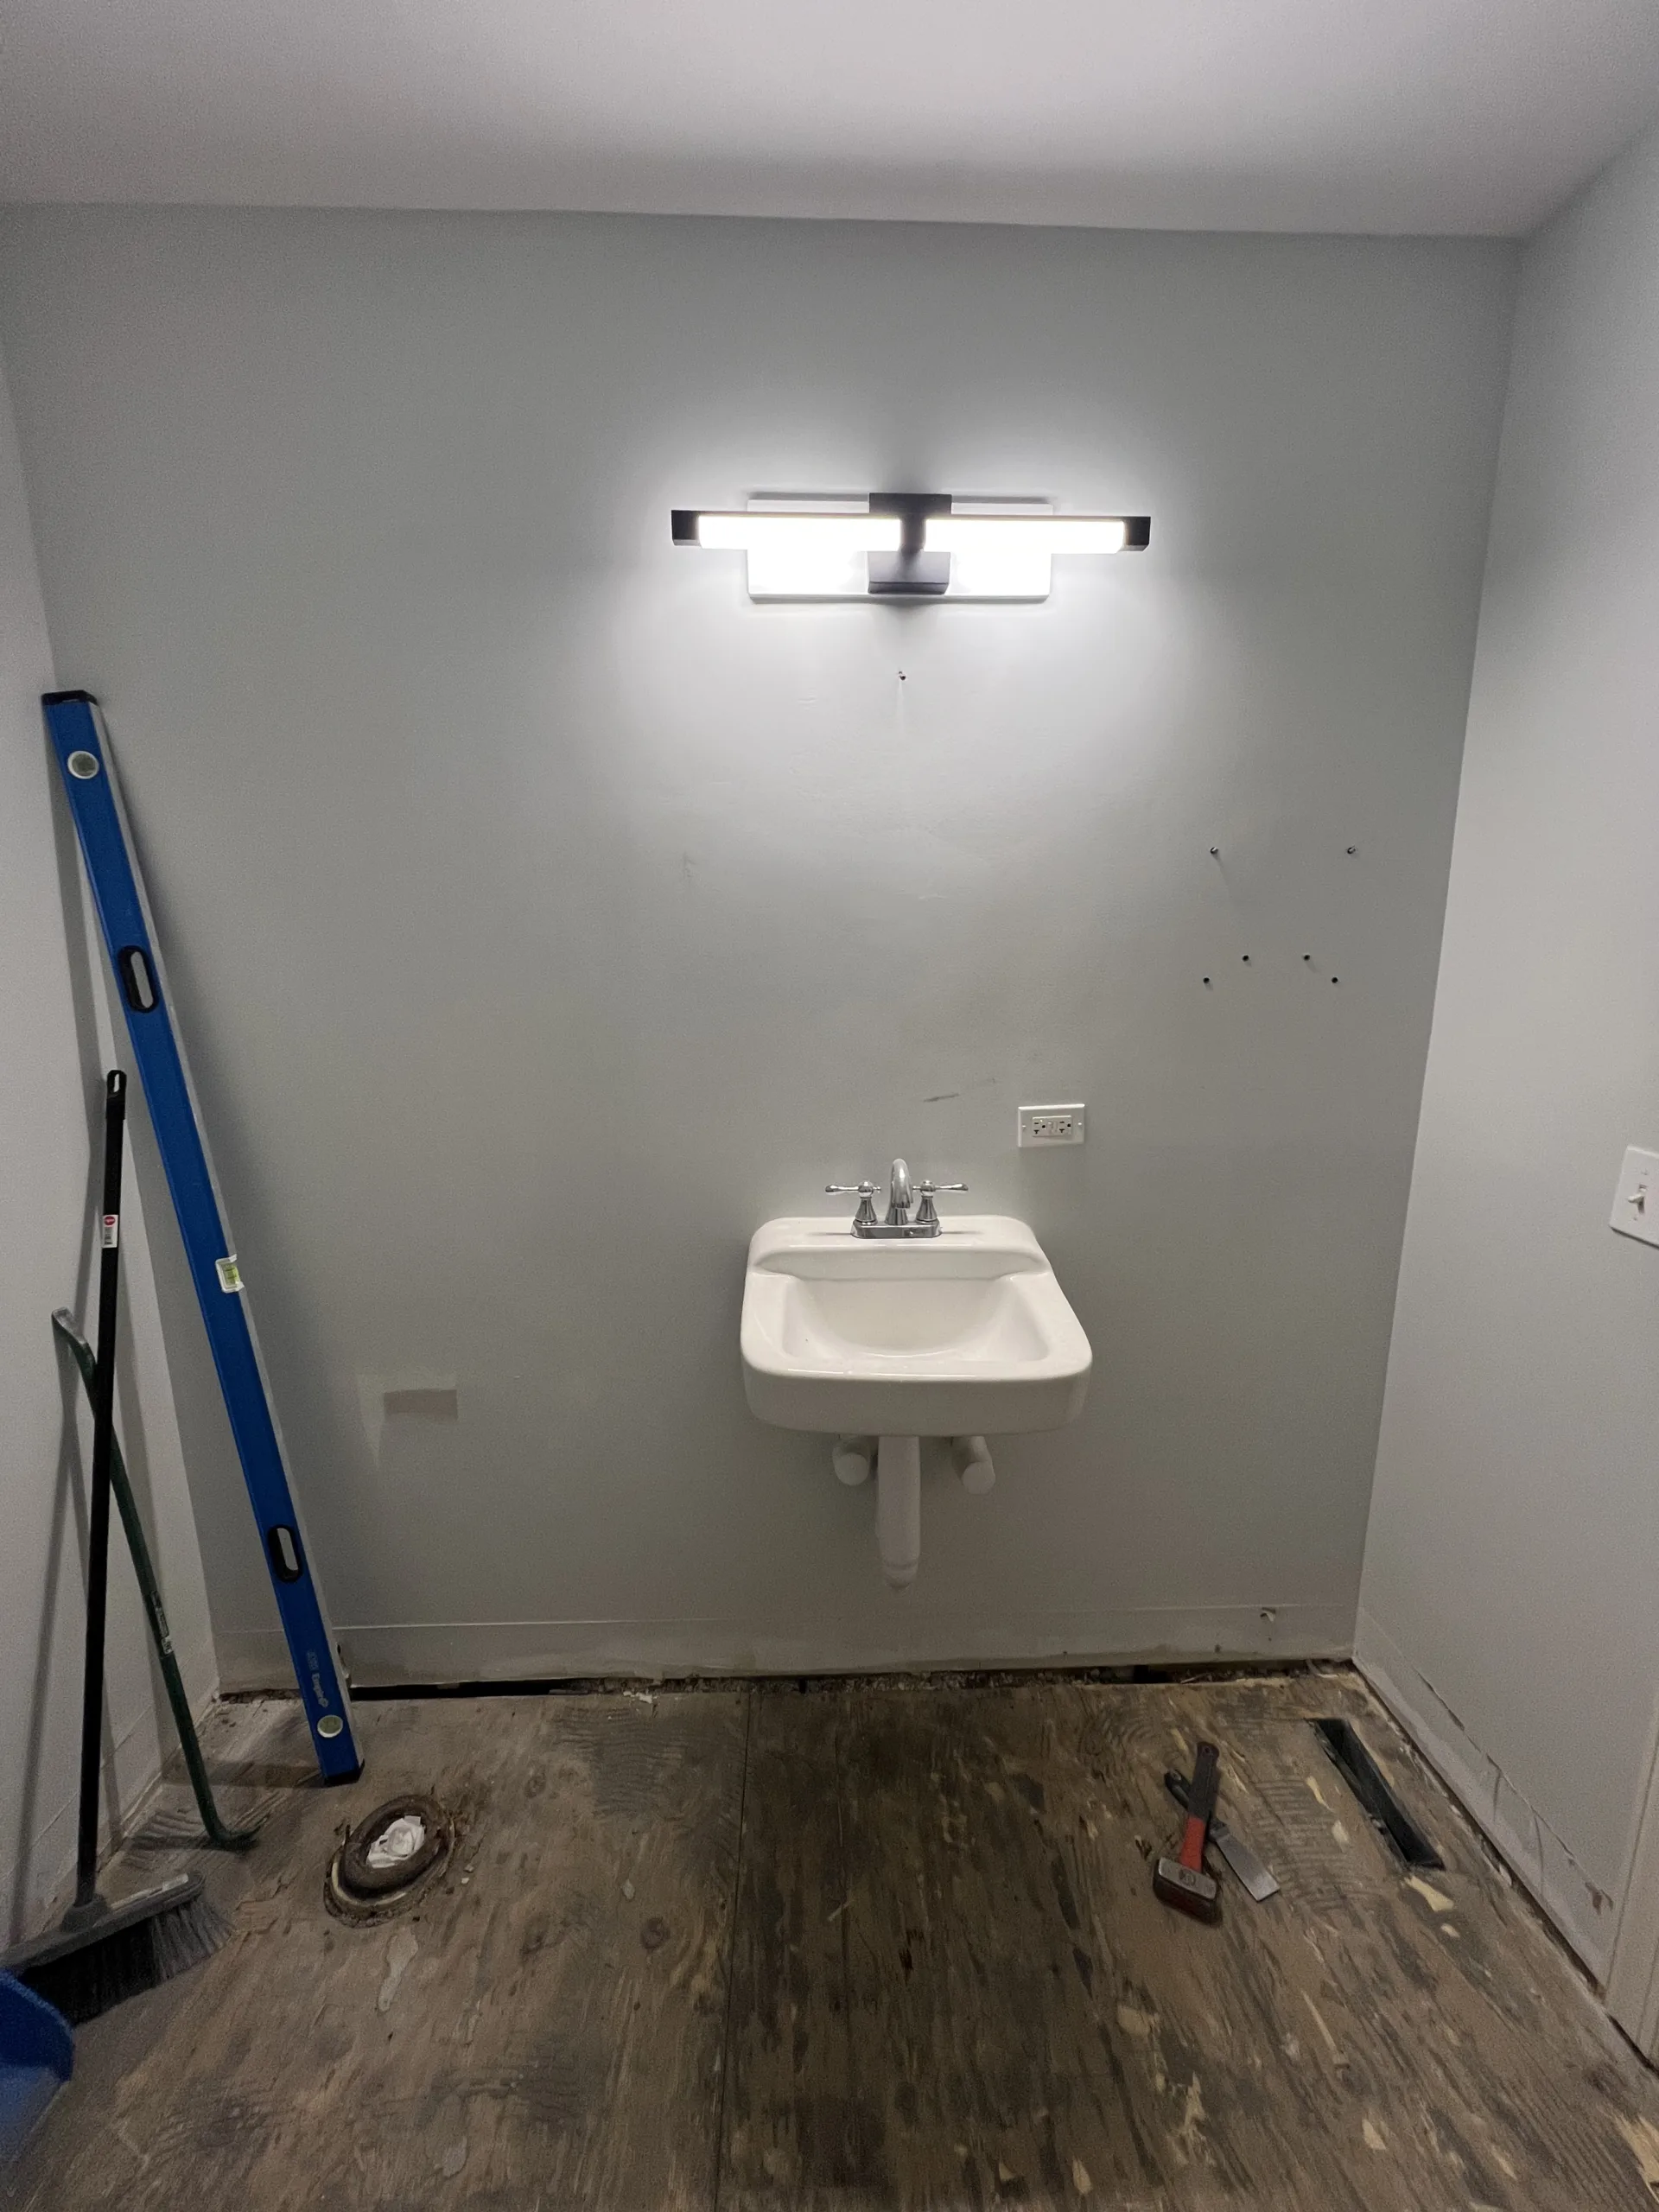
Once the old tile was removed, the floor had to be checked and cleaned. This step included removing remaining thinset ridges, clearing loose material, checking the floor condition, and preparing the surface for the next layers.
Small bathrooms are unforgiving because the floor is short, narrow, and surrounded by walls. If the surface is uneven, the new tile can show lippage or poor transitions at the doorway. The toilet flange area also needs attention because the finished tile height must work with the toilet reset.
The floor preparation stage created a cleaner base for leveling and tile installation. This is the difference between a quick cosmetic tile replacement and a proper restroom remodel.
Step 3: Selecting the Dark Green Wall Tile
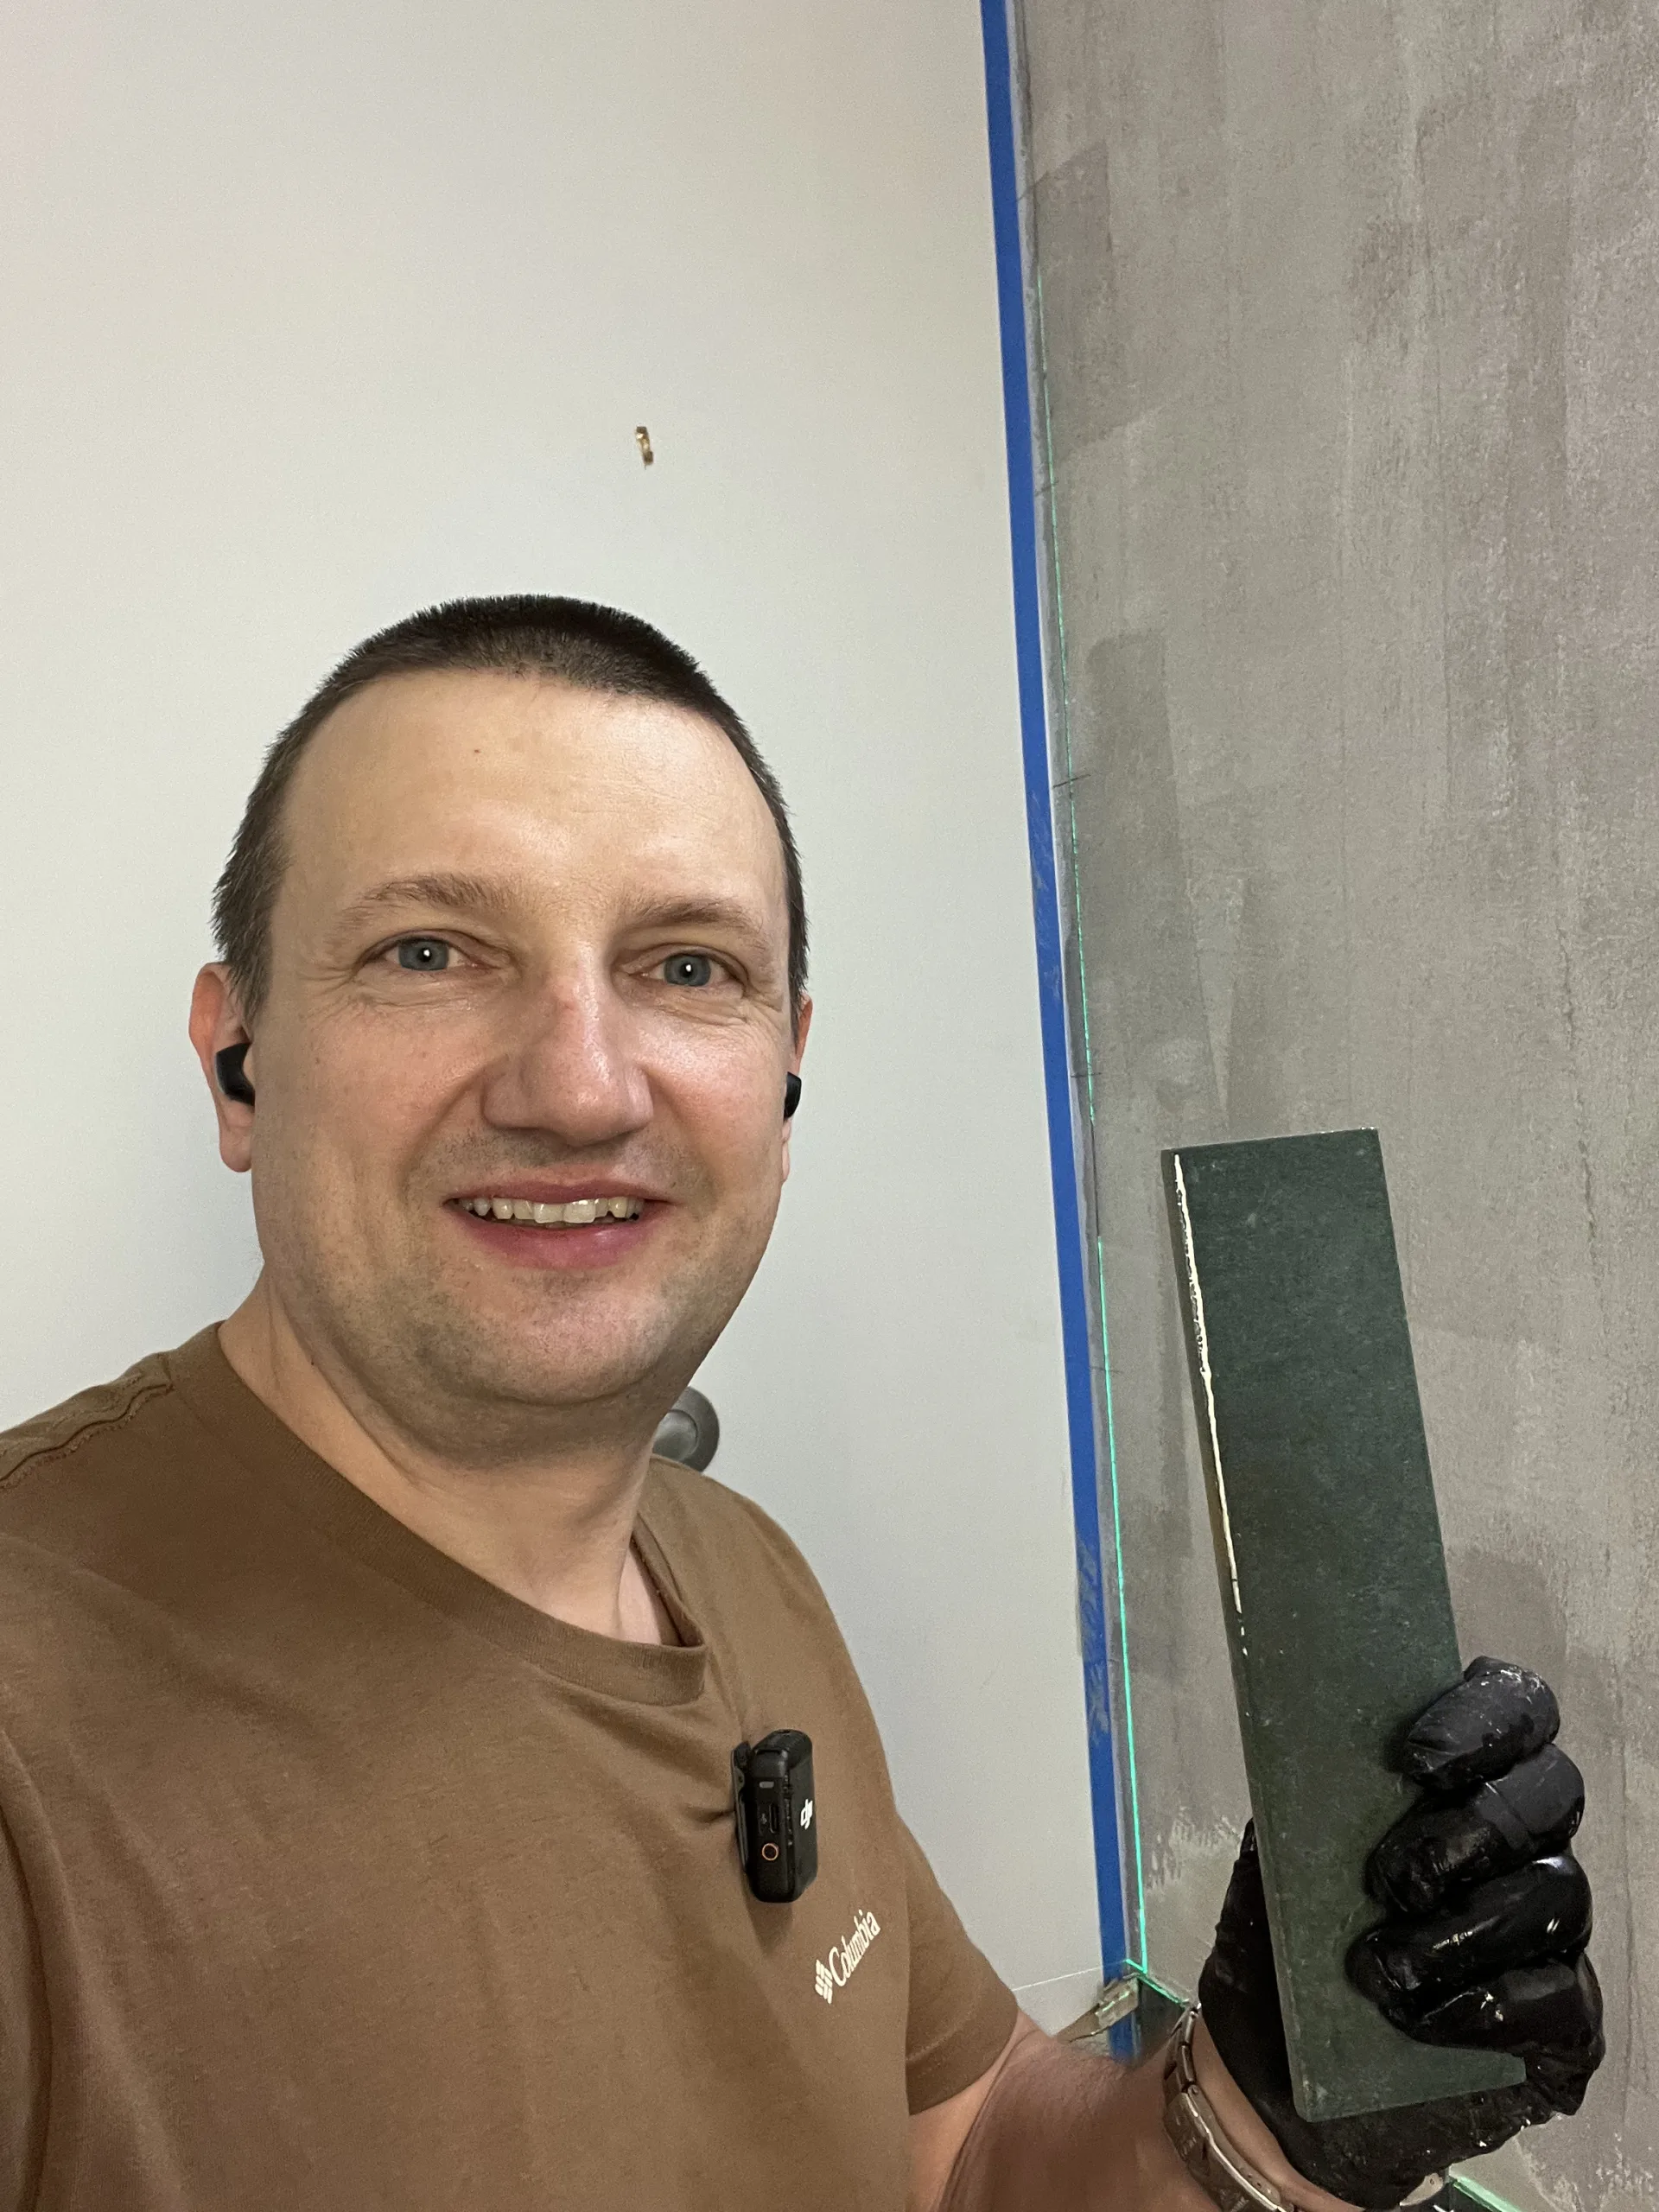
The wall tile selection was one of the main design choices in this project. A glossy dark green vertical tile was selected for the feature wall behind the toilet and fixture area. This tile gives the restroom a deeper, more modern look than plain painted drywall.
Dark green works well in a small commercial restroom because it creates a strong accent without making every wall dark. The surrounding walls can stay light, while the tiled wall becomes the main visual feature. The glossy surface also reflects light, which helps the tile wall feel more dimensional.
The vertical tile format also changes the feel of the wall. Instead of a large plain painted surface, the wall gets texture, rhythm, and a more custom finish. This is especially useful in an office bathroom where the space is small but still needs to look professional.
Step 4: Starting the Wall Tile Installation with a Laser Line
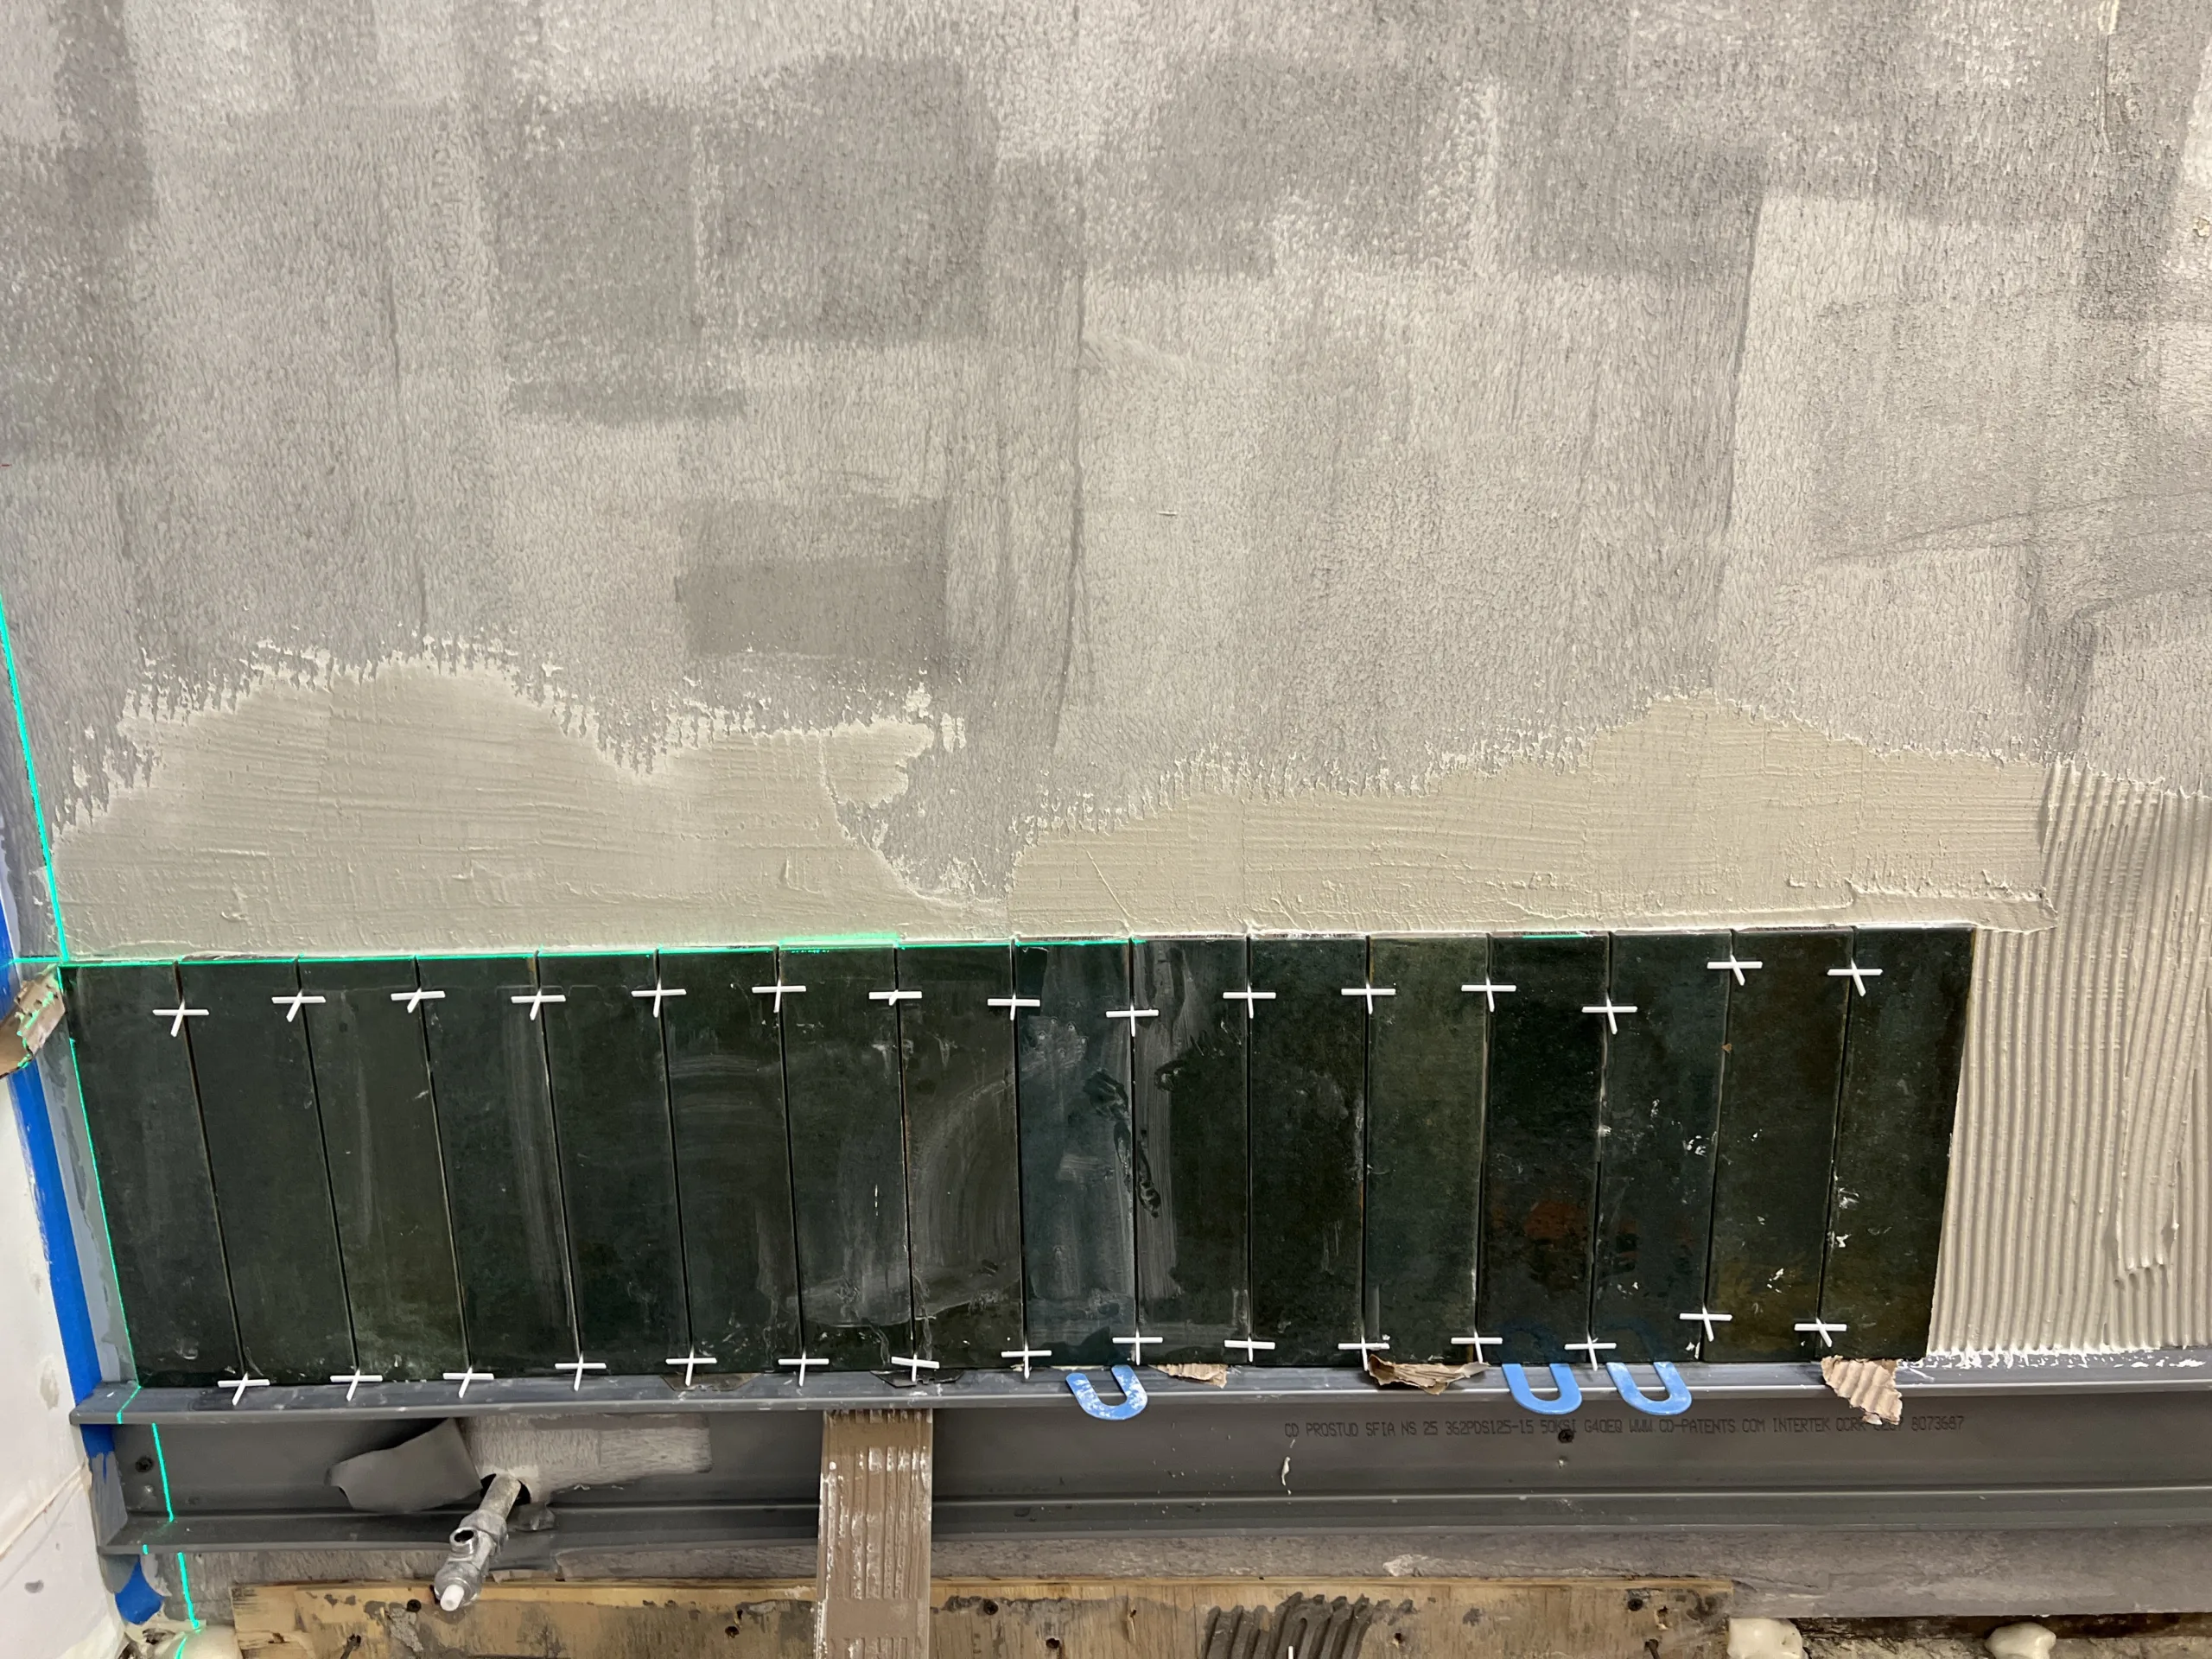
The dark green wall tile installation started with layout control. A laser line was used to keep the first course straight and level. This matters because the first row sets the direction for every row above it.
With vertical tile, alignment is especially visible. If the first row is off, the joints will drift as the wall continues upward. In a small restroom, the user is close to the tile wall, so crooked lines or inconsistent spacing would be easy to notice.
The first tiles were installed with spacers to maintain consistent grout joints. The adhesive was applied to the wall, the tiles were set into place, and the row was checked against the laser line before continuing.
Step 5: Installing the Dark Green Feature Wall Tile
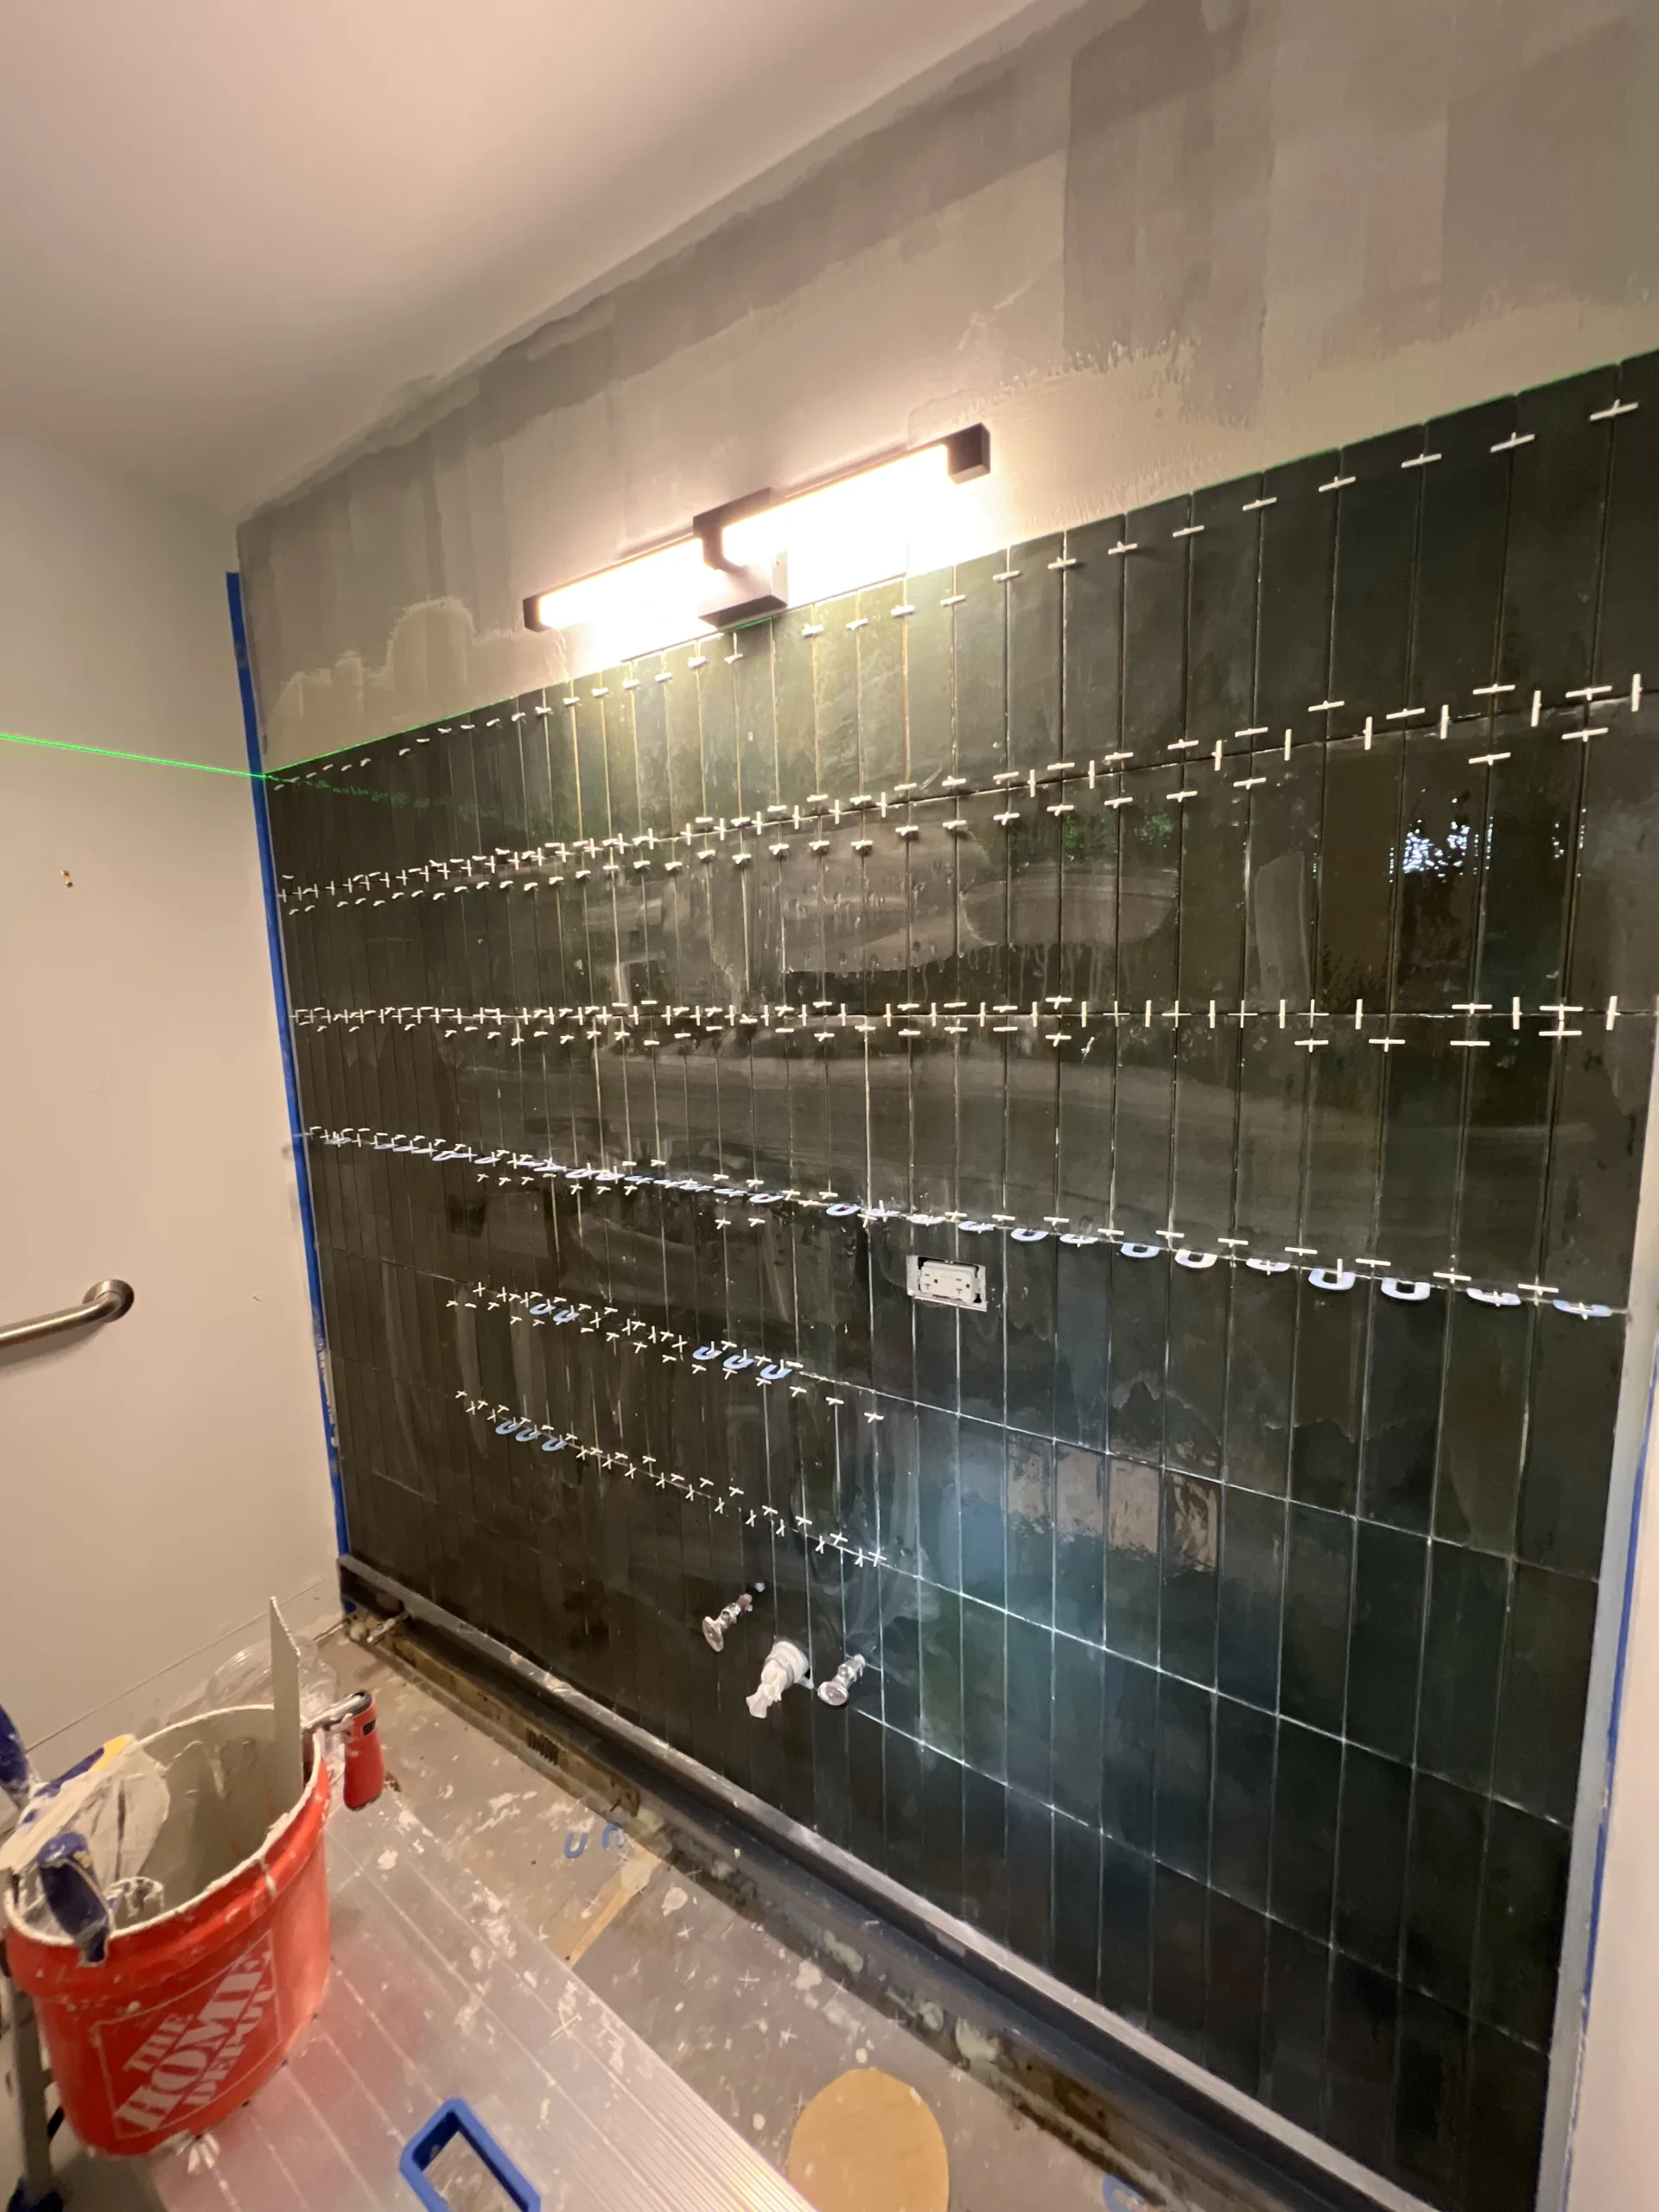
As the wall tile continued upward and across the restroom wall, spacers were used to maintain consistent vertical and horizontal joints. The installation also had to work around electrical openings, plumbing points, wall edges, and the existing restroom layout.
The glossy tile required careful handling because reflections make uneven surfaces more visible. A dark glossy tile wall can look excellent when installed cleanly, but it also shows alignment problems quickly. That is why layout lines, spacers, and steady joint spacing were important throughout the installation.
The new green wall tile changed the entire character of the restroom. Instead of a plain painted wall, the room now had a durable feature surface that felt more designed and more appropriate for a modern office or commercial space.
Step 6: Floor Leveling Before New Tile
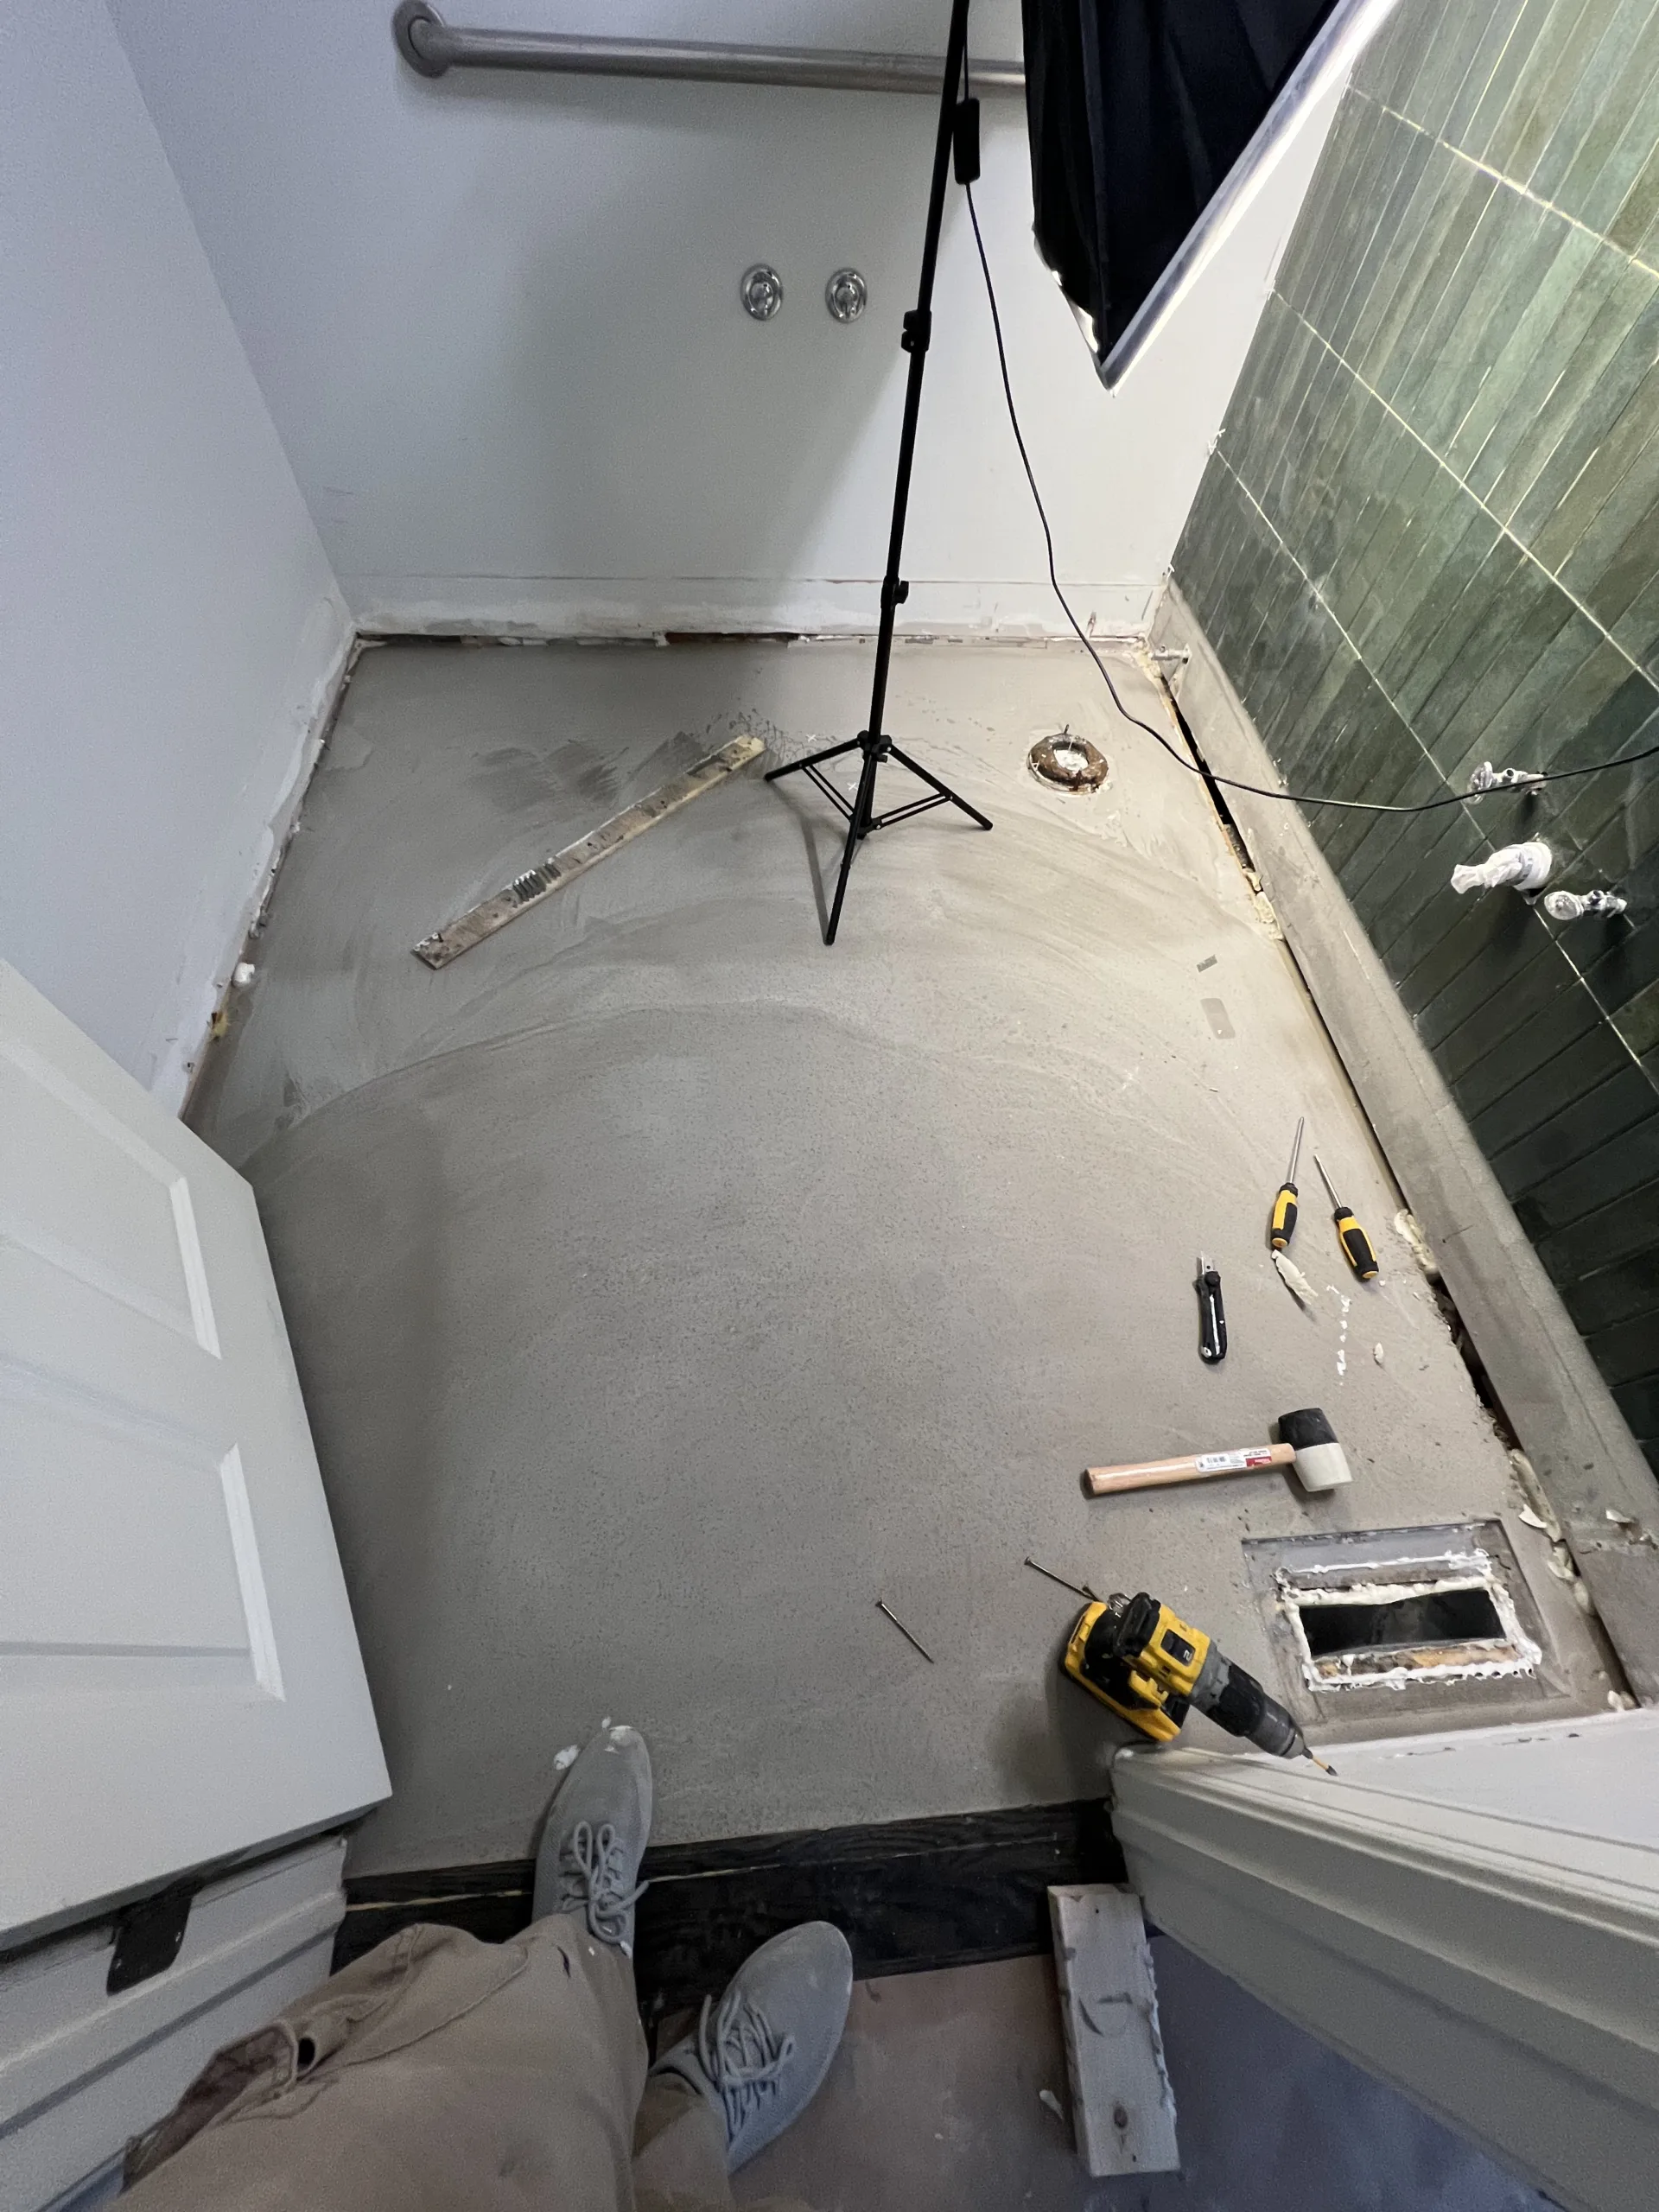
After demolition and cleanup, the floor was leveled and prepared for the new tile system. This step helped correct uneven areas and create a better base for the black marble-look floor tile.
Floor leveling is important in a bathroom because tile needs a stable and even surface. If the substrate has low spots, high spots, or old adhesive ridges, the finished tile can look uneven. It can also create problems around the toilet flange, doorway, and wall transitions.
The restroom floor was compact, but that does not make preparation less important. In small bathrooms, every tile edge and cut is close to the wall, toilet, or doorway, so poor preparation shows quickly.
Step 7: Uncoupling Membrane and Black Floor Tile Layout
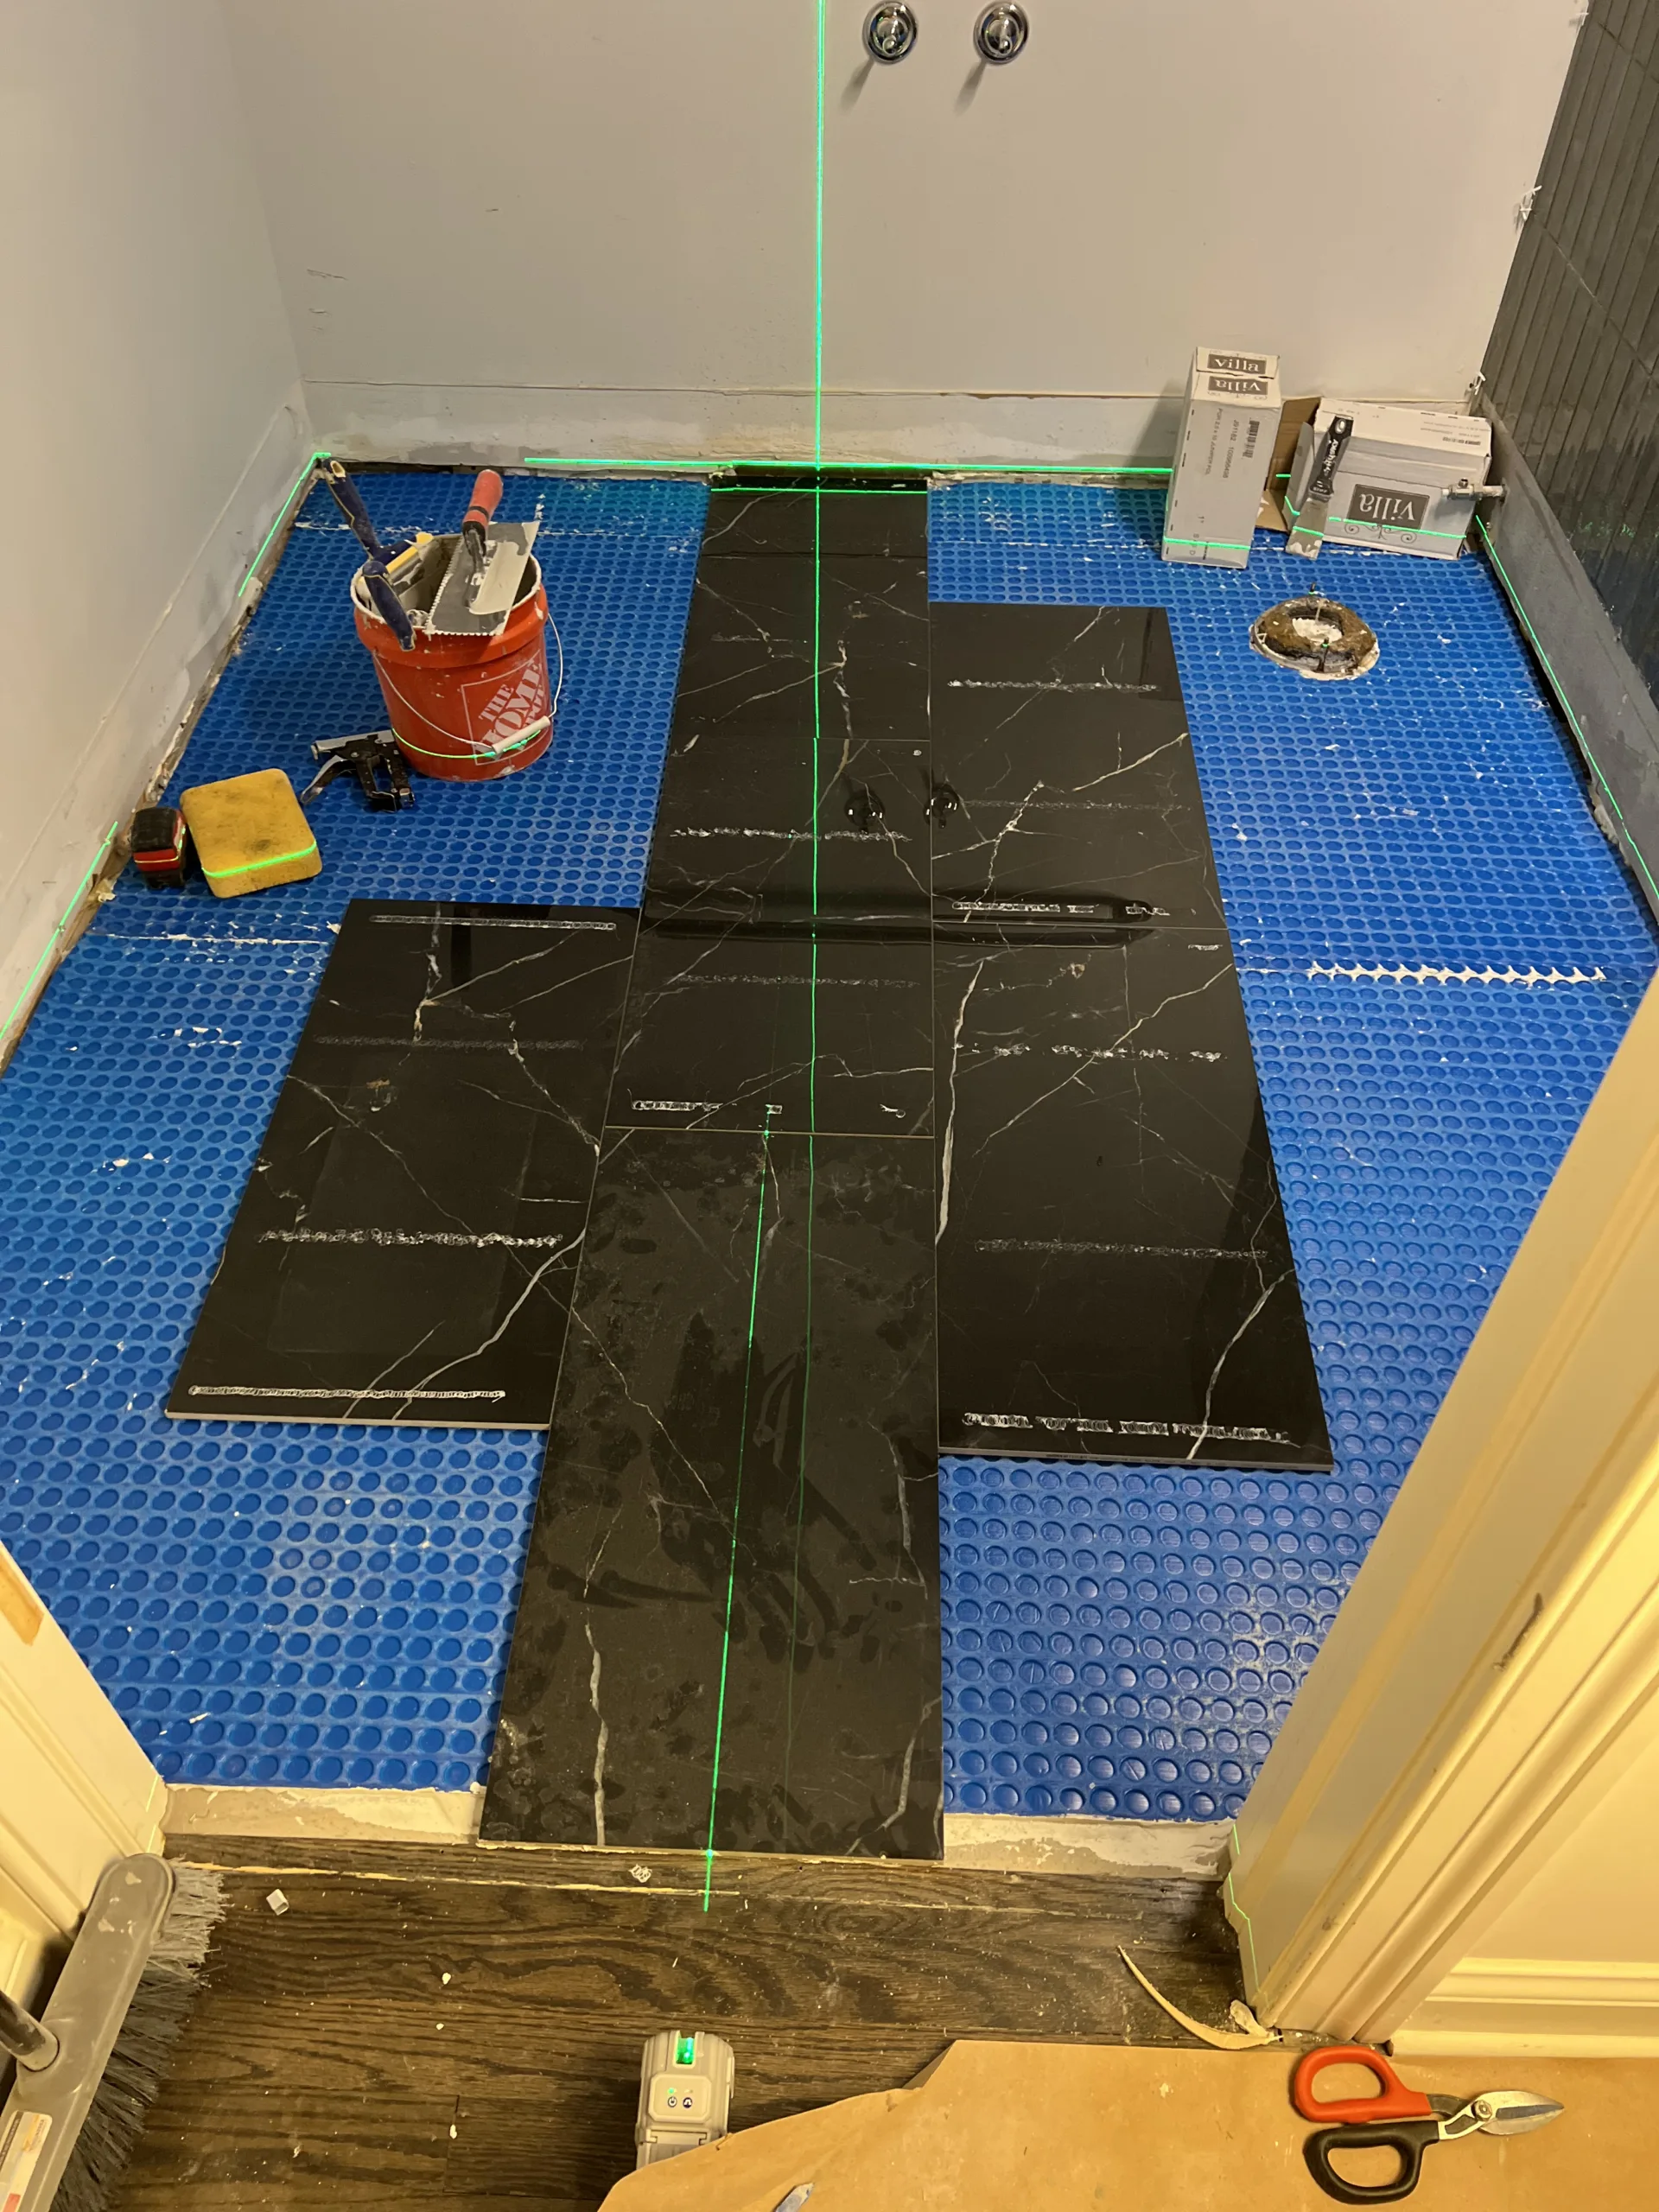
Before installing the finished floor tile, a blue uncoupling membrane was installed over the prepared floor. This type of layer helps separate the tile surface from movement in the substrate and provides a better tile installation system than bonding directly over an unreliable old base.
The black marble-look tile was then laid out to plan the pattern, cuts, and joint placement. Layout planning is important around a toilet flange because the tile cuts need to fit cleanly while leaving proper space for the toilet connection.
The black tile created a strong contrast with the green wall tile and white fixtures. The marble-look veining added movement to the floor, while the dark color gave the restroom a more upscale commercial feel.
Step 8: Installing the Black Marble-Look Floor Tile
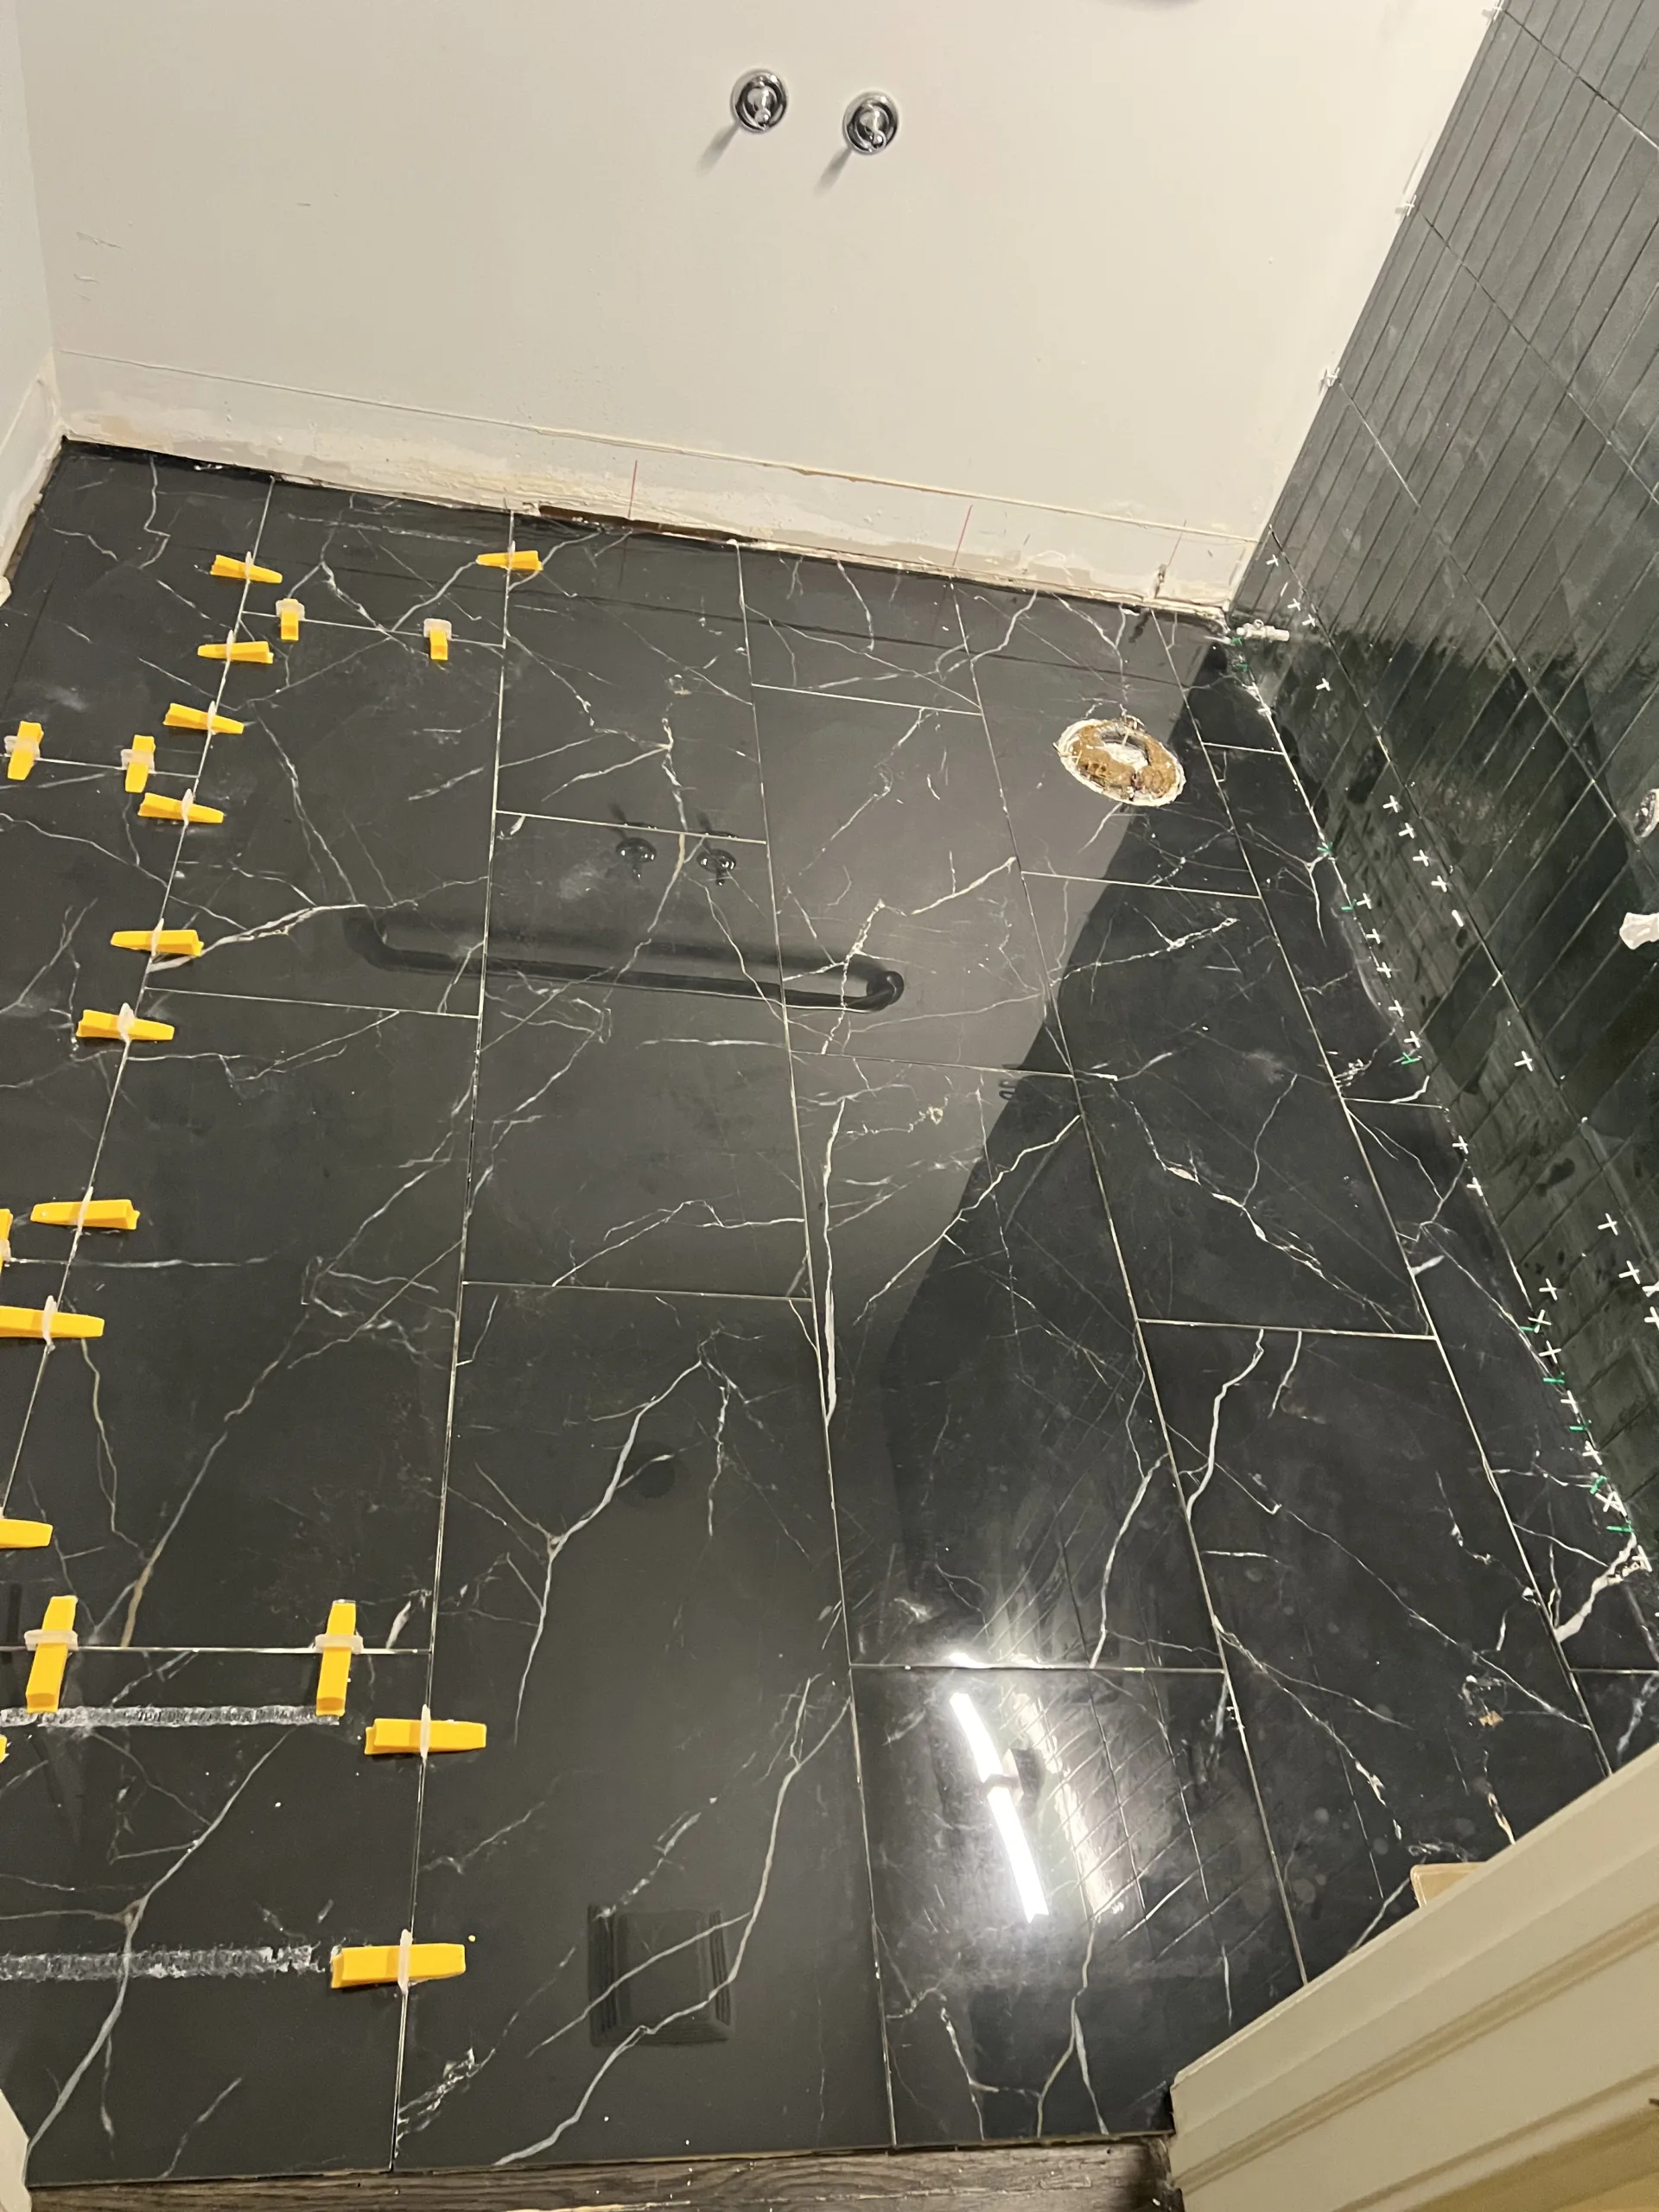
The black floor tile was installed using tile leveling clips to help keep the tile faces aligned. This is important with larger floor tile because uneven tile edges can create lippage, especially in a small bathroom where the floor is viewed from close range.
The installation required cuts around the toilet flange, wall edges, doorway, and the transition to the surrounding floor area. These detail cuts are often the most important part of a bathroom floor tile job. The open center of the floor is straightforward; the quality of the work shows at the edges and penetrations.
The black marble-look floor gave the restroom a completely different appearance. It replaced the older brown tile with a darker, cleaner, more modern surface that works with the dark green feature wall.
Finished Office Restroom Tile Remodel
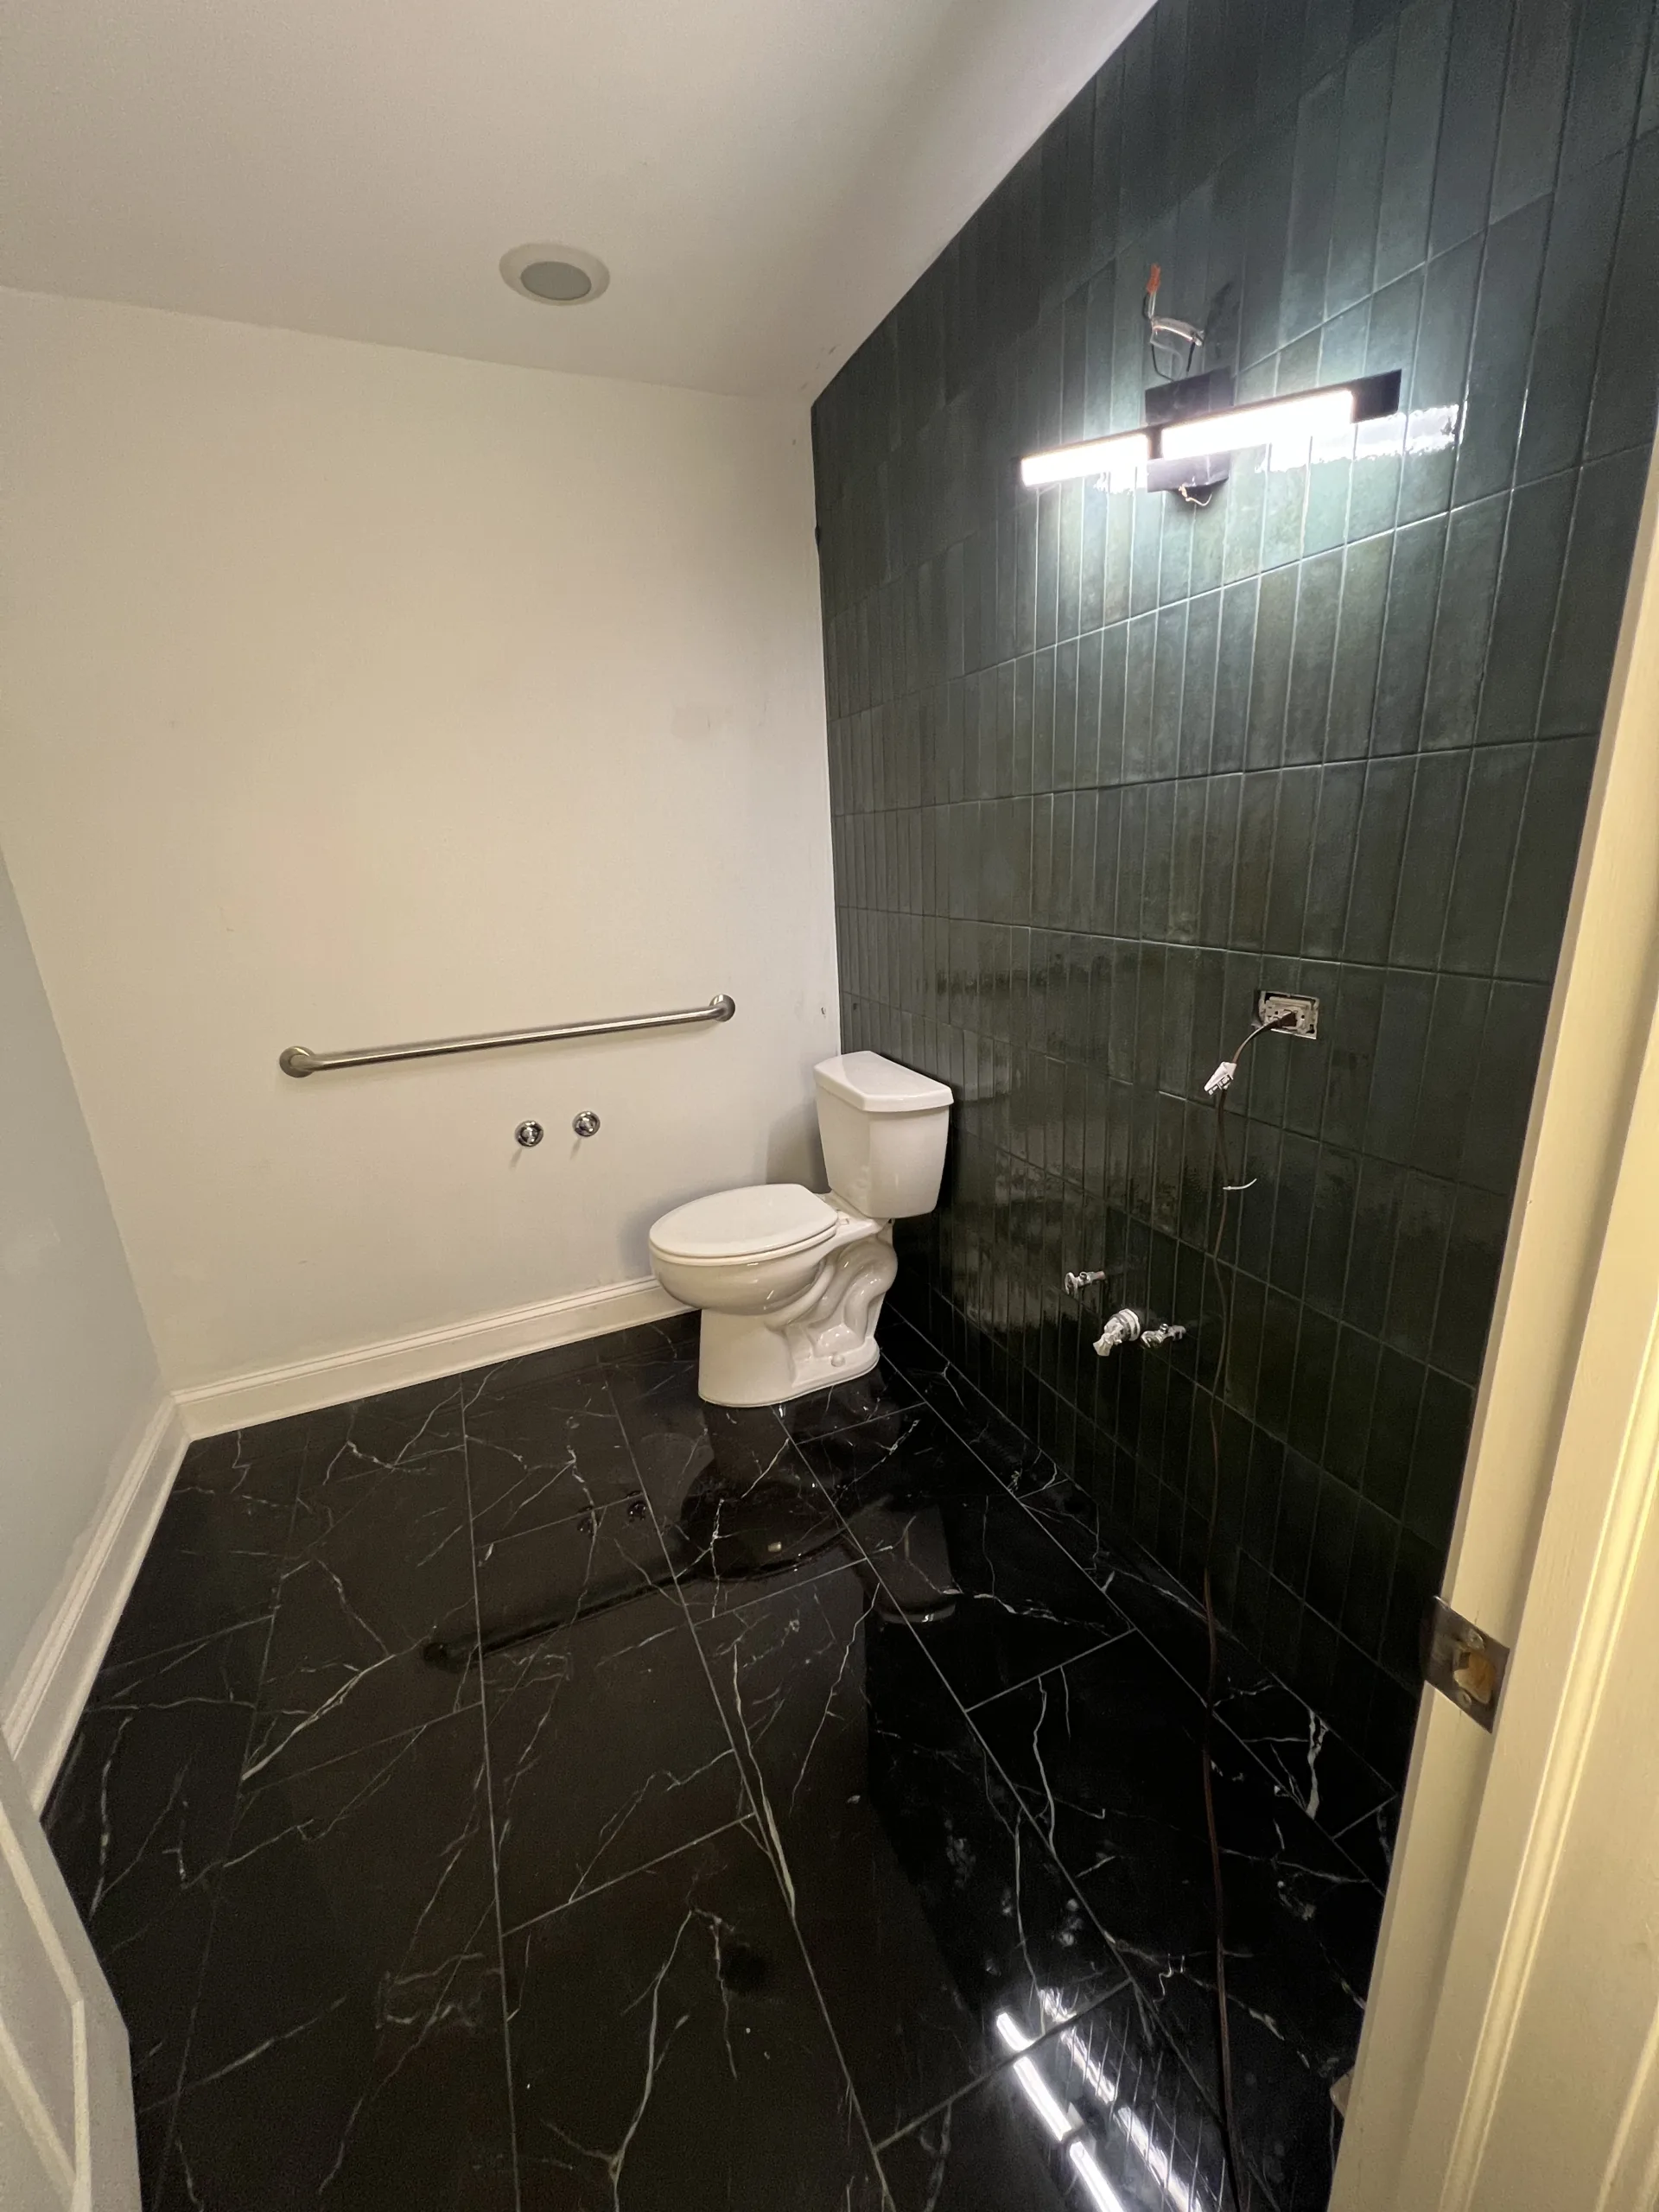
The finished restroom has a much more modern look. The dark green wall tile creates a strong feature wall, the black marble-look floor tile gives the room a cleaner commercial finish, and the white toilet provides contrast against the darker surfaces.
The remodel made the restroom feel more intentional and updated without changing the room footprint. The wall tile and floor tile now define the space, while the light fixture, grab bar, toilet location, and plumbing layout remain practical for office use.
This kind of office restroom remodel is a good option when the existing bathroom is functional but visually outdated. Instead of rebuilding the entire room, targeted tile work can create a major improvement in appearance, durability, and overall presentation.
Why Tile Is a Good Choice for Office Restrooms
Tile is a strong material choice for office and commercial restrooms because it is durable, cleanable, and visually flexible. It works well on floors, feature walls, wet areas, and high-use spaces where painted surfaces can get damaged or worn over time.
For this project, tile solved both practical and design problems. The black floor tile replaced the old brown floor, and the dark green wall tile upgraded the main wall behind the restroom fixtures. Together, the materials made the restroom look more current and easier to present as part of a professional office interior.
Tile also allows a small restroom to have a stronger design without adding bulky decoration. The color, pattern, gloss, grout lines, and layout create the design, while the room stays functional and easy to use.
Office Restroom Remodel vs. Full Bathroom Rebuild
Not every office restroom needs a full rebuild. If the layout works and the plumbing locations are usable, a focused remodel can update the room by replacing finishes, improving surfaces, and resetting fixtures.
A full rebuild may be needed when the plumbing layout must change, walls need to move, water damage is severe, or code upgrades require a larger scope. But when the main issue is an outdated look, old tile, worn flooring, or plain walls, a tile-focused restroom remodel can be a practical solution.
This project stayed focused on the most visible and useful upgrades: floor demolition, surface preparation, wall tile, floor tile, and fixture coordination. That made it a targeted commercial restroom renovation rather than an unnecessary full gut remodel.
Commercial Bathroom Remodeling and Tile Installation in Chicago
Evo Service provides office restroom remodeling, bathroom tile installation, floor tile replacement, wall tile installation, small commercial remodeling, fixture reset coordination, trim work, and interior repair services in Chicago and nearby suburbs.
For offices, small commercial spaces, restaurants, shops, rental units, and service businesses, a restroom remodel can improve the way the space feels to employees, customers, tenants, and visitors. A clean restroom is not only a utility room. It affects the overall impression of the business.
If your office restroom has outdated tile, worn flooring, plain walls, old fixtures, or a dated appearance, a focused tile remodel can create a cleaner and more professional result without changing the entire layout.
FAQ: Office Restroom Remodel in Chicago
What was included in this office restroom remodel?
This project included old floor tile removal, floor preparation, floor leveling, uncoupling membrane installation, dark green wall tile installation, black marble-look floor tile installation, cuts around plumbing and the toilet flange, toilet reset, and final cleanup.
Is this the same as a full commercial bathroom rebuild?
No. This was a focused office restroom remodel. The main work involved tile, surface preparation, and fixture coordination. A full rebuild would usually involve larger plumbing, framing, electrical, layout, or code-related changes.
Can old bathroom floor tile be removed and replaced?
Yes. Old bathroom tile can be removed and replaced, but the substrate must be cleaned, checked, leveled, and prepared before new tile is installed. Proper preparation helps prevent uneven tile, poor bonding, and cracked grout.
Why use an uncoupling membrane under bathroom floor tile?
An uncoupling membrane helps separate the tile layer from small movement in the substrate and creates a better tile installation system. It is often used when preparing floors for a more reliable tile installation.
Is dark tile a good choice for a small office restroom?
Dark tile can work very well in a small restroom when it is balanced with light walls, white fixtures, and good lighting. In this project, the dark green wall tile and black marble-look floor tile created a modern commercial look without changing the room layout.
Do you remodel office restrooms in Chicago?
Yes. Evo Service provides office restroom remodeling, commercial bathroom tile installation, floor tile replacement, wall tile installation, small bathroom remodeling, and interior repair services in Chicago and nearby suburbs.