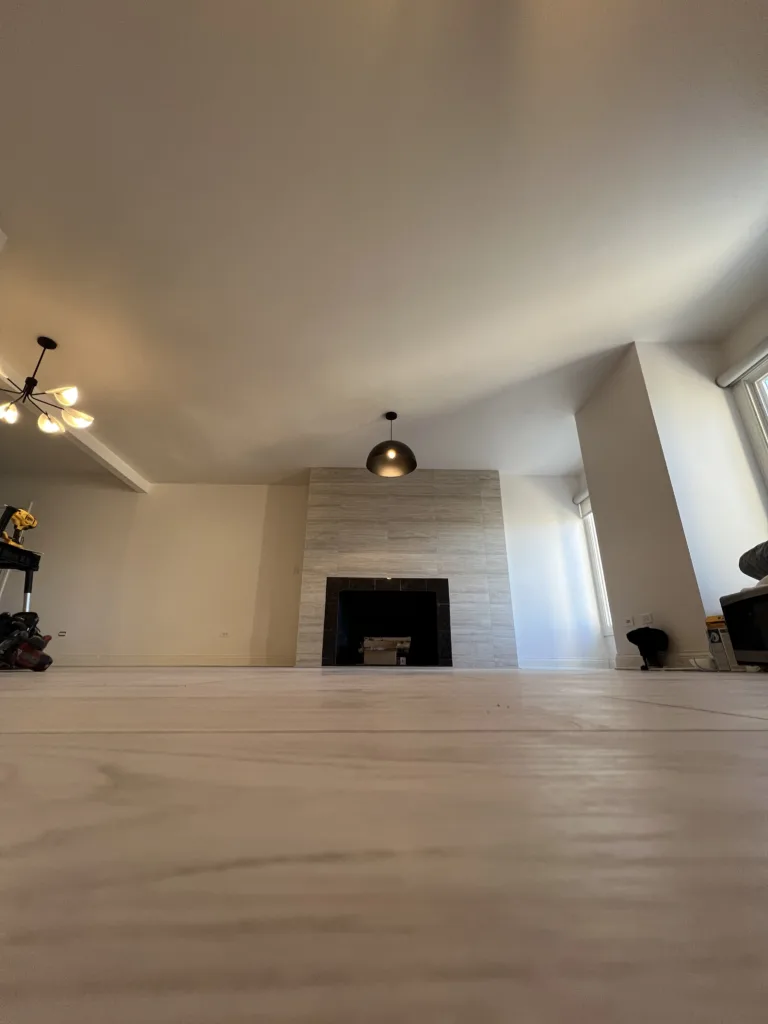
This completed office ceiling remodel in Chicago updated an older commercial office space by removing the existing suspended acoustic ceiling and converting the room to a cleaner drywall ceiling. The original ceiling system used acoustic tiles and a suspended grid, which made the space feel lower, older, and more commercial in a dated way. The goal was to open the ceiling area, inspect the framing, install a solid drywall ceiling, finish the seams, and create a smoother, more modern office interior.
The project included drop ceiling removal, inspection of the exposed joists, ceiling layout, furring strip installation, drywall panel installation with a lift, cutouts for ceiling fixtures, taping, mudding, sanding, and final preparation for paint. This was a focused office ceiling renovation designed to improve the appearance of the room without changing the entire office layout.
For an office space, the ceiling has a major effect on how the room feels. A suspended acoustic ceiling can be practical in some commercial buildings, but it can also make a smaller office feel lower and outdated. A finished drywall ceiling gives the space a cleaner residential-style finish while still working well in a small commercial or professional office environment.
Project Overview: Office Ceiling Remodel in Chicago
This ceiling remodeling project started with an office room that had an older drop ceiling. The space already had finished walls, windows, dark flooring, and a fireplace feature. The suspended ceiling did not match the direction of the rest of the remodel, so it was removed and replaced with a new drywall ceiling system.
The work was completed in stages. First, the existing ceiling tiles and grid system were removed. Then the exposed ceiling framing was inspected and prepared. Furring strips were installed to create a flatter surface for drywall. After that, drywall panels were lifted and fastened into place. The new ceiling was then taped, mudded, sanded, and prepared for final paint.
- Existing suspended acoustic ceiling inspection
- Drop ceiling tile and grid removal
- Exposed joist and ceiling structure review
- Ceiling layout with laser lines
- Furring strip installation for a flatter drywall base
- Drywall panel installation using a drywall lift
- Cutouts for ceiling fixtures and electrical boxes
- Drywall screw fastening and panel alignment
- Taping and mudding of seams and screw spots
- Sanding and final ceiling preparation before painting
Before the Remodel: Old Drop Ceiling in the Office
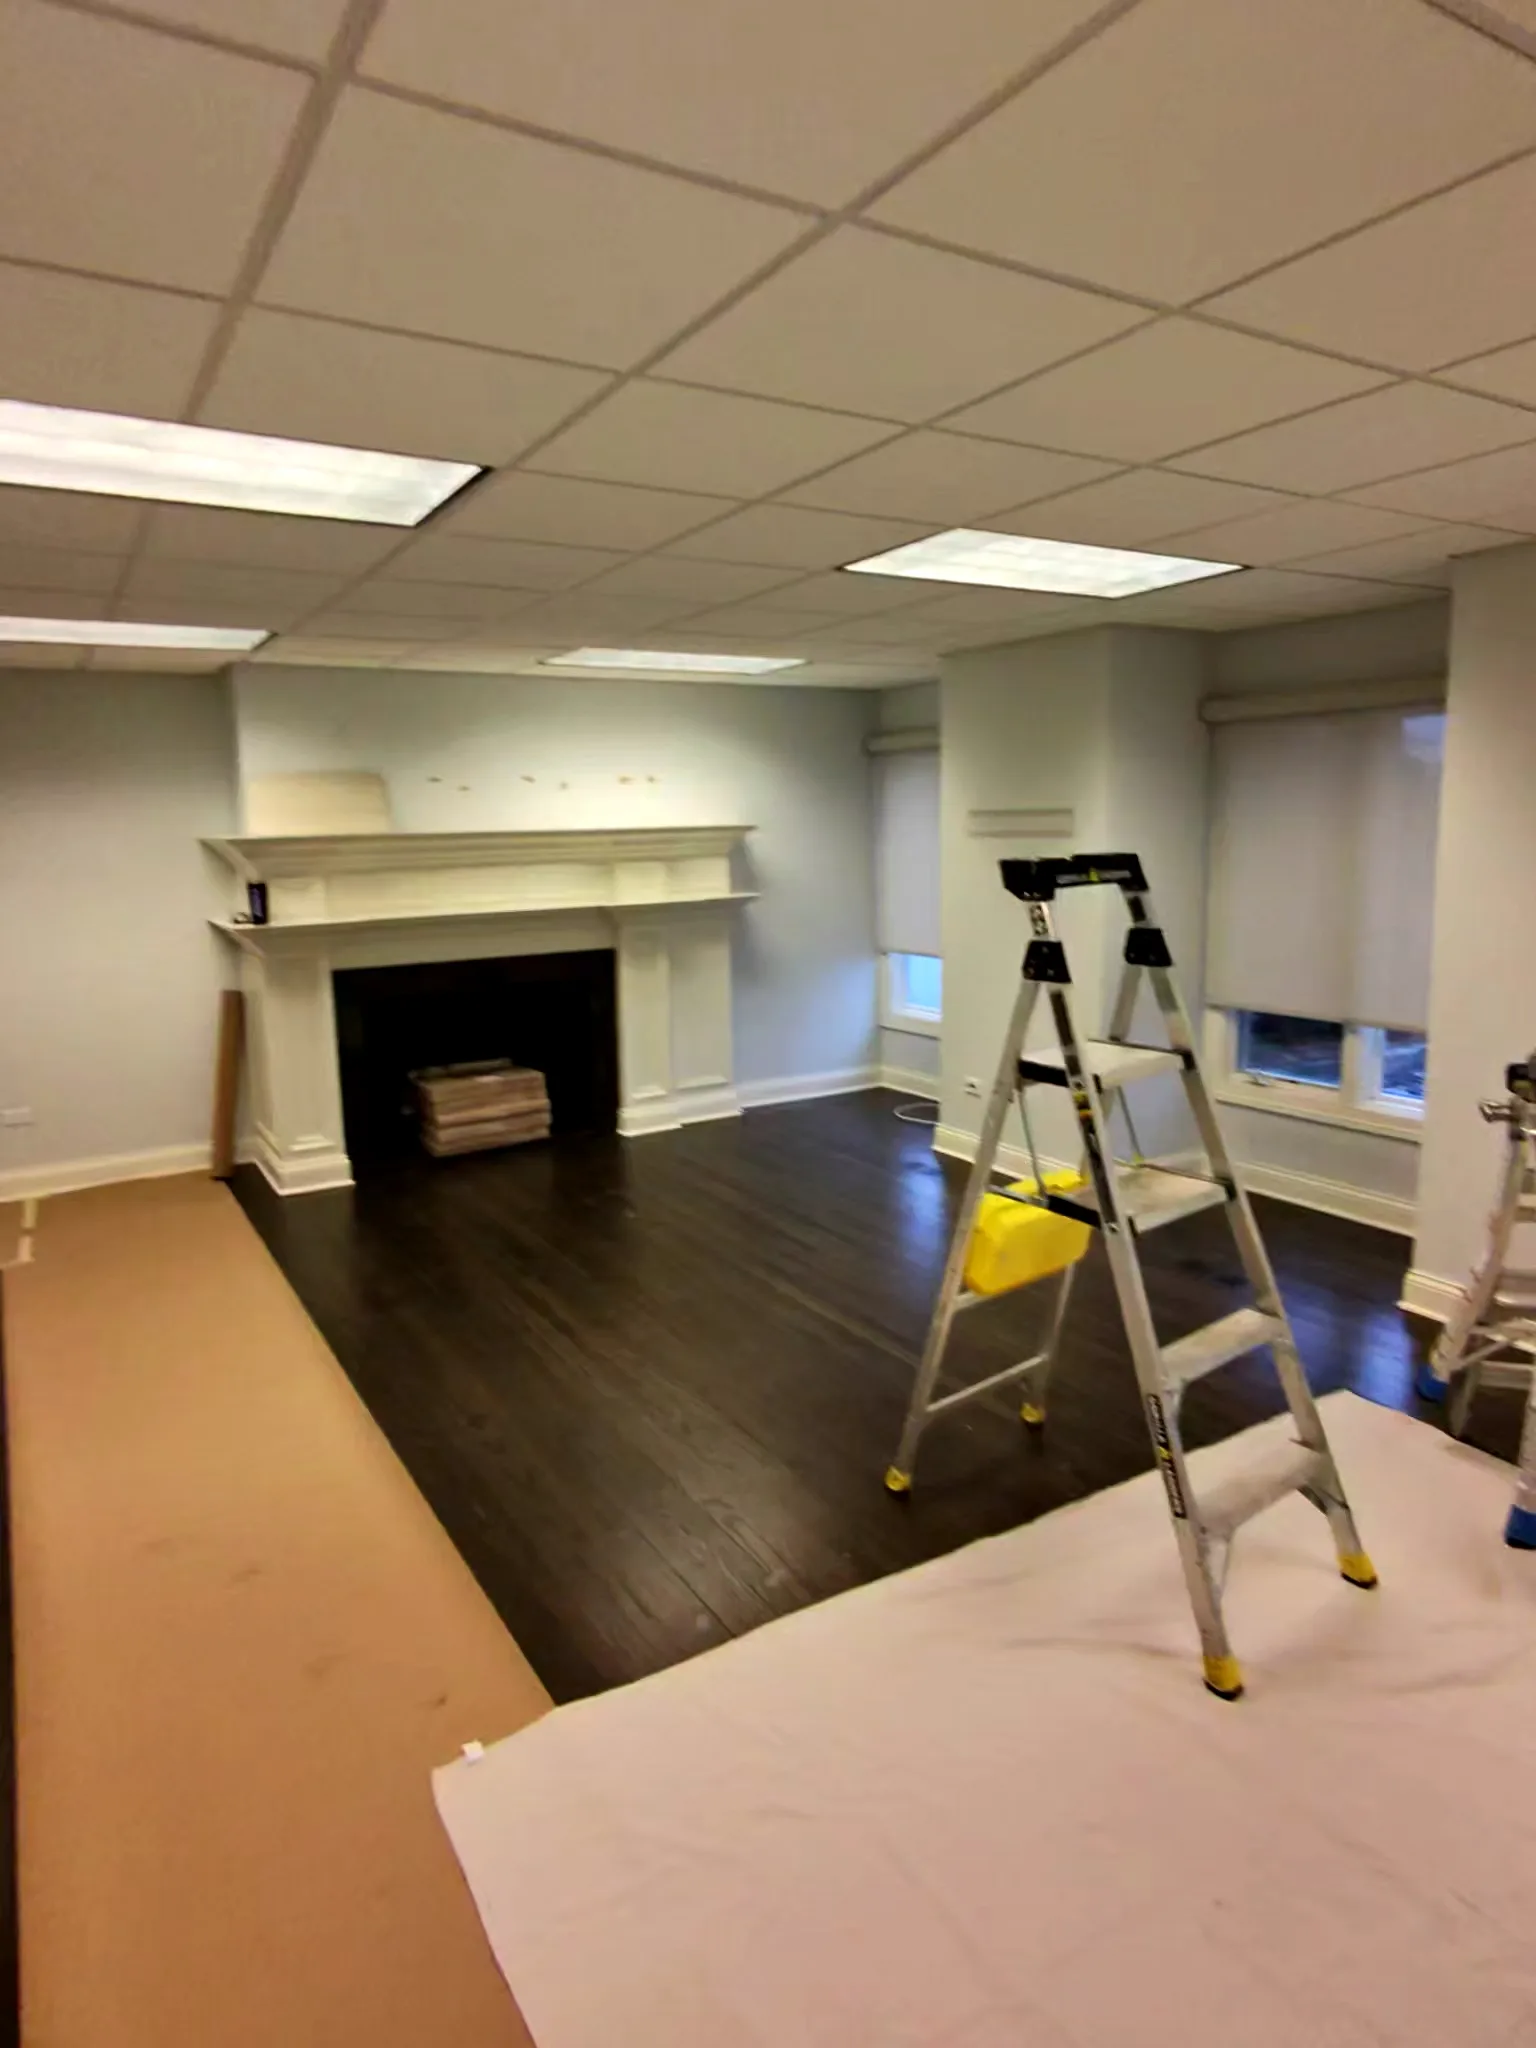
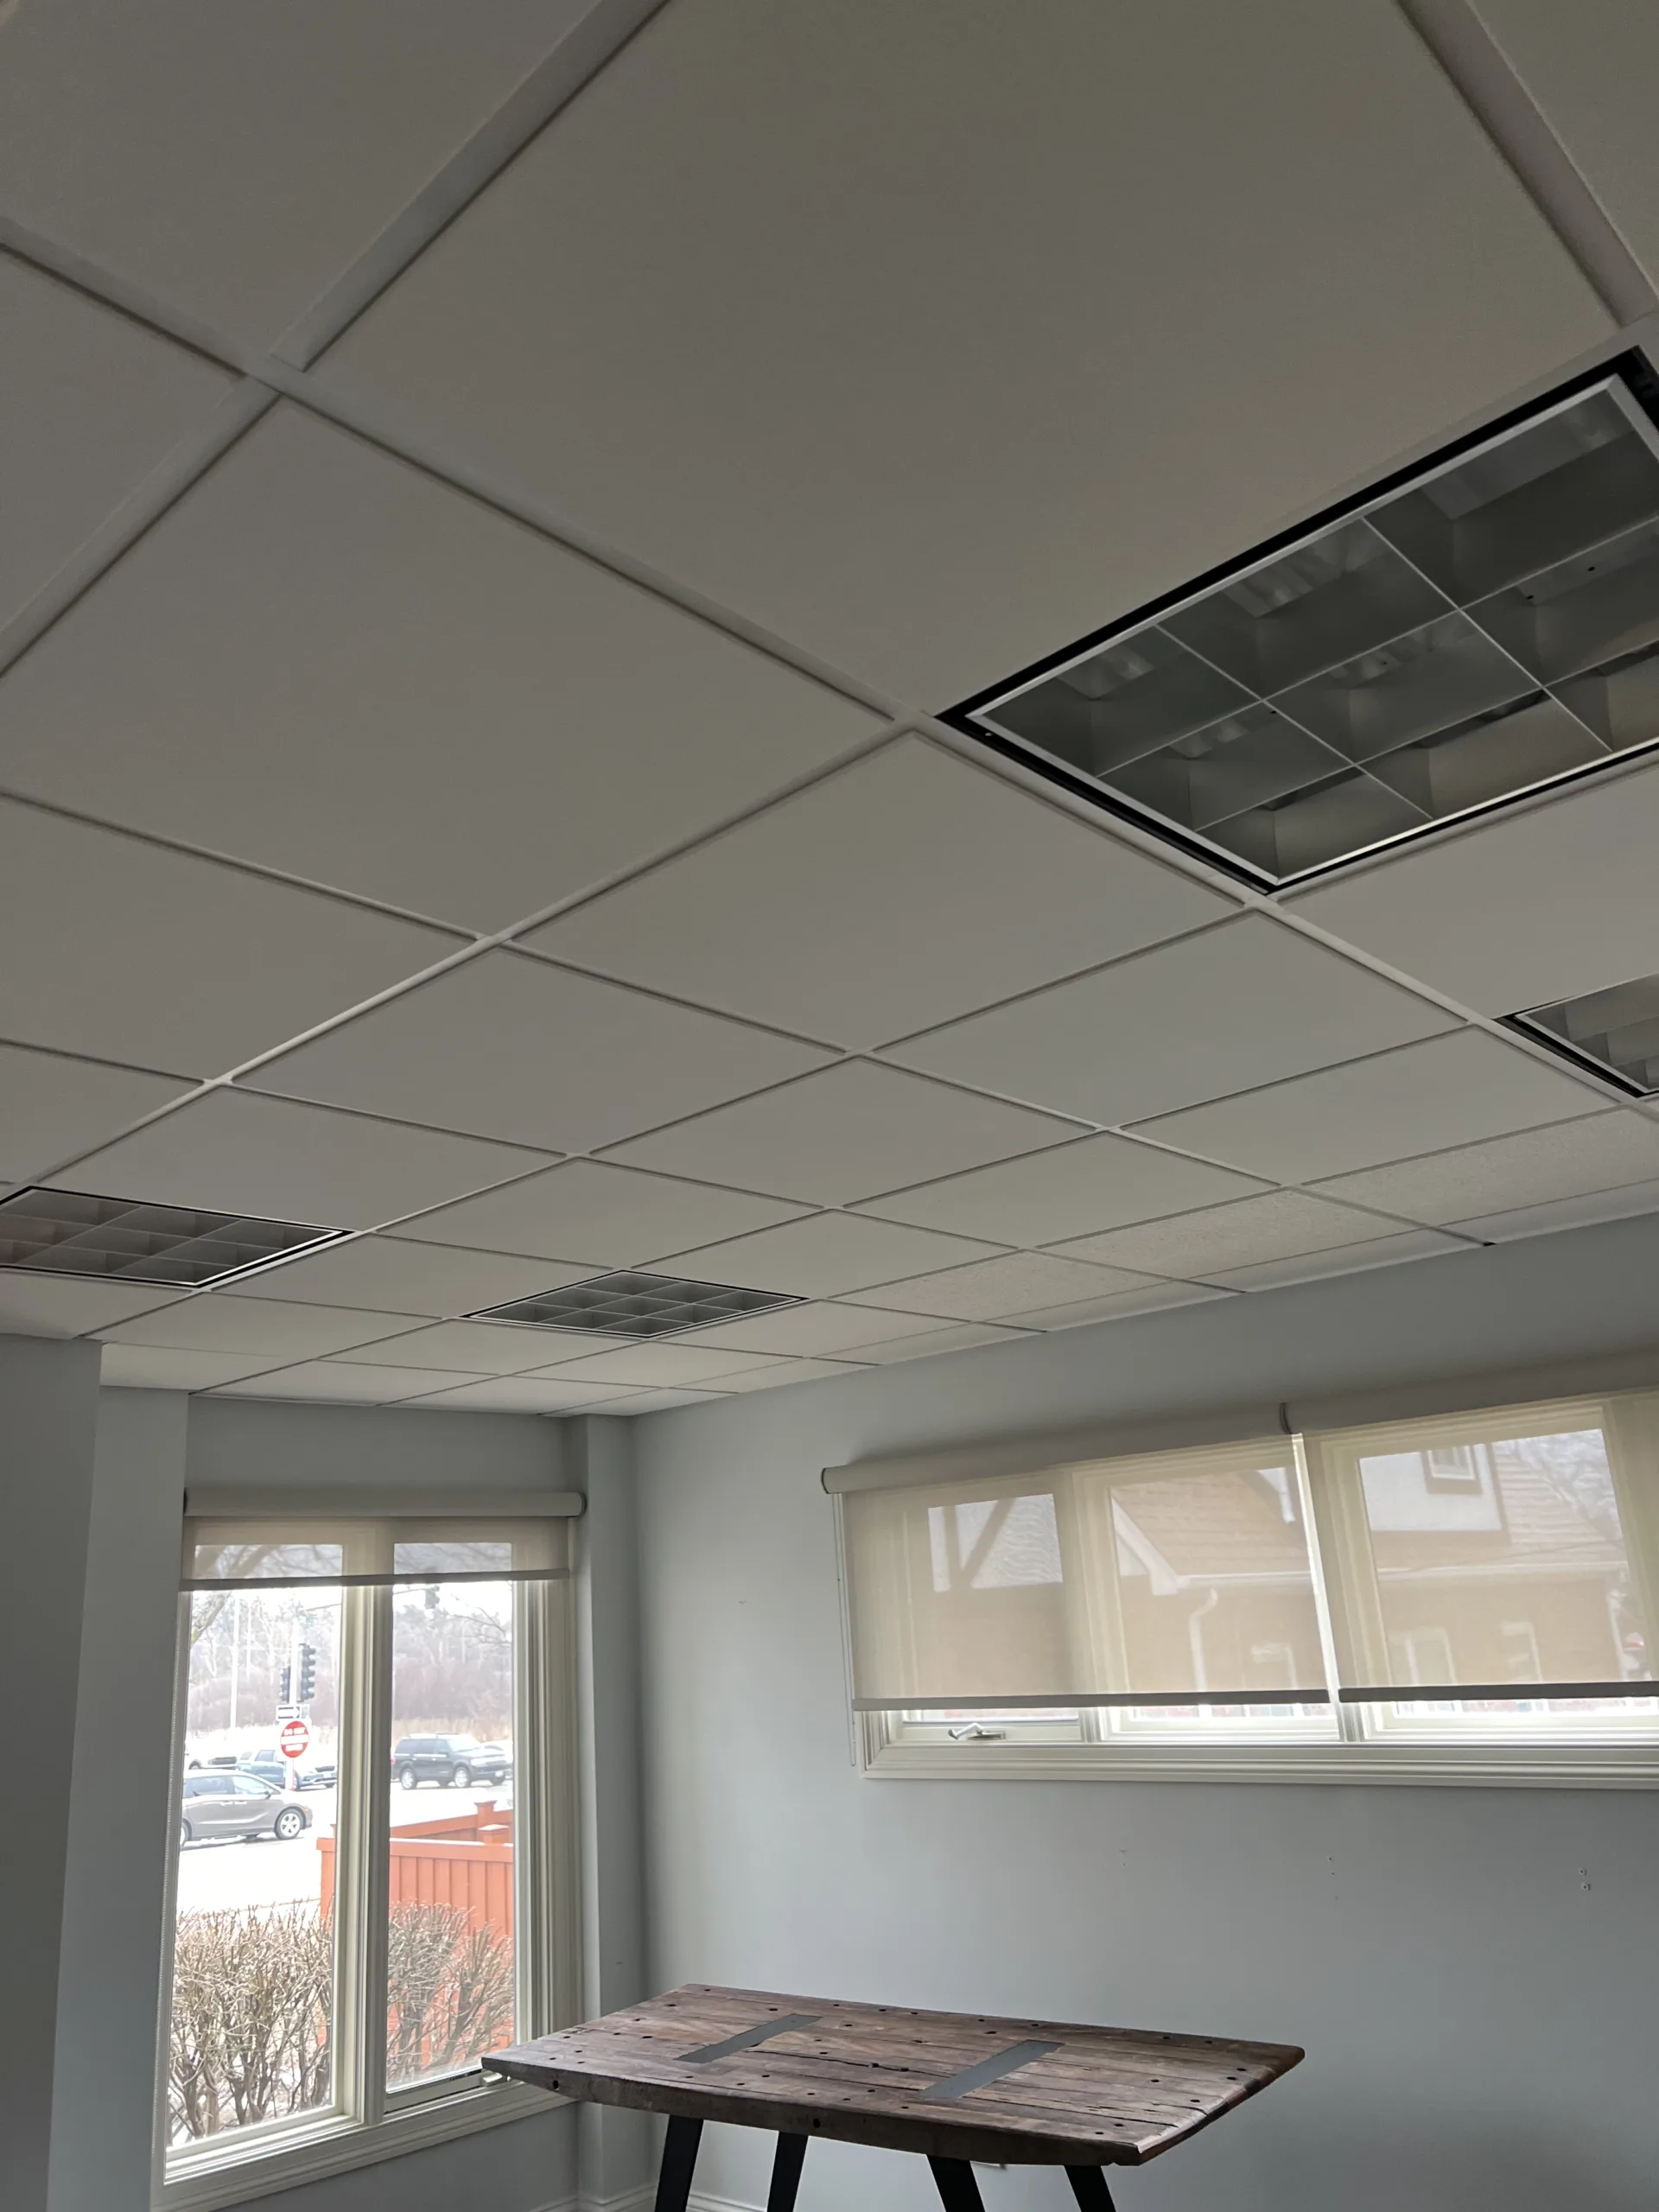
Before the remodel, the office had a typical suspended acoustic ceiling. This type of ceiling is common in older commercial spaces because it provides access above the ceiling and is relatively easy to service. But visually, it can make a room feel dated, especially when the rest of the office is being updated with newer flooring, lighting, walls, and finish work.
The old ceiling grid lowered the visual height of the room and broke the ceiling into small square panels. In this office, the goal was to create a cleaner ceiling plane that looked more like a finished room than a basic commercial unit. Removing the drop ceiling was the first step toward that result.
The room was prepared for construction with ladders, floor protection, tools, and working space. Ceiling remodeling creates dust and debris, so the work area had to be managed carefully before the old tiles and grid came down.
Step 1: Removing the Suspended Ceiling System
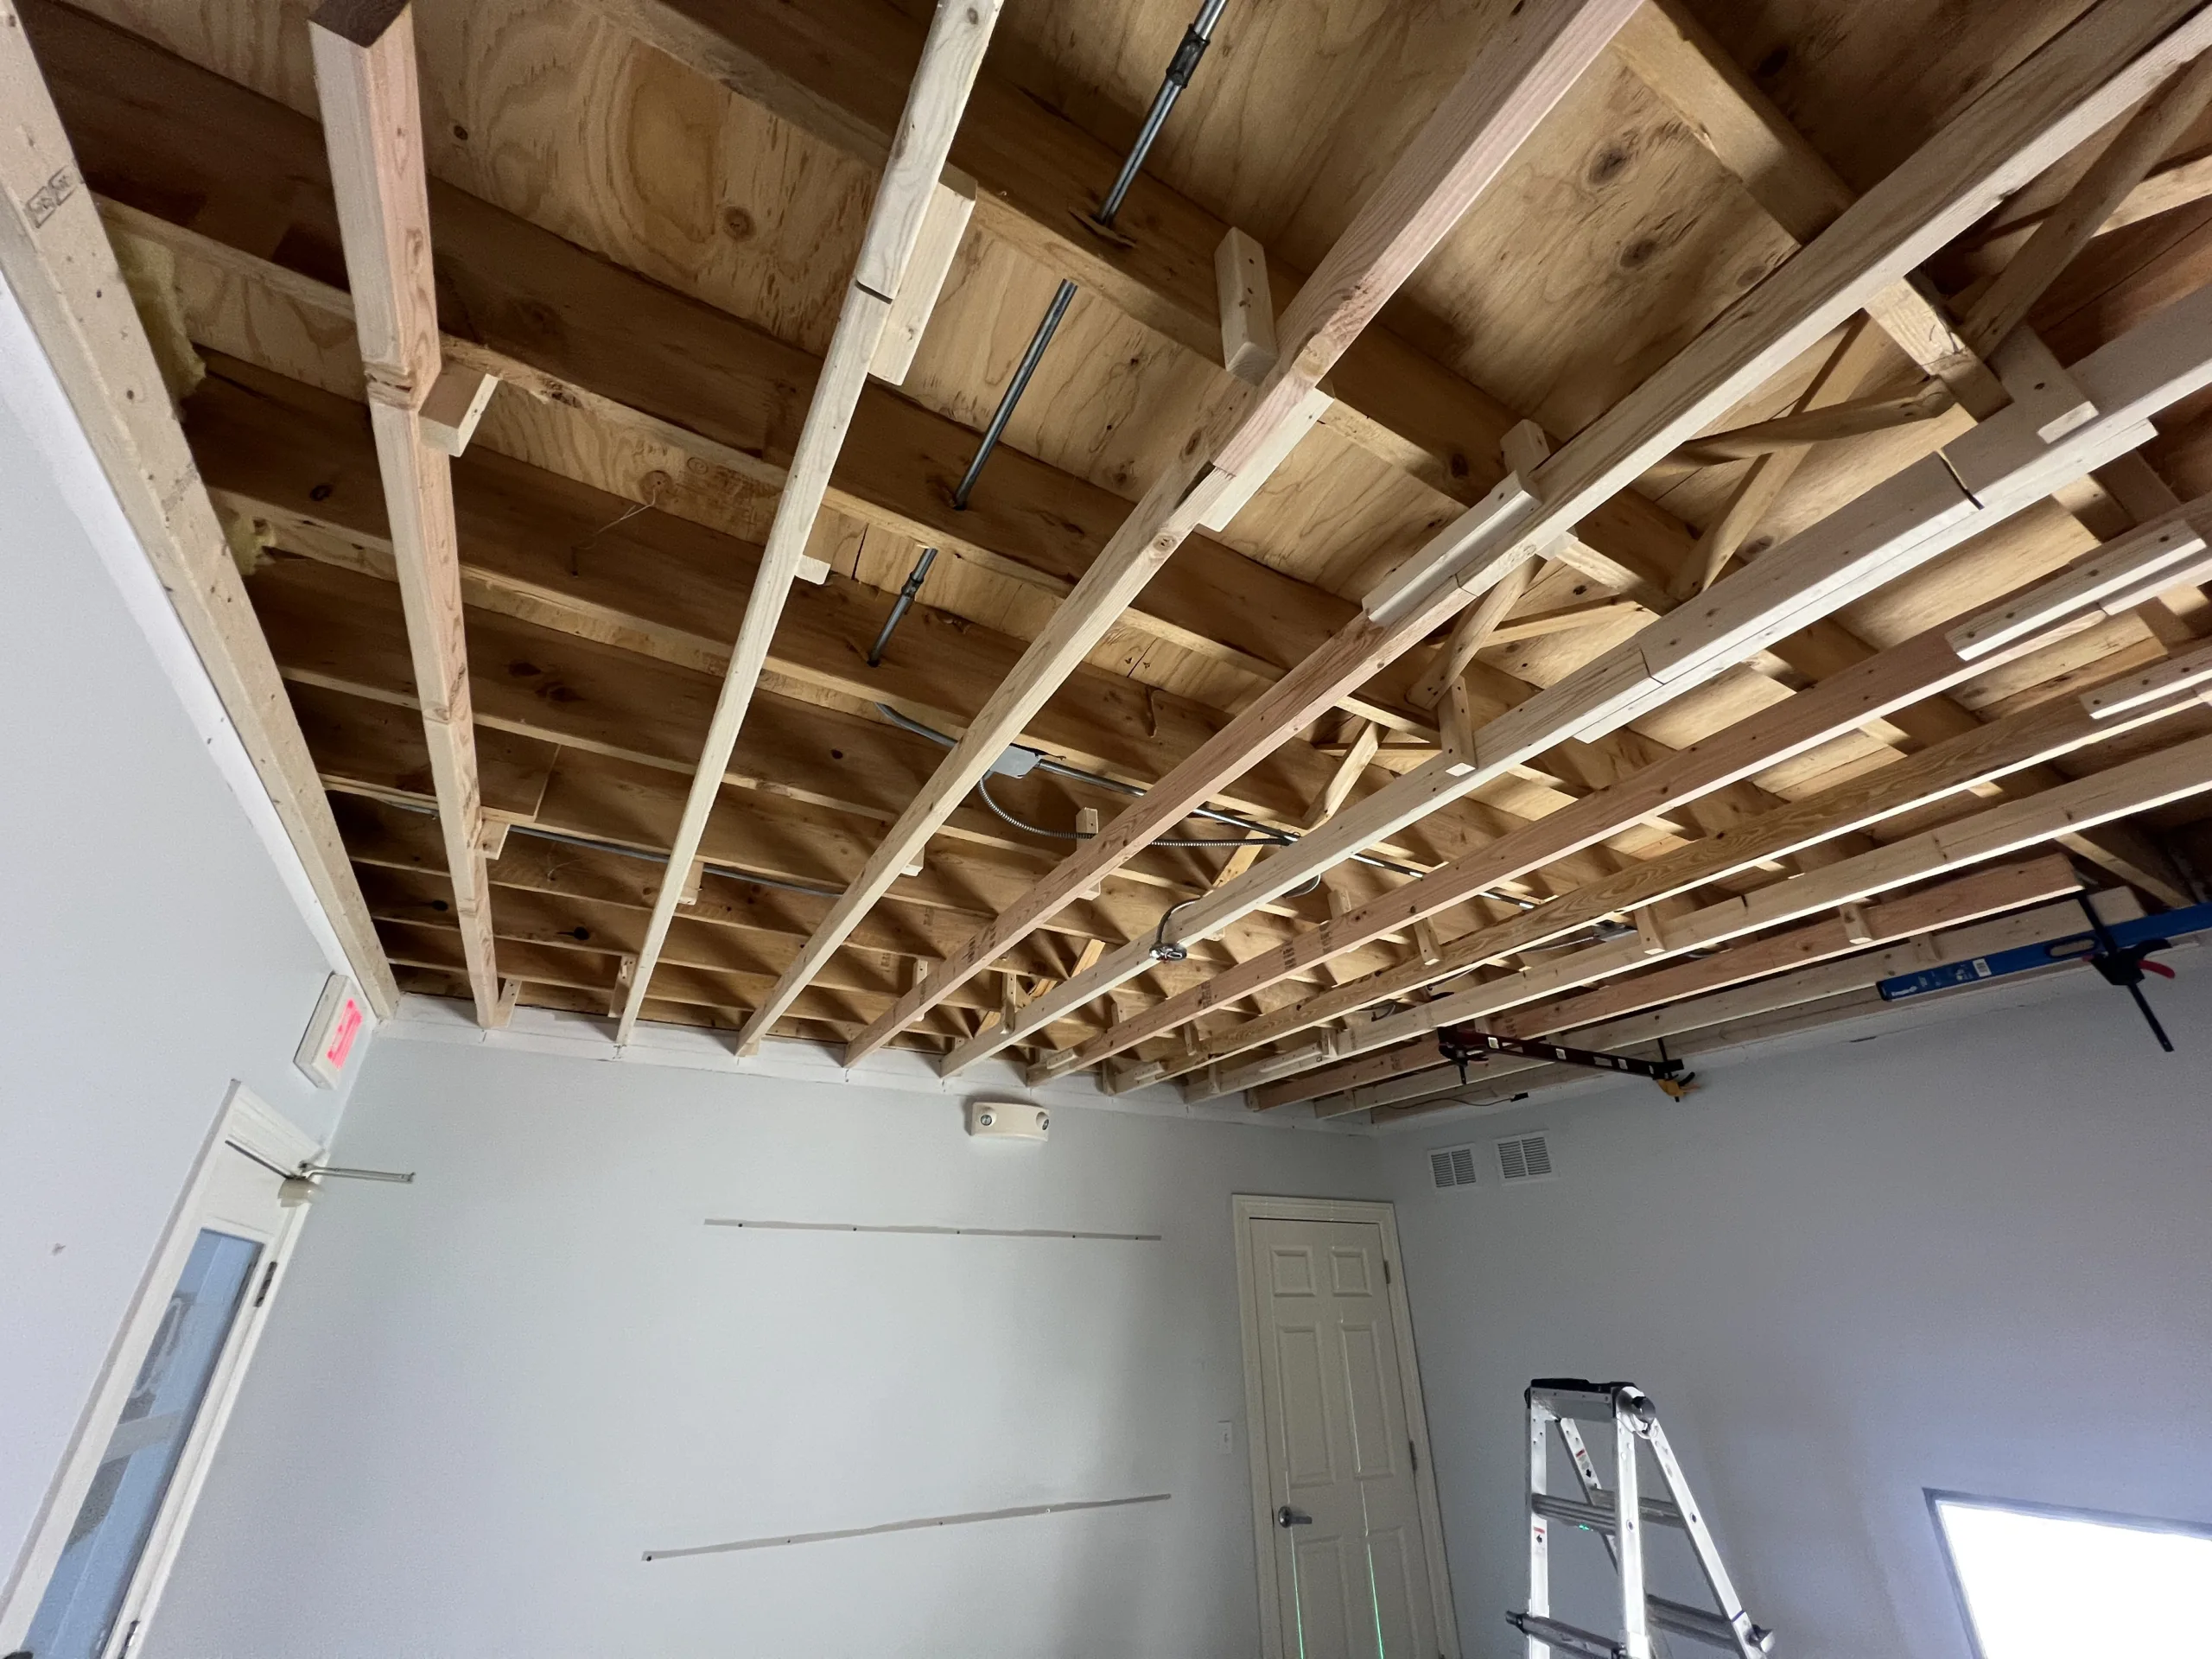
The first major stage was removing the suspended ceiling system. This included taking down the acoustic panels, removing the metal grid, clearing old ceiling components, and exposing the original structure above.
Once the drop ceiling was removed, the existing joists, wiring paths, and ceiling framing were visible. This inspection stage is important because drywall cannot simply be installed blindly over an unknown ceiling structure. The framing has to be checked, the layout has to be planned, and the final ceiling plane needs a stable base.
The exposed ceiling also showed why the conversion needed careful preparation. The original structure was not designed as a finished visible ceiling. It needed additional layout work and furring before drywall panels could be installed cleanly.
Step 2: Ceiling Layout and Framing Preparation
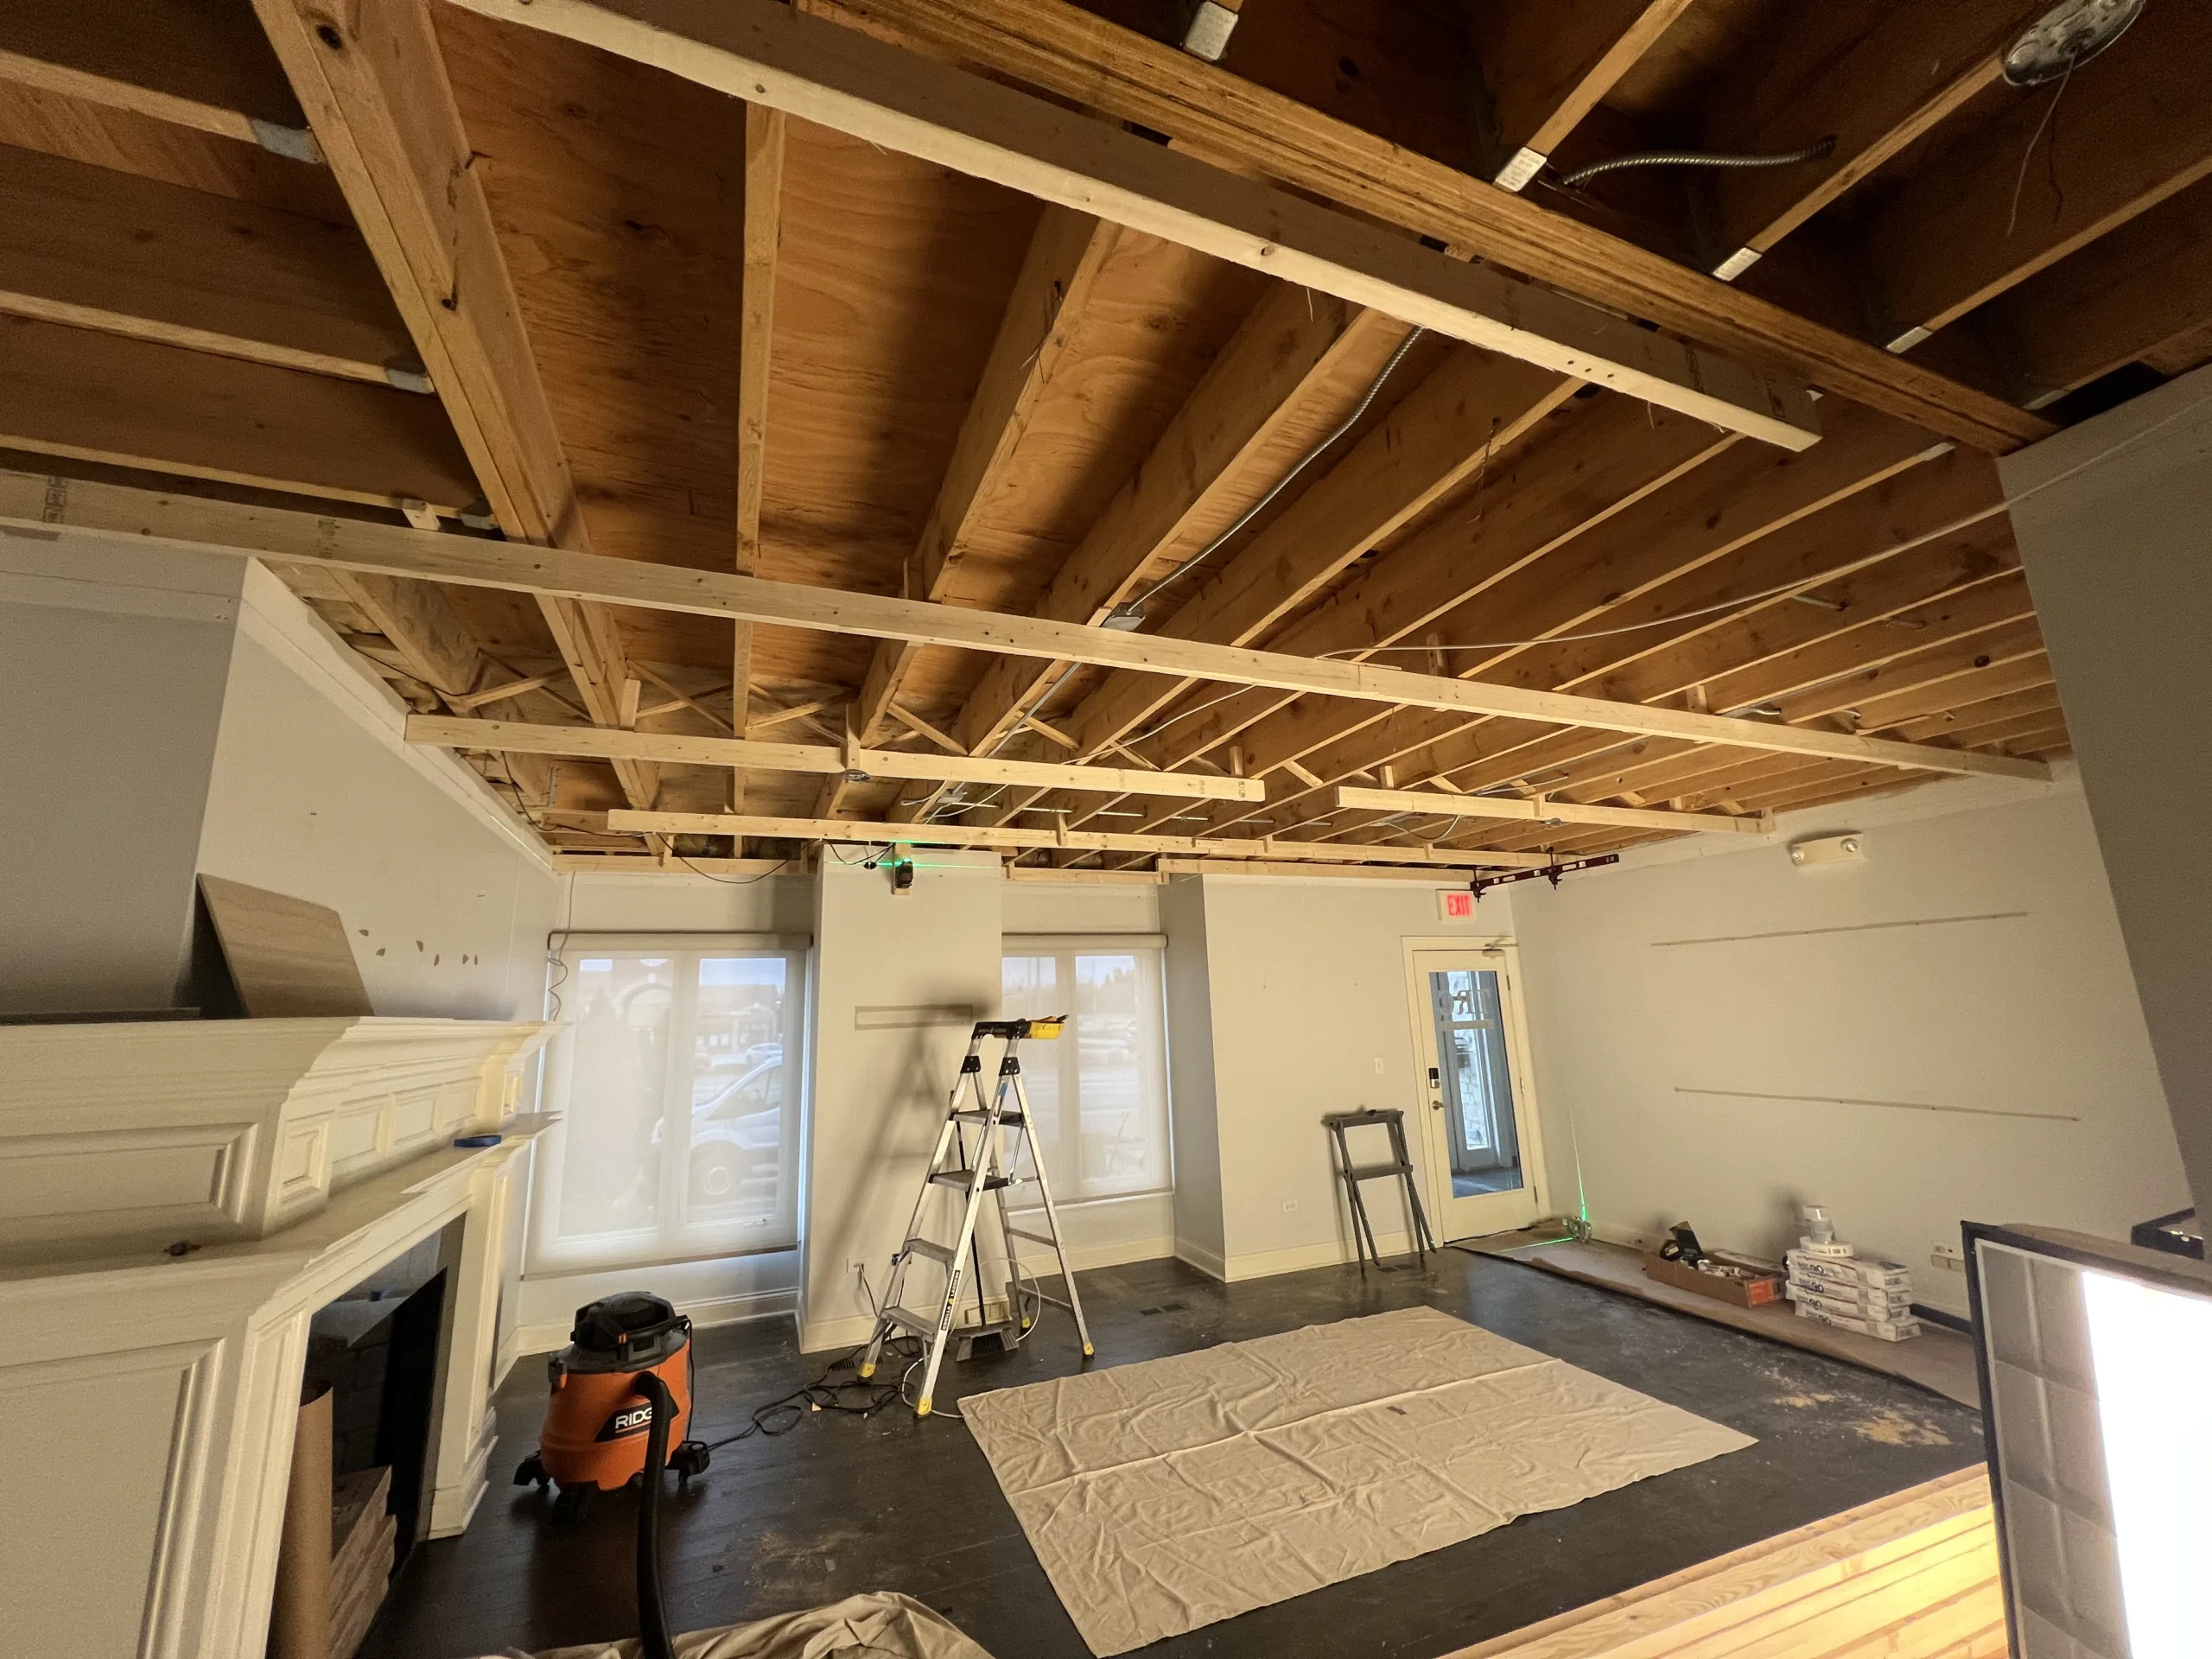
After removal, the ceiling layout was planned. This stage included checking the direction of the framing, reviewing the ceiling height, identifying low or uneven areas, and planning where the drywall panels would land. A laser line was used to help maintain a consistent ceiling plane.
Ceiling preparation is critical because drywall sheets are large and rigid. If the framing below them is uneven, the finished ceiling can show waves, uneven seams, or visible changes in plane. A ceiling may look acceptable while open, but once drywall is installed and painted, imperfections become more visible under light.
The goal was to create a ceiling surface that would look clean from different angles in the room. Office lighting, windows, and daylight can reveal uneven seams or dips, so layout and framing preparation had to be handled before installing panels.
Step 3: Installing Furring Strips for a Drywall Ceiling
Furring strips were installed below the existing joists to create a better base for the drywall. This step helped establish a cleaner, flatter attachment plane and gave the drywall panels consistent support across the ceiling.
Furring is especially useful when converting an old drop ceiling into a drywall ceiling. A suspended ceiling grid hides irregularities above it, but drywall does not. Once the ceiling becomes a solid surface, panel seams, fasteners, and uneven framing can show through if the backing is not prepared properly.
The furring layout also helped with fastening points for the drywall sheets. Proper fastening is important on ceilings because panels are installed overhead and must stay secure. The layout had to support the drywall while also allowing openings for lights or ceiling fixtures where needed.
Step 4: Installing Drywall Panels with a Drywall Lift
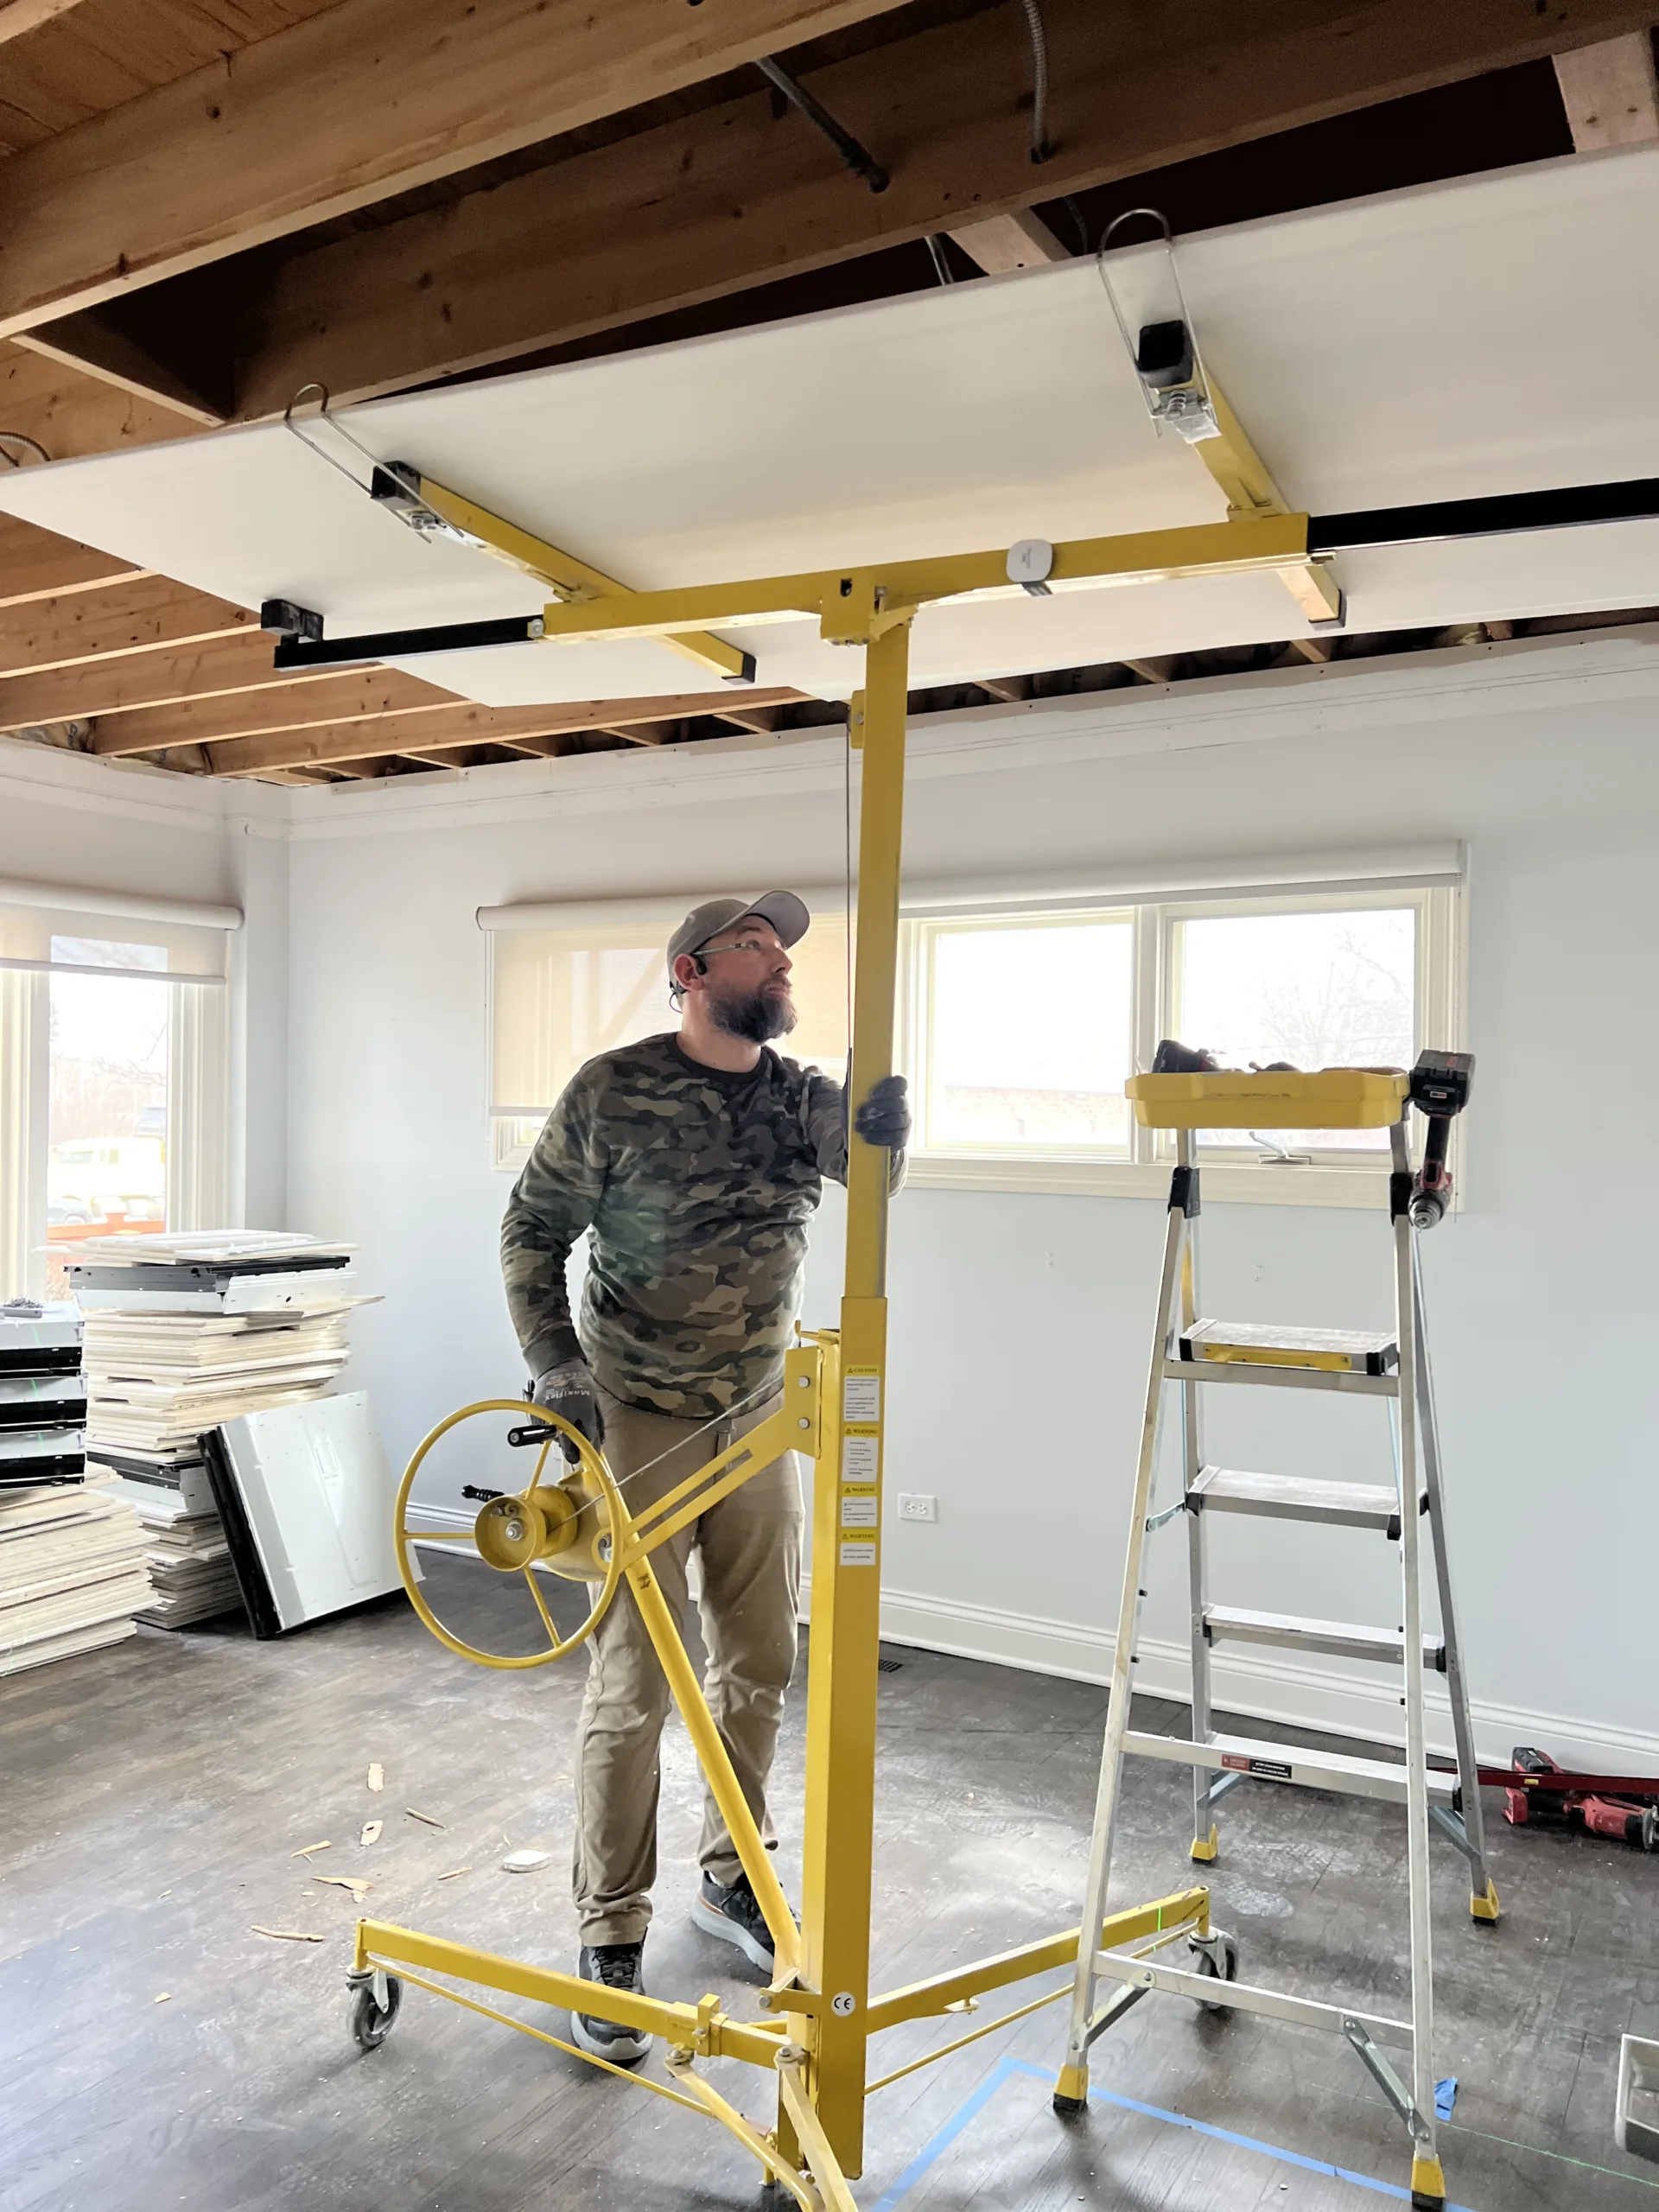
Once the ceiling framing was prepared, drywall panels were installed. Because ceiling sheets are heavy and awkward to handle overhead, a drywall lift was used to raise the panels into position. This makes the installation safer and helps keep the sheet aligned before fastening.
The drywall sheets had to be positioned carefully against the prepared furring strips. Panel seams were planned so they would land on solid backing. The installer also had to work around the room edges, windows, door area, existing walls, and future ceiling fixture openings.
Ceiling drywall installation is more demanding than wall drywall because gravity works against the panels. Good support, correct screw spacing, and proper panel alignment all matter. A rushed ceiling installation can lead to sagging edges, uneven seams, or extra finishing work later.
Step 5: New Drywall Ceiling Installed Before Finishing
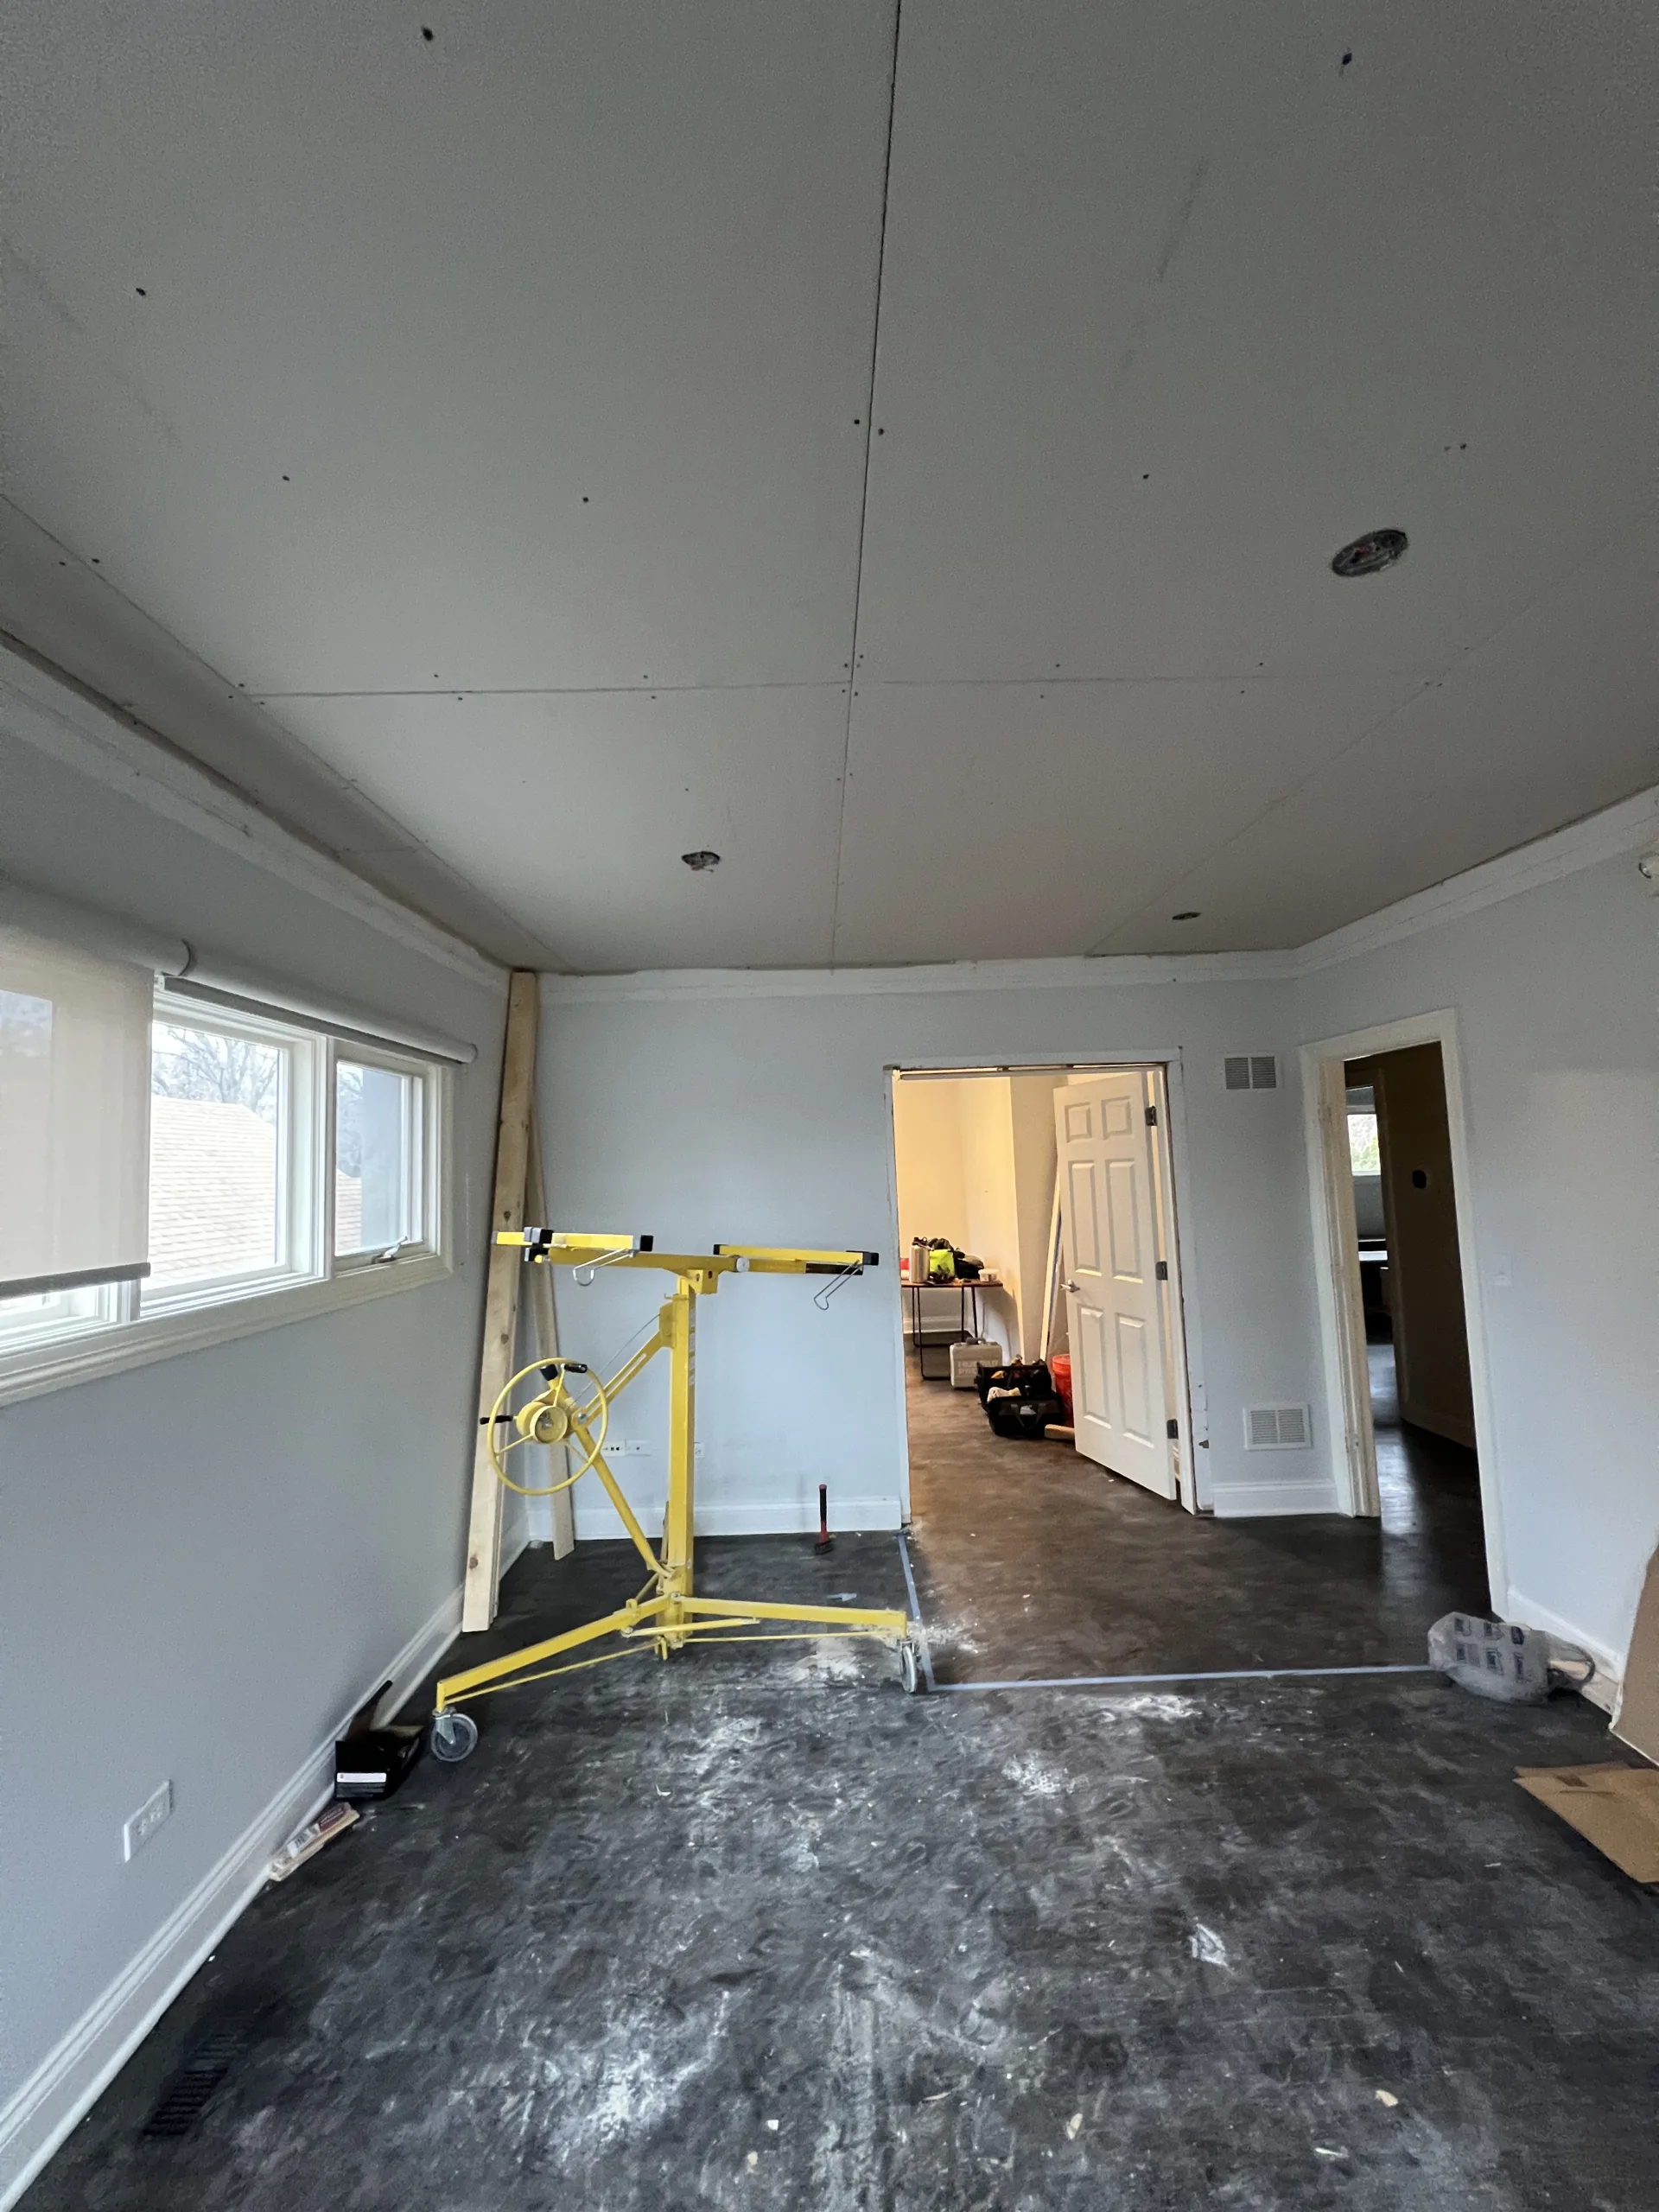
After the drywall sheets were installed, the room already looked different. The old drop ceiling grid was gone, and the ceiling became one continuous surface. At this stage, the drywall was fastened but not yet finished.
Openings were prepared for ceiling fixtures, and the seams were ready for tape and compound. The screw heads, panel joints, edges, and fixture cutouts all needed finishing before the ceiling could be sanded and painted.
This stage is where the office starts to transition from construction to finished interior. The ceiling no longer looked like a commercial grid system. It now looked like a clean drywall ceiling ready for finishing.
Step 6: Taping, Mudding, and Ceiling Compound Work
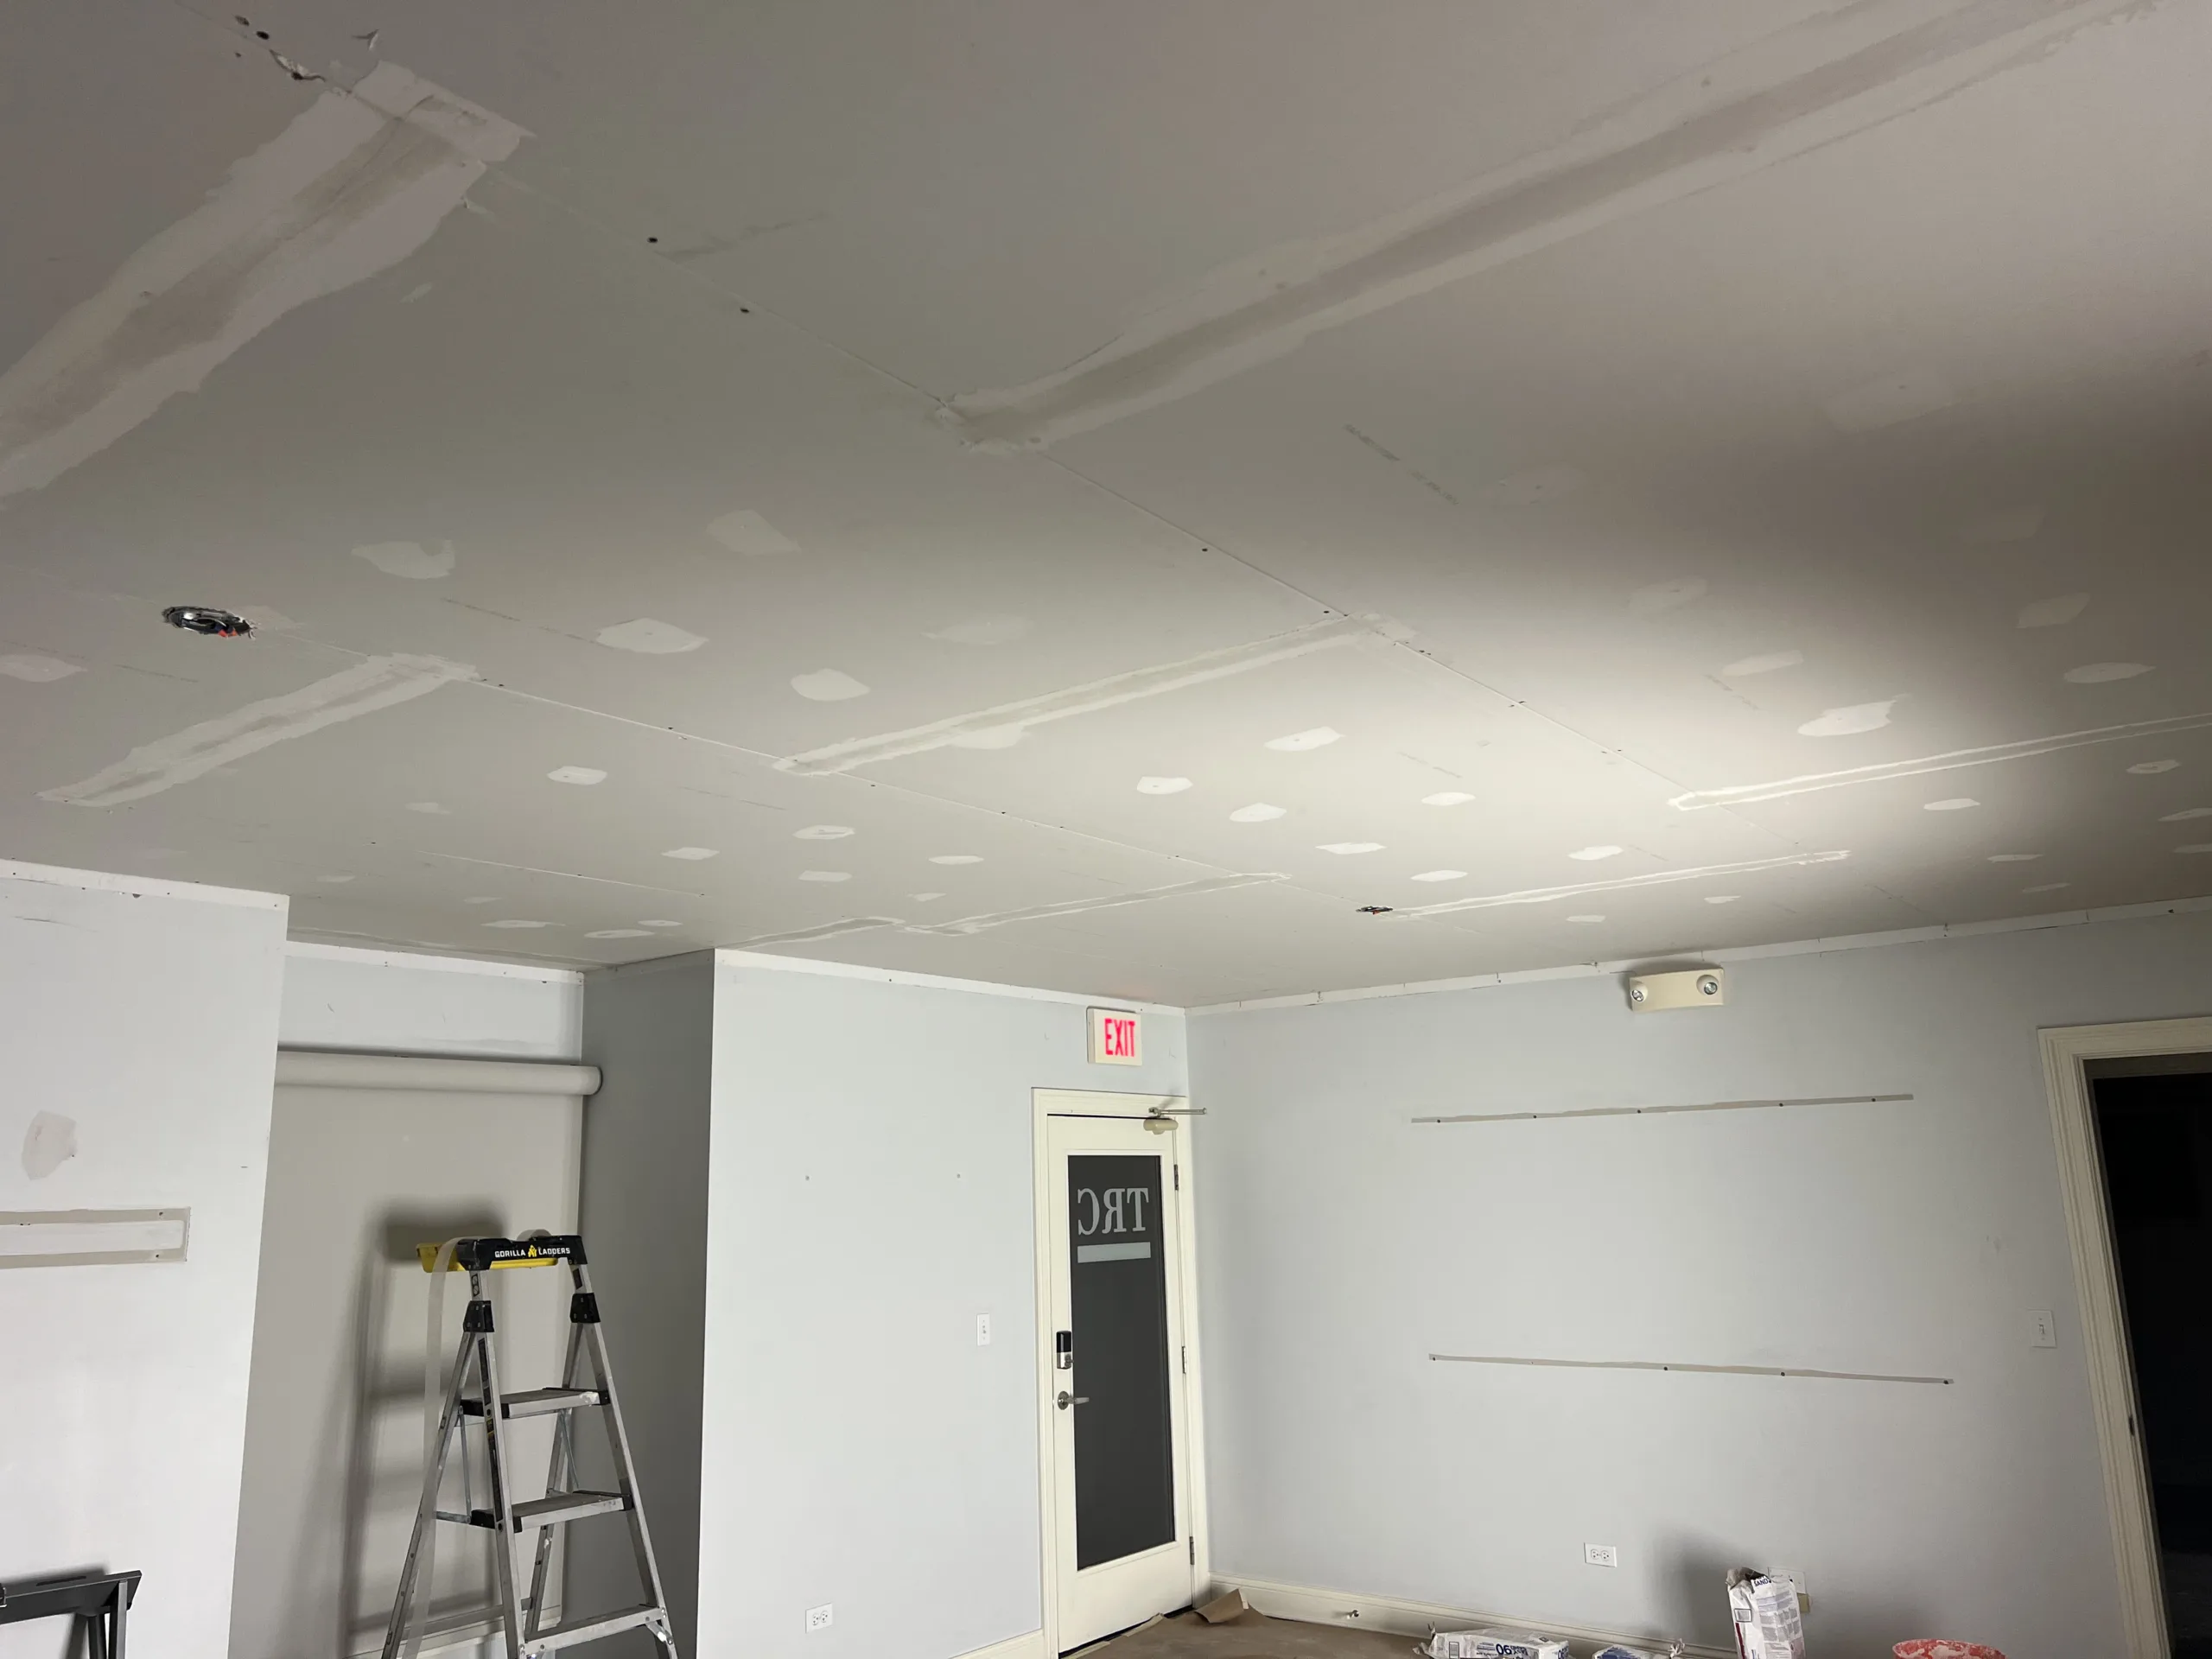
After drywall installation, the ceiling seams were taped and covered with joint compound. Screw heads were also covered, and the joints were built up in layers so the ceiling could be sanded smooth. This stage is what turns raw drywall panels into a finished ceiling surface.
Ceiling finishing requires careful feathering because overhead surfaces catch light differently than walls. If compound edges are too sharp or seams are not blended wide enough, they can show after paint. The goal was to blend the joints and screw spots so the final painted ceiling would look clean and even.
The photos show the ceiling after compound was applied to seams and fastener areas. This is a normal intermediate stage: the ceiling looks patchy before sanding and paint because the compound is visible across joints, screw heads, and transitions.
Step 7: Sanding and Dust Control During Ceiling Finishing
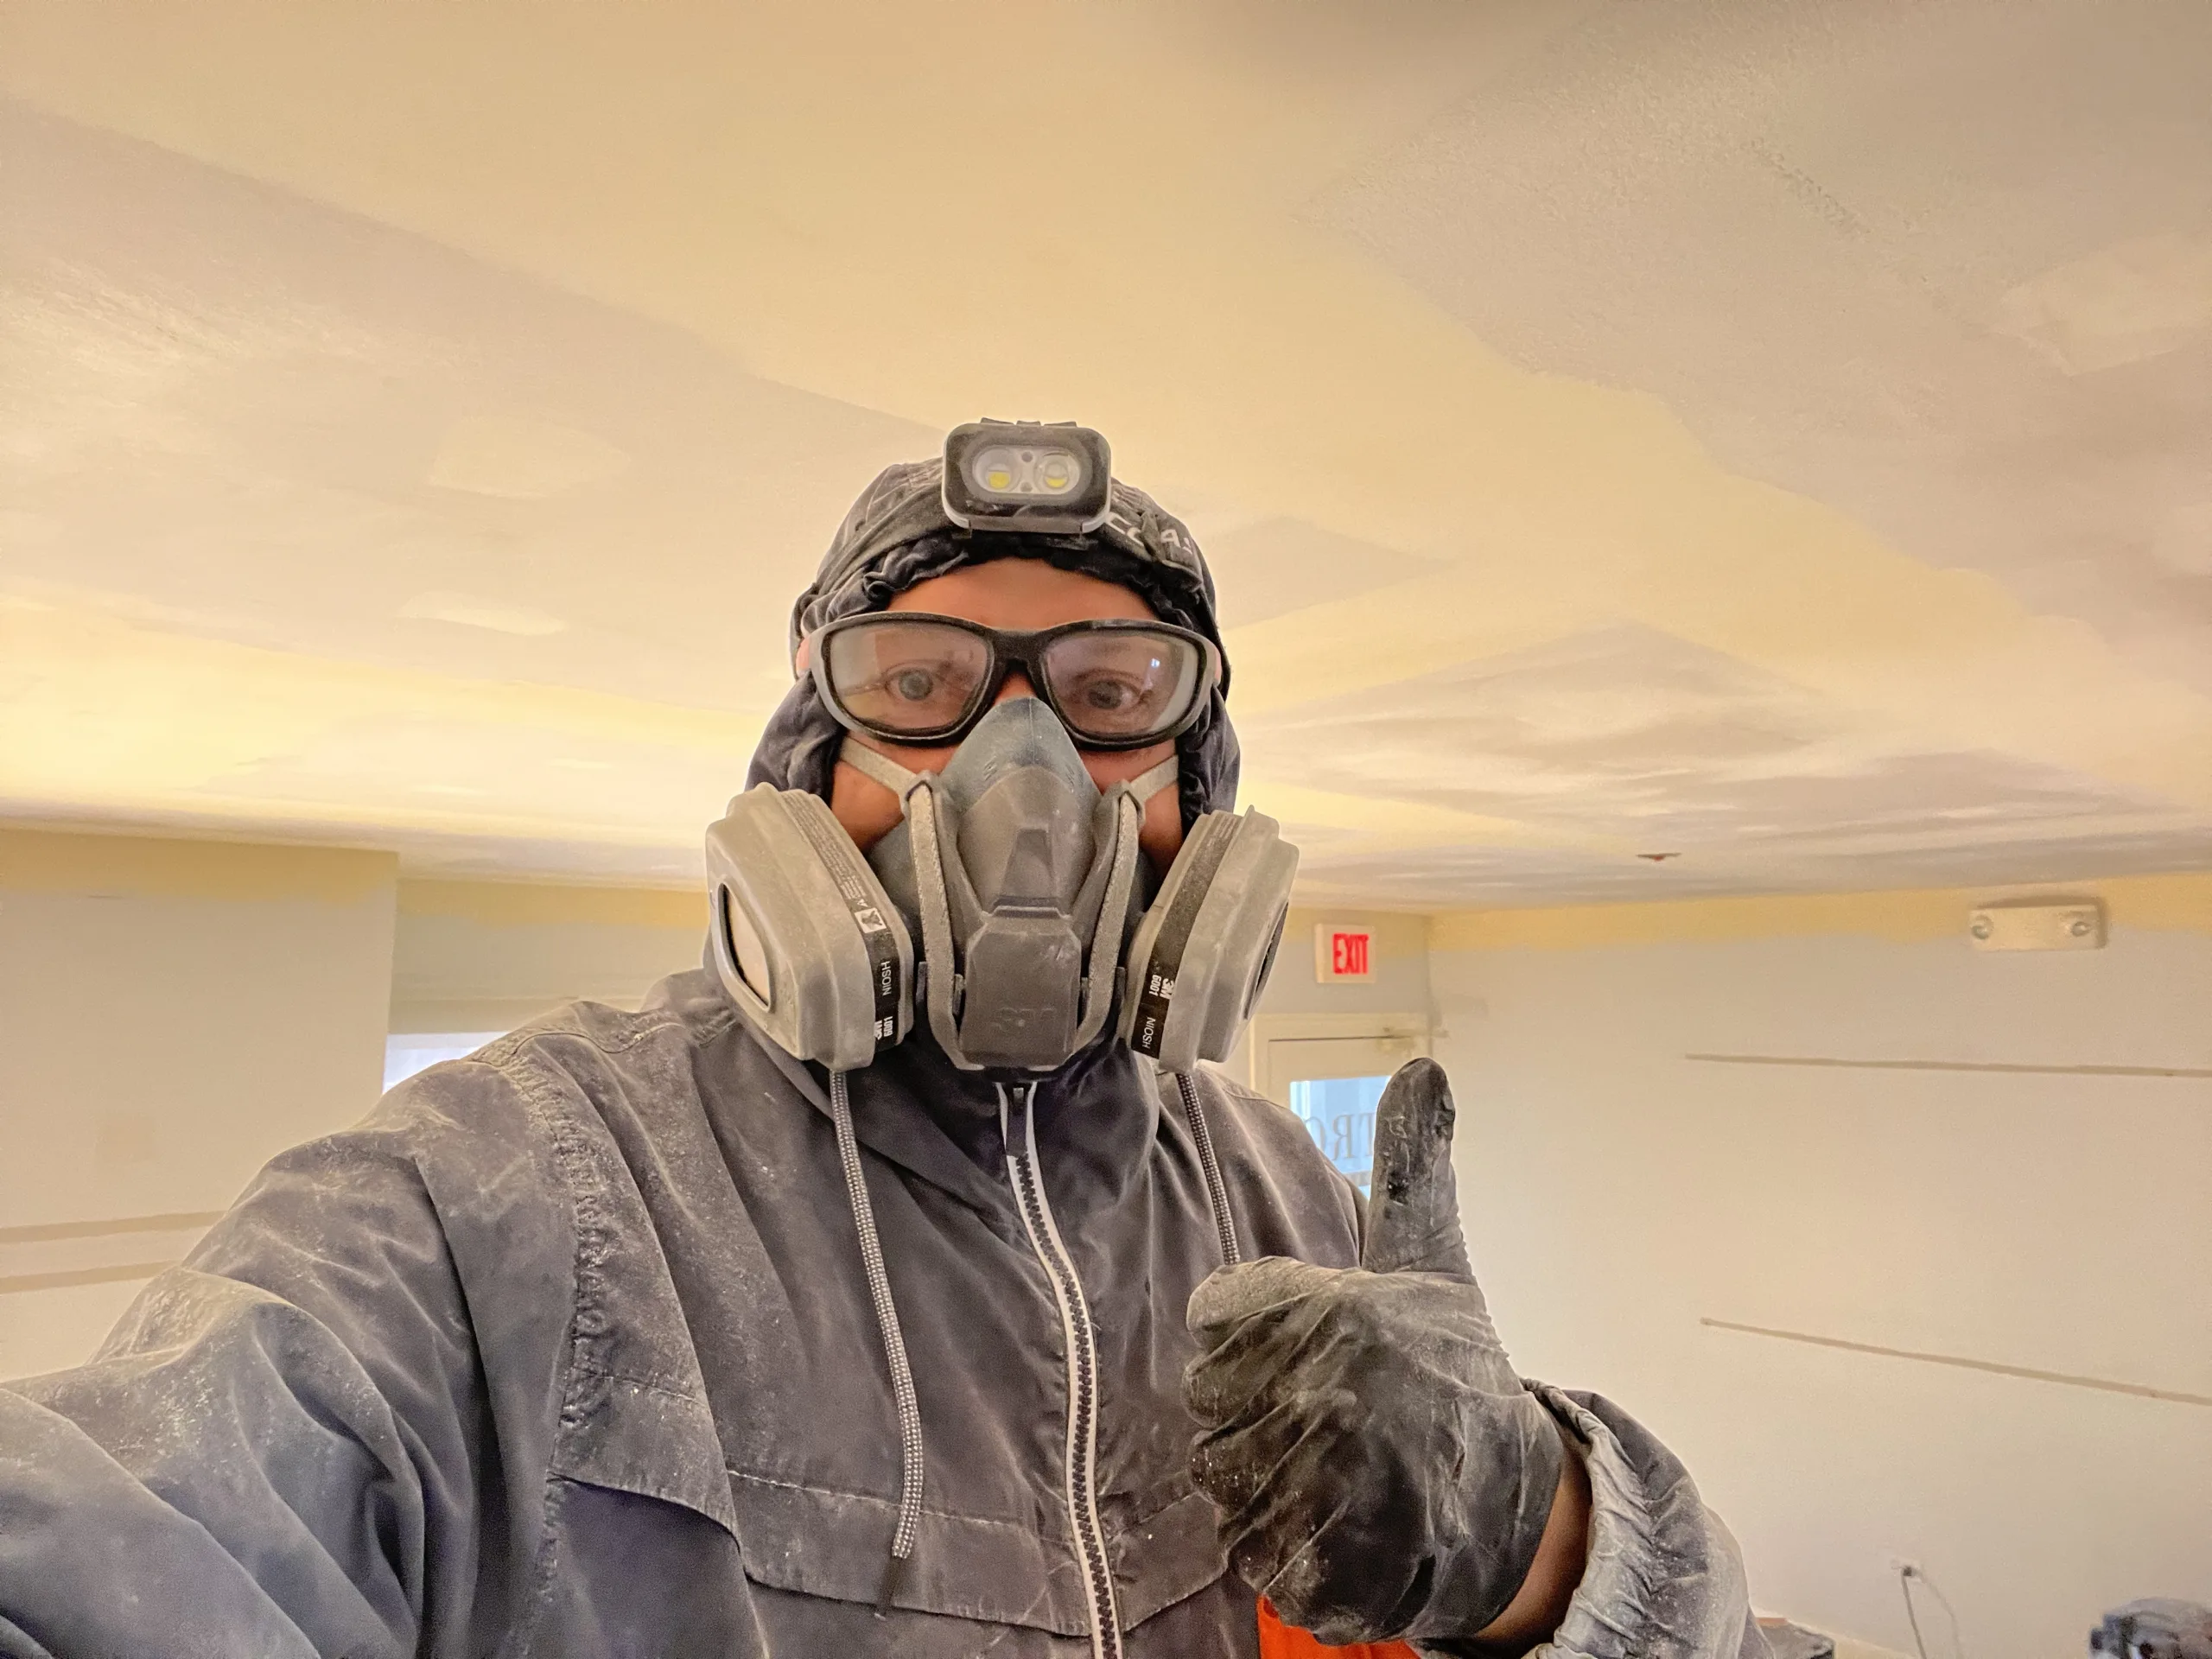
Drywall ceiling finishing creates fine dust, especially during sanding. Protective gear was used during this stage because ceiling sanding sends dust downward and across the room. Dust control is an important part of interior remodeling, especially in an office space where the final cleanup needs to leave the room ready for the next finish stage.
The sanding stage removes high spots, blends compound edges, and prepares the ceiling for primer and paint. This is also when imperfections are checked under different lighting angles. Ceiling work often needs more than one pass of compound and sanding to get a clean finish.
Once sanding is complete, the ceiling can be primed and painted. Primer helps seal the drywall compound and paper surface so the final paint coat looks more consistent.
Finished Result: A Cleaner Drywall Ceiling for the Office
The finished ceiling remodel removed the older suspended acoustic ceiling and replaced it with a more modern drywall ceiling surface. This made the office feel cleaner, more updated, and more integrated with the rest of the interior remodel.
The new ceiling created a better visual connection with the office walls, windows, fireplace feature, and flooring. Instead of a grid of acoustic tiles overhead, the room now has a smooth ceiling plane that makes the space feel more finished and less like an outdated commercial unit.
This type of ceiling remodel works well for offices, small commercial spaces, studios, service businesses, and professional rooms where the owner wants a cleaner interior appearance without changing the entire building structure.
Why Remove a Drop Ceiling in an Office?
A drop ceiling can be useful when a building needs easy access to mechanical, electrical, or plumbing systems above the ceiling. But in many small offices, a suspended ceiling can also make the room feel lower, older, and less finished.
Removing a drop ceiling and installing drywall can improve the appearance of the room. It can make the ceiling look cleaner, reduce the visual grid pattern, and create a more modern interior. In spaces where the office is being used for client meetings, professional services, retail, or studio work, that visual improvement matters.
For this project, the suspended ceiling no longer matched the direction of the renovation. The new drywall ceiling made the room feel more like a finished office interior instead of a dated commercial shell.
Drop Ceiling Replacement vs. Drywall Ceiling Installation
There are two common ways to update an old office ceiling. One option is replacing the acoustic tiles and repairing the existing grid. That can be practical when ceiling access is still needed and the goal is only to refresh damaged or stained panels.
The second option is removing the suspended ceiling and installing a drywall ceiling. That creates a cleaner finished surface, but it requires more work: demolition, framing preparation, drywall installation, taping, mudding, sanding, priming, and painting.
This project used the drywall ceiling approach because the goal was not just to replace old panels. The goal was to remodel the ceiling and make the office look more finished and modern.
Important Details in Office Drywall Ceiling Installation
A good office ceiling remodel depends on more than installing drywall panels. The important details include ceiling structure inspection, furring layout, panel support, straight seams, fixture cutouts, screw spacing, taping, compound feathering, sanding, and final paint preparation.
The ceiling has to be flat enough to look clean under natural and artificial light. Windows, ceiling lights, and wall lights can reveal uneven seams or poor finishing. That is why ceiling drywall requires careful preparation and finishing.
In this office, the use of furring strips, laser layout, a drywall lift, and staged compound work helped create a better finished ceiling than simply attaching drywall over uneven framing.
Office Ceiling Remodeling and Drywall Services in Chicago
Evo Service provides office ceiling remodeling, drop ceiling removal, drywall ceiling installation, ceiling drywall repair, wall repair, interior finishing, and small commercial remodeling services in Chicago and nearby suburbs.
For office suites, small commercial spaces, studios, rental units, and client-facing rooms, ceiling updates can make a major difference. Removing an old suspended ceiling and installing a finished drywall ceiling can help the space feel cleaner, brighter, and more professional.
If your office has an outdated acoustic tile ceiling, damaged ceiling panels, an old grid system, uneven ceiling surfaces, or a ceiling that no longer matches the rest of the remodel, a ceiling renovation can be a practical way to improve the entire room.
FAQ: Office Ceiling Remodel in Chicago
What was included in this office ceiling remodel?
This project included removing the old suspended drop ceiling, exposing and checking the ceiling structure, installing furring strips, installing new drywall panels, cutting openings for fixtures, taping, mudding, sanding, and preparing the ceiling for paint.
Can a drop ceiling be replaced with drywall?
Yes. A suspended drop ceiling can often be removed and replaced with drywall, but the ceiling structure must be inspected and prepared first. The new drywall needs proper support, layout, fastening, and finishing.
Why remove an acoustic tile ceiling in an office?
An acoustic tile ceiling can make an office look dated or feel lower. Removing it and installing drywall can create a cleaner, more modern ceiling surface, especially when the office is being remodeled for client-facing or professional use.
Is drywall ceiling installation better than replacing ceiling tiles?
It depends on the goal. Replacing ceiling tiles is faster when the existing grid is staying. Drywall ceiling installation is better when the goal is a cleaner finished look and a more modern room appearance.
Why are furring strips used before installing ceiling drywall?
Furring strips help create a more consistent attachment surface for drywall panels. They can improve the ceiling plane and provide better support when converting an old drop ceiling area into a drywall ceiling.
Do you provide office ceiling remodeling in Chicago?
Yes. Evo Service provides office ceiling remodeling, drop ceiling removal, drywall ceiling installation, commercial drywall repair, ceiling finishing, and small office remodeling services in Chicago and nearby suburbs.